What if we say you can introduce new elements to your webpage without writing a single line of code?
Sounds interesting enough? If yes, let’s delve more into it.
Consider a situation wherein, along with making changes on your website, you wish to add a new CTA that makes it easy for customers to access the items on sale directly. Now, to do this, you do not have any coding knowledge. For such scenarios, the VWO platform lets you accomplish this task on your own by just using the WYSIWYG editor. Yes, this is possible.
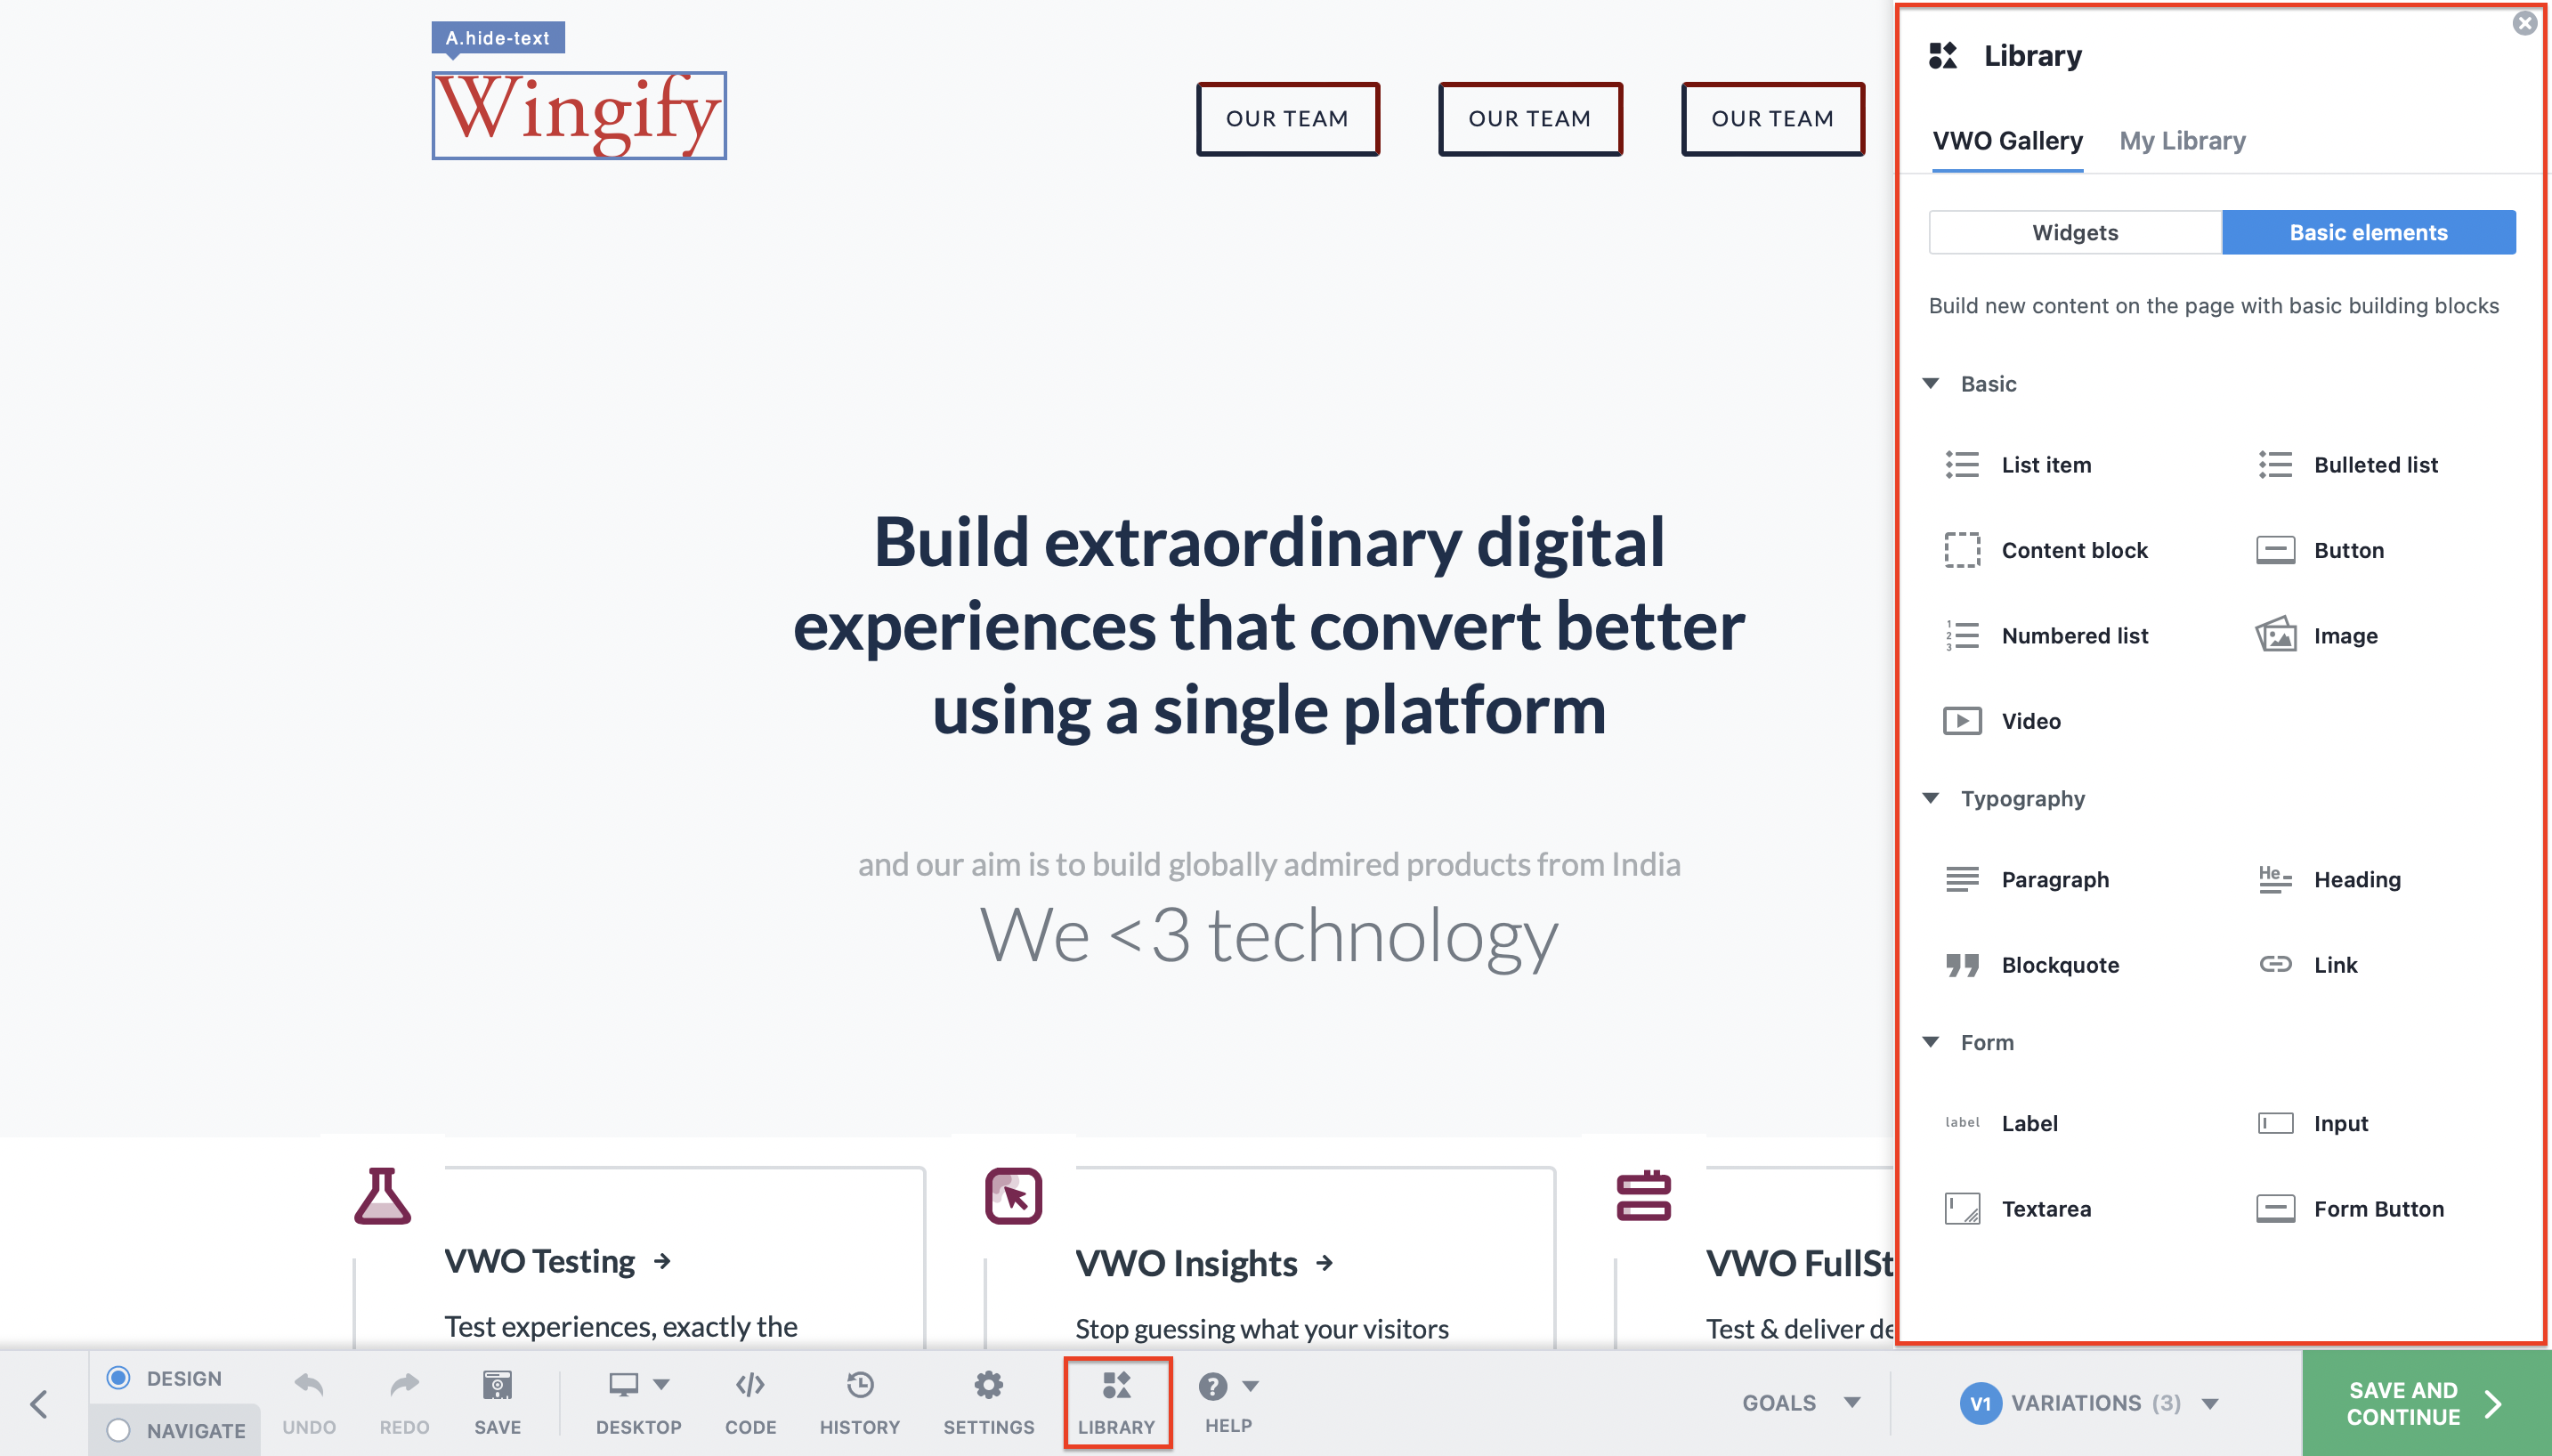
Using the Library > VWO Gallery > Basic elements option in VWO Editor, anyone can create UI elements per their requirements on the go. With this, you are no more dependent on your development teams to create the UI elements for your webpage. The easy-to-use interface of VWO Editor provides you with the option to add different types of UI elements.
These UI elements are broadly classified into three categories:
-
Basic: Using this, you can add List Item, Bulleted List, Content Block, Button, Numbered List, and Images to your webpage. For example, you can introduce a new CTA on your landing to make navigation easy for your customers.
-
Typography: Using this, you can add a Paragraph, Heading, Blockquote, and Links to your webpage. For example, to add information about the ongoing promotional offers, you can add a paragraph element and write the relevant information inside it.
- Form: Using this, you can add Label, Input, Textarea, and Form Buttons to your webpage. For example, to add a new question in the customer feedback form, you can add a label element and a corresponding input element in the existing form.
How to Add a New Element to Your Webpage
When you are creating a variation or an experience using the VWO Editor, you can not only edit but also add new elements to your webpage. Once you click on the Library option in the VWO Editor, the Library dialog appears. Then navigate to VWO Gallery > Basic elements in the same to access the different types of elements that you can add to your webpage.
Procedure
-
Click on the element you want to add to your webpage from the gallery.

-
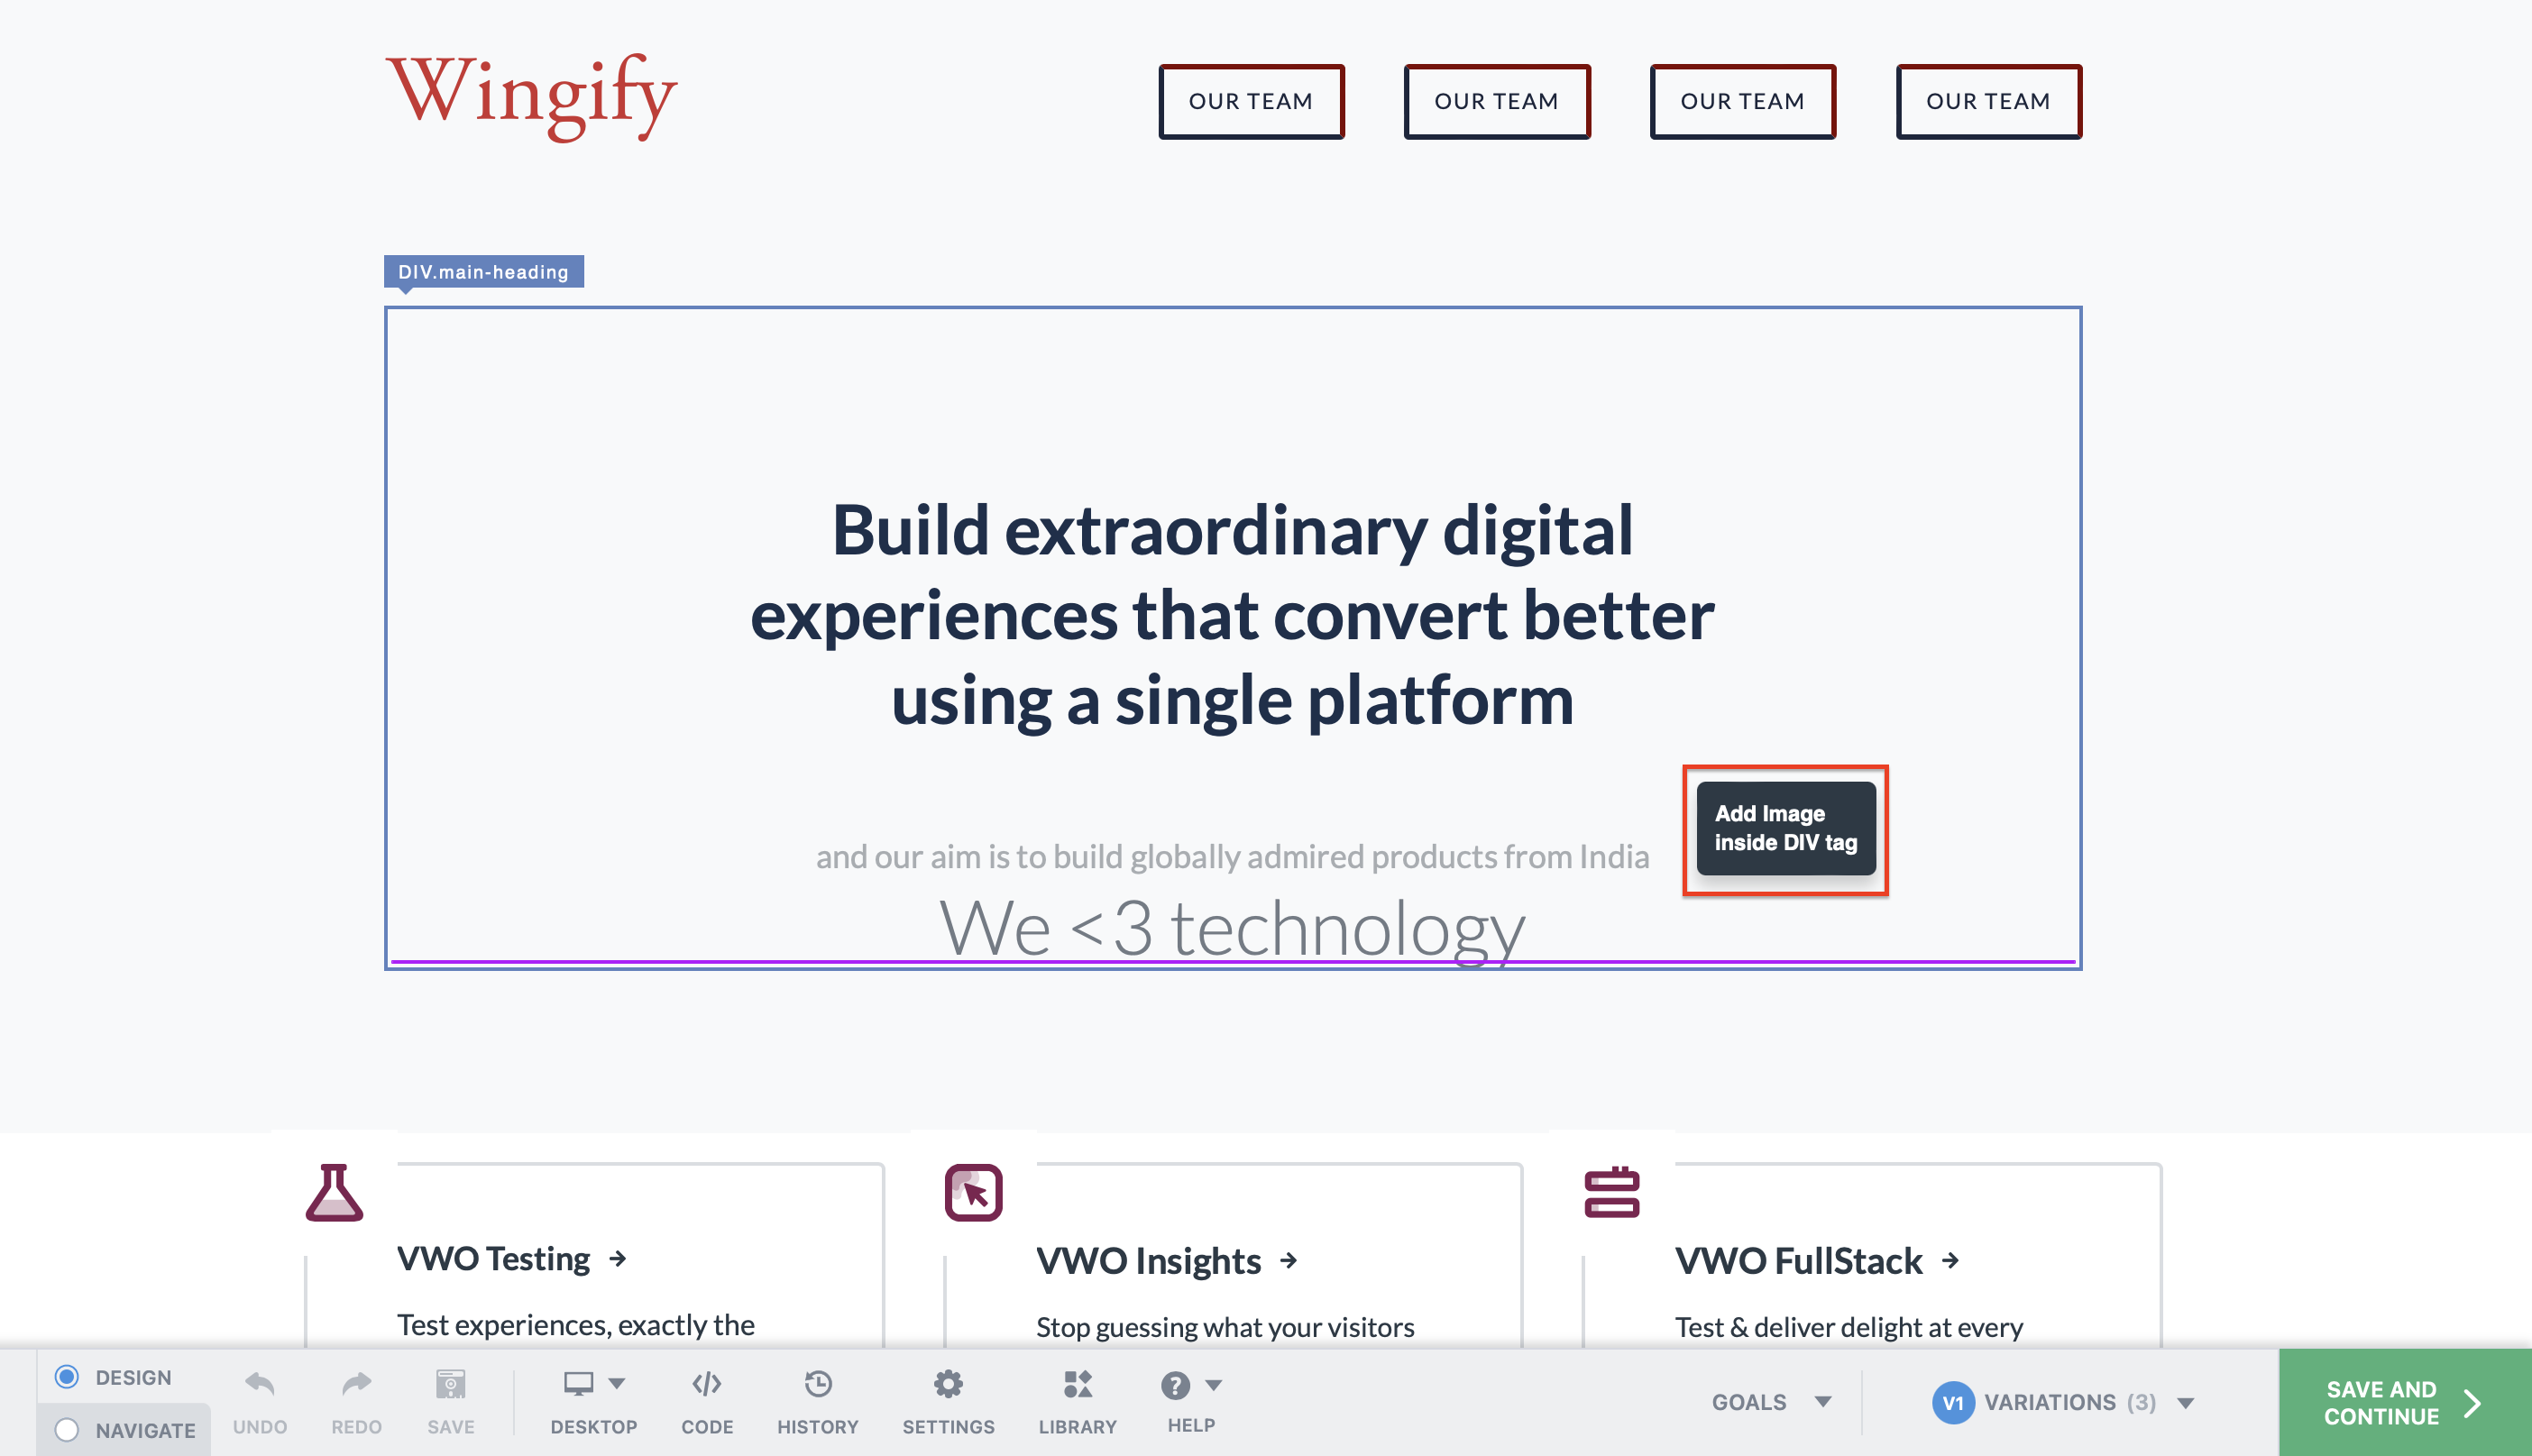
Hover on the page to choose the positioning of the element. On mouse hover, a tooltip starts to appear indicating where all you can position the element.

INFO: The tooltip has the info about what element is being placed and where it is being placed. The tooltip format is- "Add <element name> <before/after/inside> <hovered element type>".
-
Click the area where you want to add the element.
NOTE: You can place the element anywhere on the page (before, after, inside) with respect to an existing element. These options appear based on the type of element you are hovering over and the type of element you are adding.
- Once you have positioned the element on your webpage, you can then modify its properties and attributes using the edit operations.
- Click Done to save your changes.
Adding a Video Element to Your Webpage
Adding a video to your webpage is a great way to connect with your visitors. It can deliver the content faster and in a much-simplified way. In the case of a page having complex information, chances are there that the visitors may not invest more time in going through it. To tackle such situations, adding a video comes in handy.
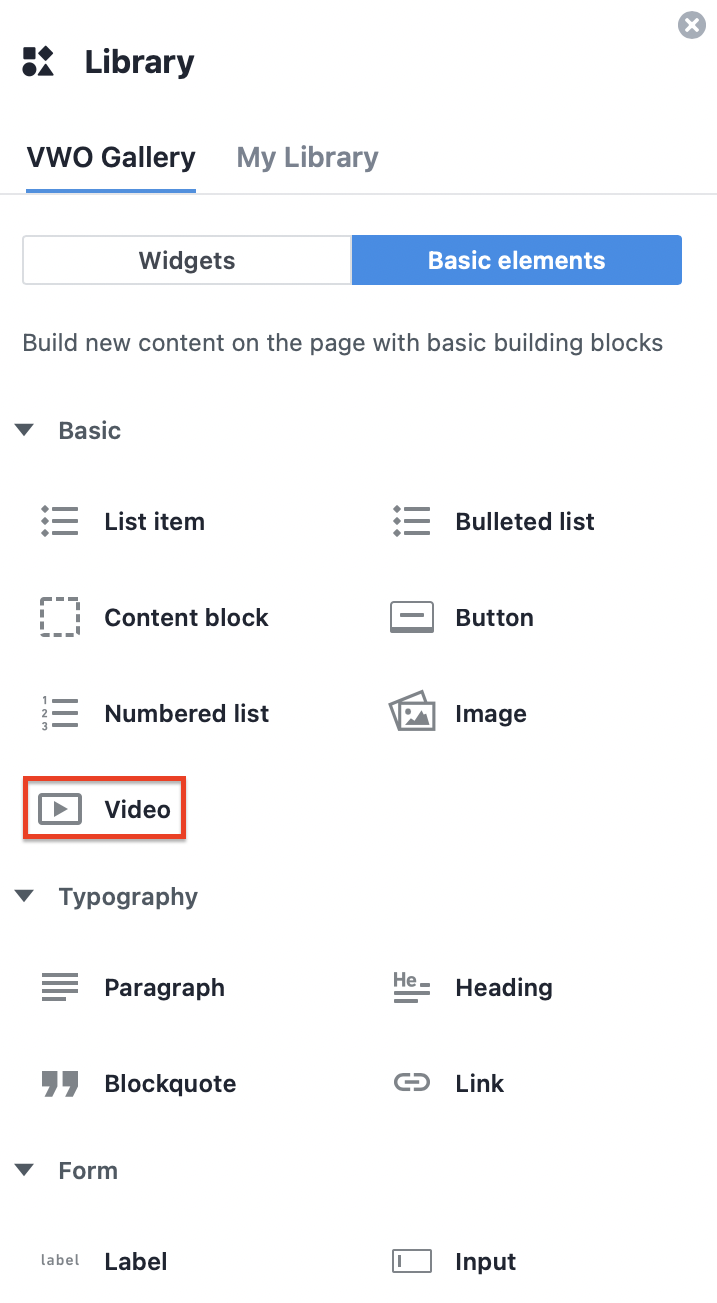
VWO allows you to add video elements wherever you want on your webpage. Try compiling a video and adding it to the page while creating a variation or an experience. You can do that by using the Library > VWO Gallery > Basic Elements > Basic > Video option in the VWO Editor.
Procedure
-
From the Library dialog > VWO Gallery > Basic elements > Basic, click on the Video element.

-
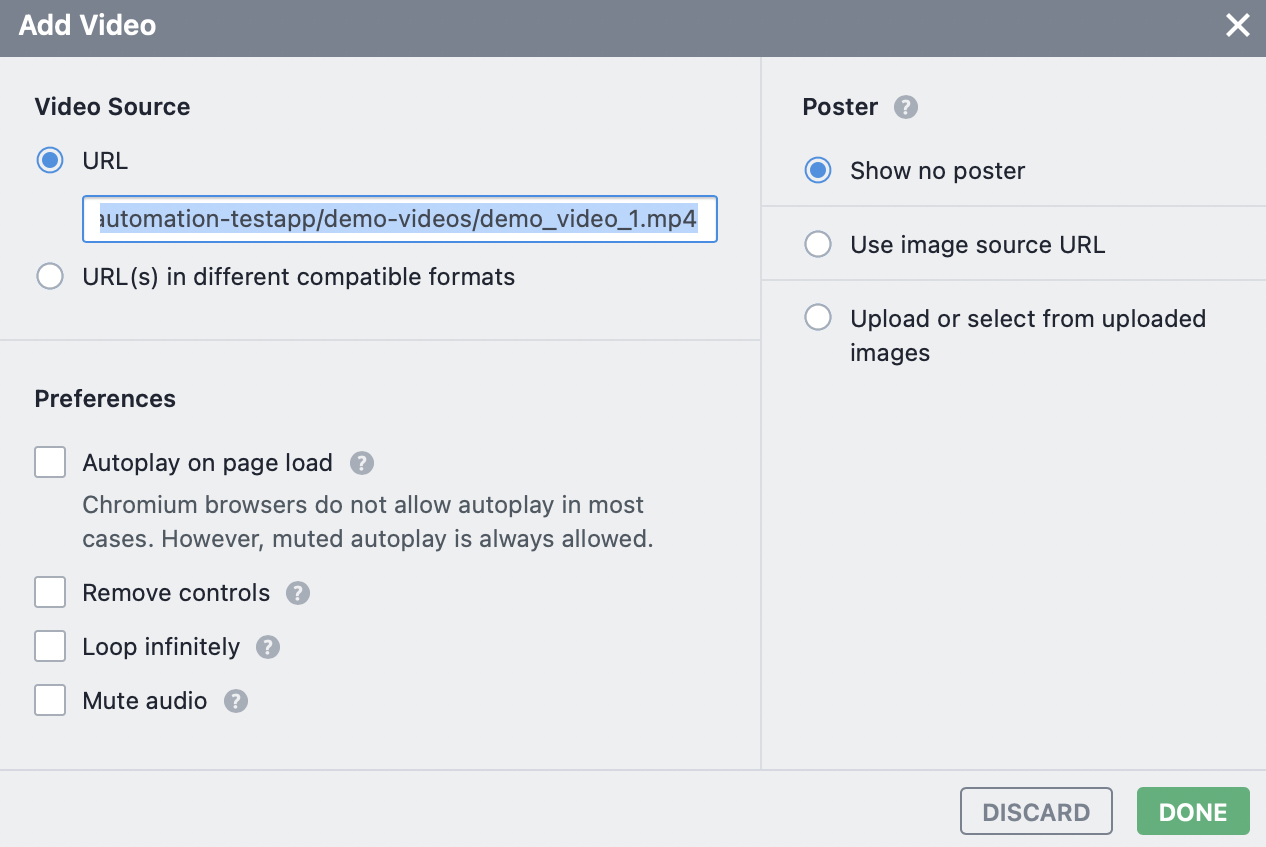
Once positioned, you can then modify the properties and attributes of the element using the settings available in the Add Video dialog.
The following settings are available in the Add Video dialog:
Video Source
- URL - Use this to change the video source.
- URL(s) in different compatible formats - Use this to specify the video source in various formats. The one that is compatible with the browser is automatically displayed. This is often useful when there are browser compatibility issues.
Preferences
- Autoplay on page load - Enable this to ensure that the video automatically plays when the page loads.
- Remove controls - Enable this if you wish to hide all controls from the video.
- Loop infinitely - Enable this if you wish to replay your video continuously.
- Mute audio - Enable this if you want the video to be played without audio when the page loads.
Poster
- Show no poster - Choose this if you want to display the first frame of the video while it loads.
- Use image source URL - Choose this if you want to display an image as a poster from a specific URL while it loads.
-
Upload or select from uploaded images - Select this if you want to display an already uploaded image or upload a new image as a poster while the video loads.
ATTENTION: The poster image should have the same aspect ratio as the video.
- Once you apply the settings, click Done to save your changes.
ATTENTION: The Video element does not support embedding YouTube and Vimeo URLs. These URLs can be embedded using the YouTube and Vimeo widgets from the Widgets section in the VWO Gallery. Read more about these options here.
