|
In this article, you’ll learn the following: |
Before making a Personalize campaign live, it is a good practice to verify the campaign setup. The Previews feature provides a convenient way to quickly check and validate your experiences without having to dig through the campaign settings. It typically ensures that your experiences have no broken links or sections, and function as expected for the targeted visitors.
For example, assume you've designed a Personalize campaign for visitors in a specific geographic area. In this case, the Previews option allows you to load the campaign pages as they will load for the targeted segment of visitors. This helps to simulate the experience, allowing you to ensure that the experience for targeted visitors is implemented correctly.
How to verify the campaign setup in VWO Personalize?
To verify the campaign setup, perform the following steps:
- Log in to your VWO account.
- From the main menu, click PERSONALIZE.
- From the Personalize dashboard, select the campaign you want to preview and go to the Previews tab.
NOTE: The campaigns can be previewed only when their setup is complete. - From the Experience dropdown, select the experience you want to preview.
- In the Preview URL field, the Default Campaign URL is auto-populated. If you want to load the previews for a different URL, you can override it with the one on which you want to preview the changes.
NOTE: If your campaign is running on multiple pages, you can preview them individually. - To preview the experiences without applying the campaign-level segmentation conditions, select the Ignore campaign targeting conditions in previews option. To preview the experiences without applying the experience-level segmentation conditions, select the Ignore experience targeting conditions in previews option.
- Once done, click Preview in a new tab. The preview opens in a new tab displaying the experience that you have selected.
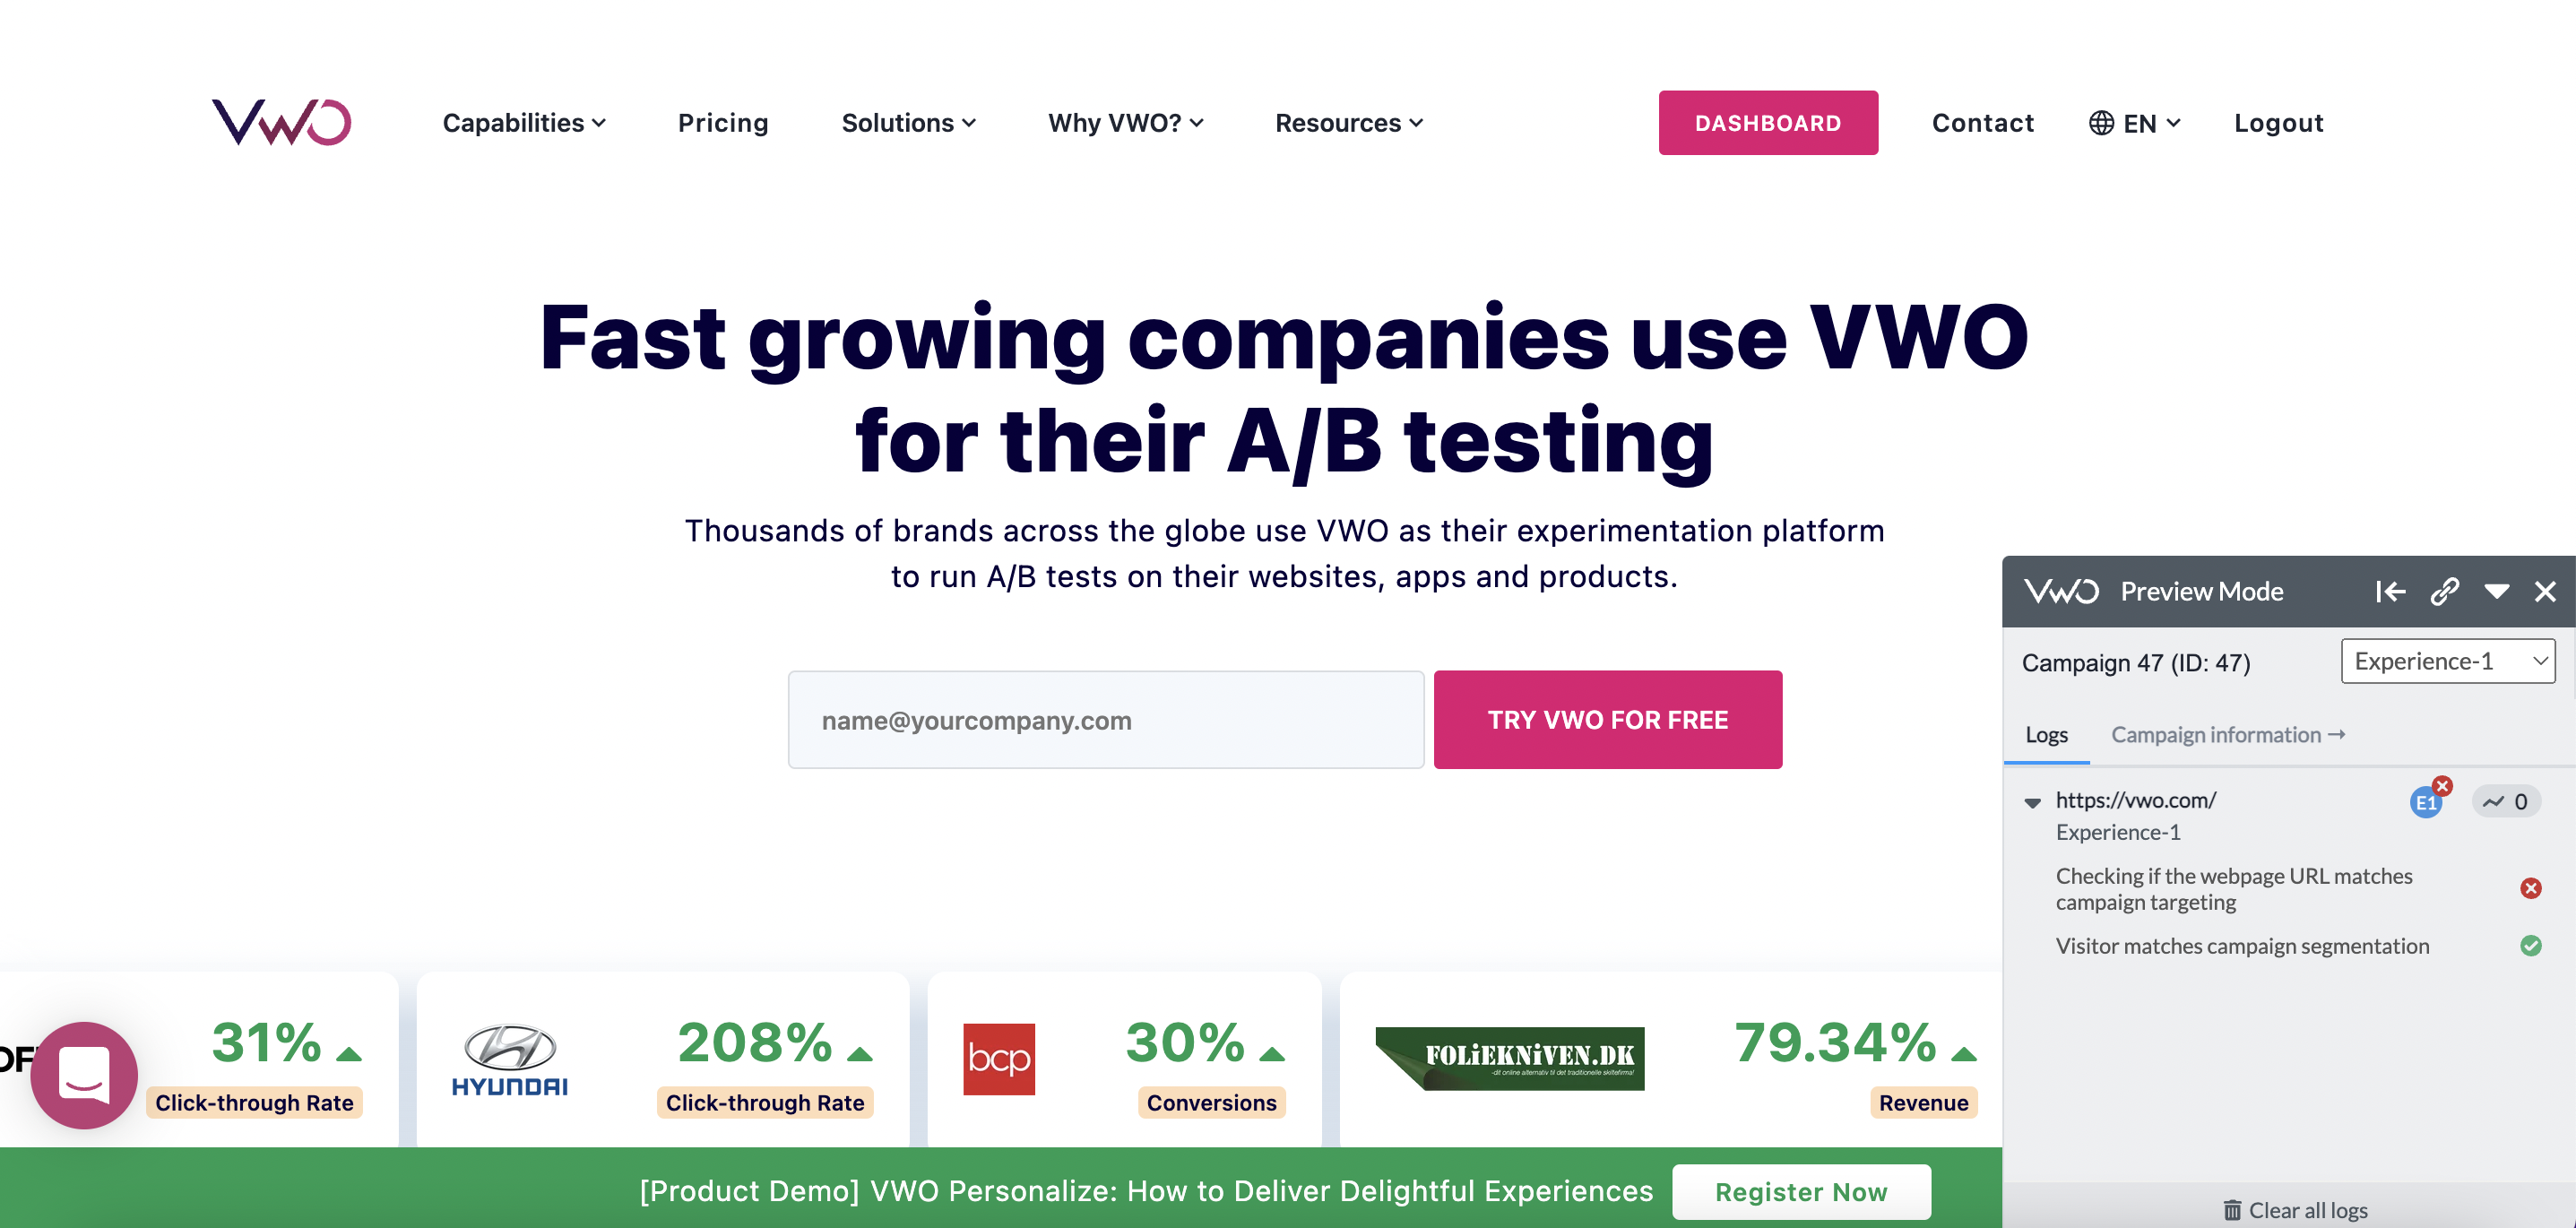
- In the preview window, a Preview Mode debugger pop-up appears in the lower right corner which displays the information about your Personalize campaign.
The Preview debugger popup comes with the following options:

To copy the direct preview link to be pasted elsewhere or shared with someone. This option comes in handy when you’re looking to verify the experiences across different browsers or devices. You can choose to use the direct preview link or scan the QR code from your mobile to verify the experiences in mobile browsers. 
To switch the position of the pop-up to the left of the screen 
To switch the position of the pop-up to the right of the screen 
To minimize the pop-up 
To close the pop-up While previewing, you can perform the following actions to verify the campaign setup:
-
Switch to the other experiences by selecting correspondingly from the experience dropdown in the debugger pop-up.
-
Click on the Campaign Name to verify the details about the campaign and the logs of page visits for the current page within the Campaign information and Logs for page visits sections. You can expand each of the sections to view the respective details.
-
Trigger a goal to verify if it is working fine. If the goal is triggered, the corresponding status will be updated under the Logs for page visits section.
TIP: Before verifying the goal, clear the page visit logs by clicking on the CLEAR option in the Logs for page visits section. This helps you identify if the goal is being tracked.
-
Previewing Screenshots of Your Experiences
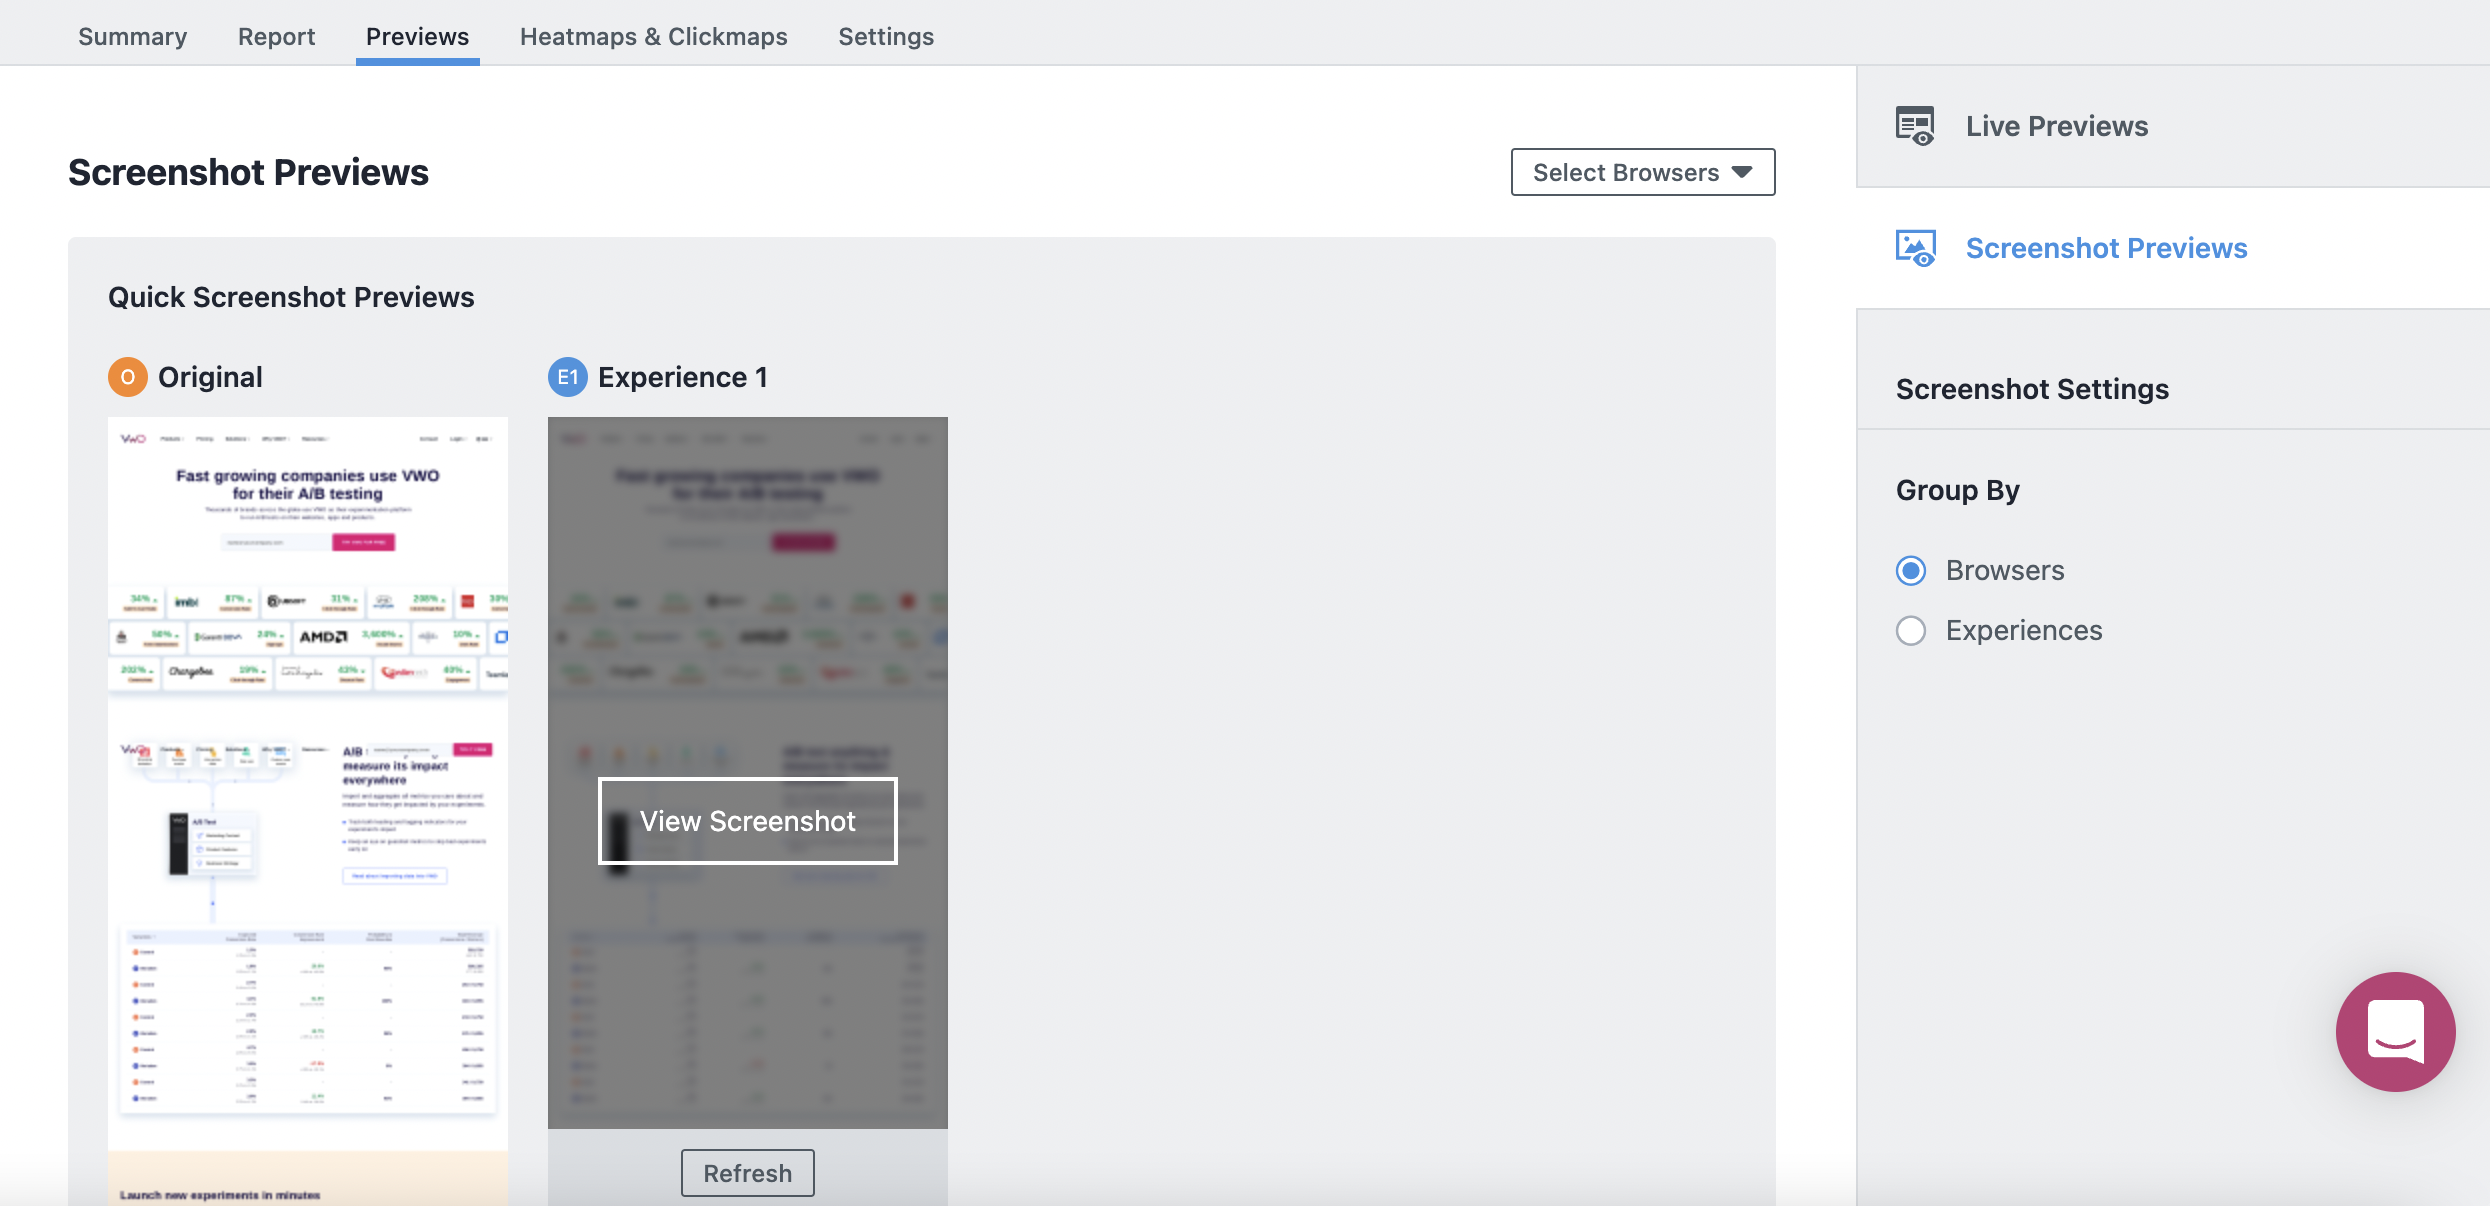
Using the Screenshot Previews section under the Previews tab, you can view the screenshots for your Personalize experiences based on the modifications that you have made. Here, the screenshots of all your experiences appear as thumbnails. To preview the screenshots of your experiences, perform the following steps:
- Go to the Previews tab, and from the panel on the right, click Screenshot Previews.
- To view a screenshot, hover on the screenshot thumbnail and click View Screenshot.

- On the screenshot that appears, you have the option to view the screenshot of your experience in specific browsers. To do this, select the experience and the browser from the respective dropdowns and click Go. Alternatively, you can also use the Select Browsers dropdown present in the top right corner of the Screenshot Previews section to load screenshots of your experiences in different browsers.
NOTE: If you’re viewing the screenshots for the first time, they may take a few seconds to generate depending on the server load.
Additionally, you can also group your experiences based on the Browsers and Experiences using the Group By screenshot settings present in the panel on the right.
