Welcome Drip - Welcome your customers with a series of automated push notifications!
A Welcome Drip campaign on VWO Engage (formerly PushCrew) allows you to set up a series of automated browser push notifications for your newly acquired subscriber. If you are looking at a way to engage your newly acquired subscriber to your website & its content for a longer period of time, A welcome drip campaign can do the trick.
You can schedule your first automated notification to a new subscriber within minutes of them becoming a subscriber & set up the subsequent ones as desired for your website. You can also create multiple welcome drips for a different set of your audiences.
This feature is available to customers on the Enterprise plan only.
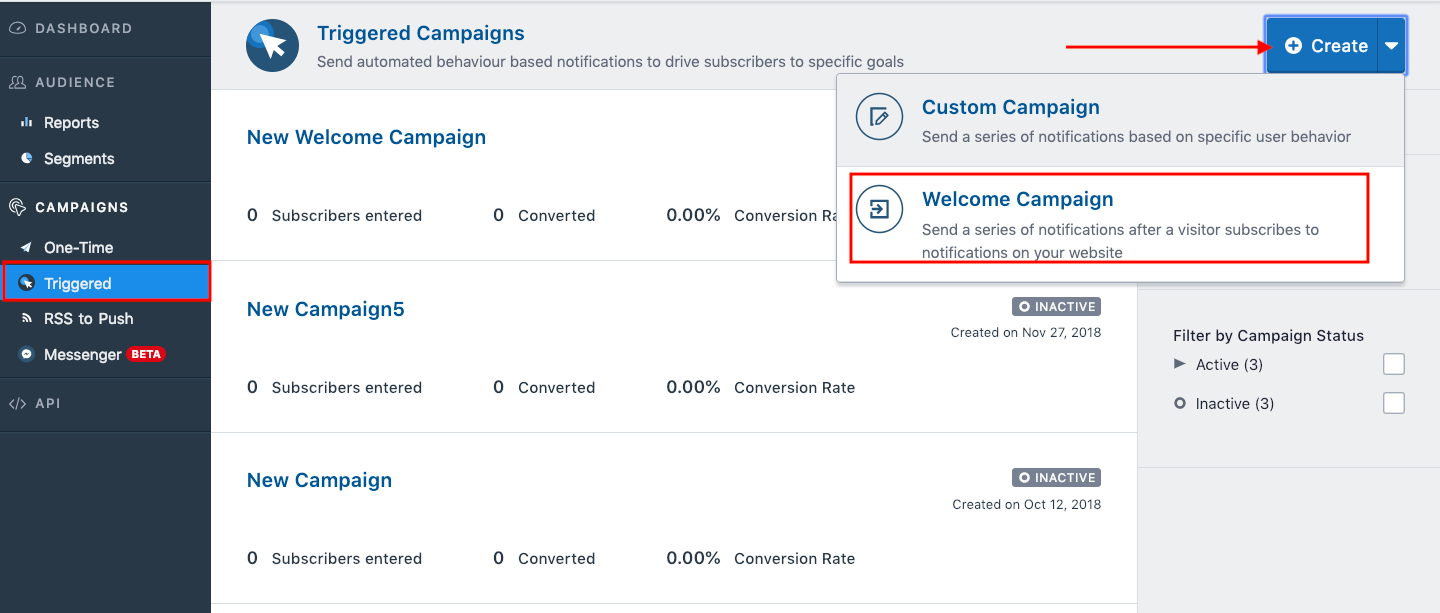
Step1) a. Under your CAMPAIGNS column, Click on “Triggered”.
- Click on Create
- Select Welcome Campaign
Step 2) Now you under Target Audience you will have two options 1. "All subscribers" and 2. "Custom Targeting".
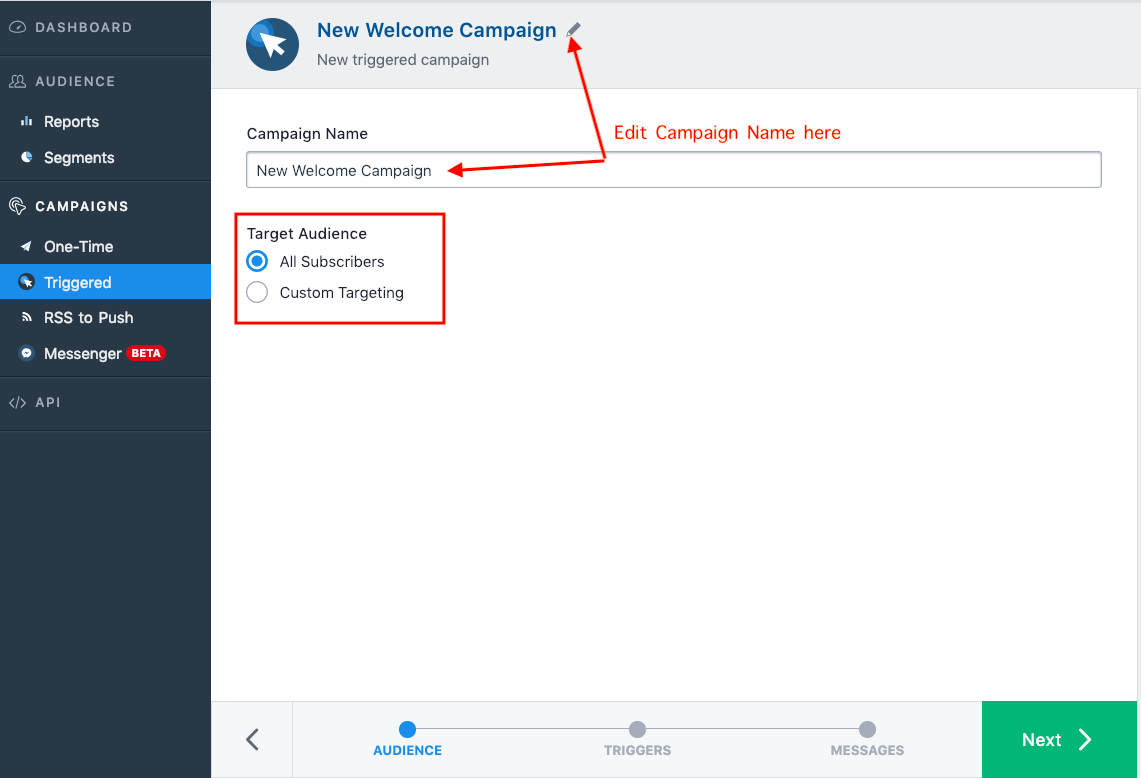
Step 3) To create a Custom Target Audience, Click on "Custom Targeting".
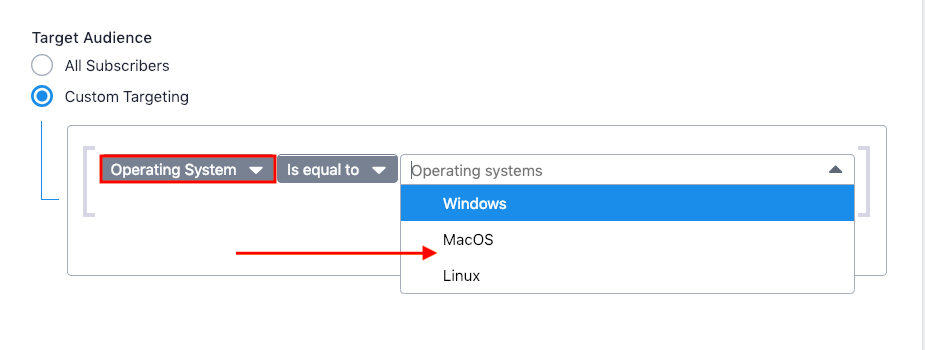
You have 5 Subscriber properties based on which you can create your audience, namely -
- a) Operating System - You can set the Welcome Drip Campaign based on Windows, Mac OS, and Linux
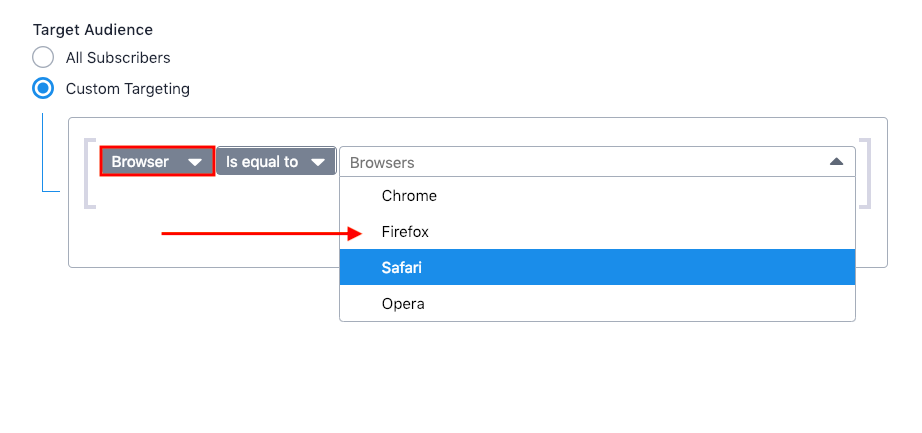
b) Browser - Chrome, Firefox, Safari, Opera
c) User Agent - This is a special kind of Subscriber property which has following conditional properties as shown. For example, if you want to target users based on the model of a mobile device that they are using, custom code can be written for the same.
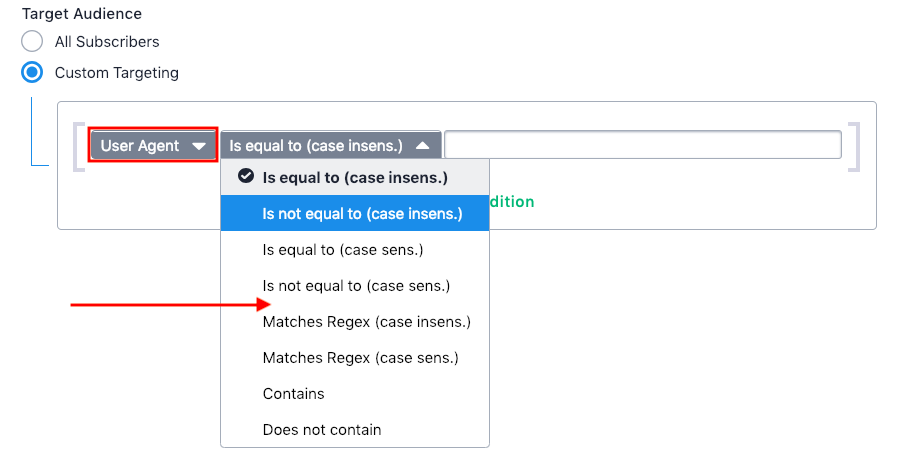
For example, If you want to target users who use Samsung Galaxy S8 Phone, Select "contains" and type in the user agent for the same as shown. It will group all the subscribers which subscribed using Samsung Galaxy S8 "Samsung S8"
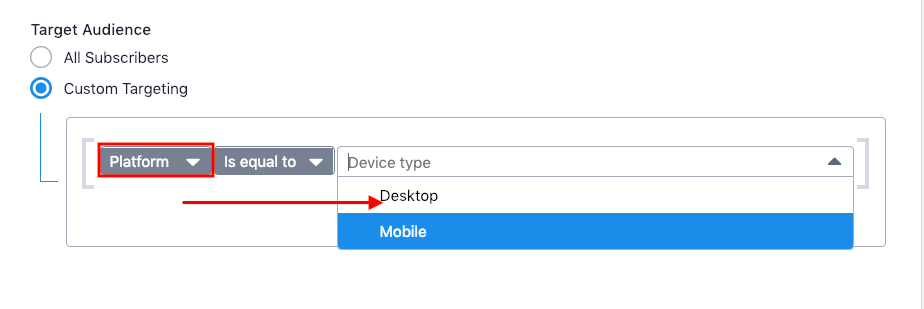
d) Platform - Desktop or Mobile devices
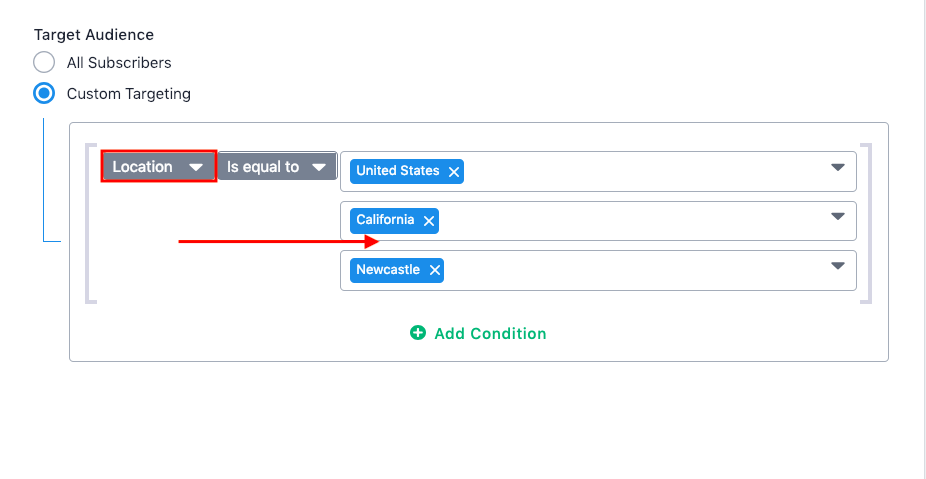
e) Location - You can choose your audience. The Location-based option can be from country level to city level.
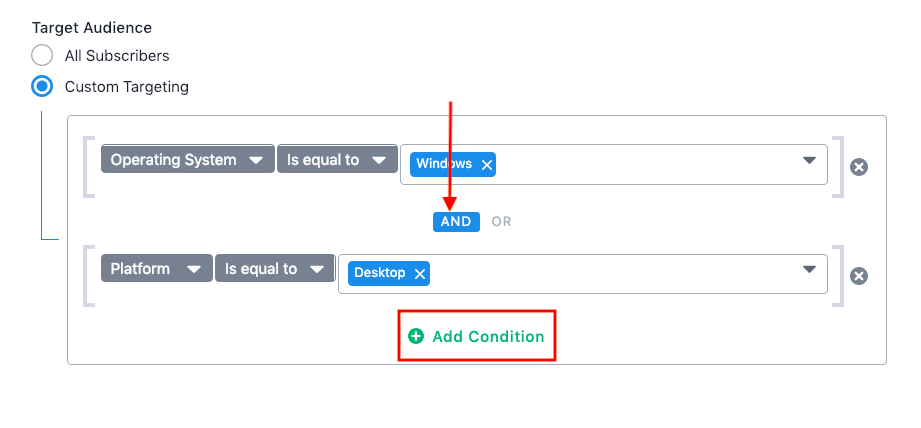
You can also add Multiple conditions to create your audience by clicking on "Add condition" and using the Logical Operators "AND" & "OR" as shown.
Step 4) Once you have set the audience, Click on Next and you will have the Entry Triggers and Goals.
You can proceed and select the Entry triggered as “Subscribed to Web Push”
There are 8 “Subscribed to Web Push” Parameters using which you can create the triggers -
- a) Page URL - A URL can be provided and the subscribers will be targeted when he/she visits that page. The below listed are the types of conditions available.
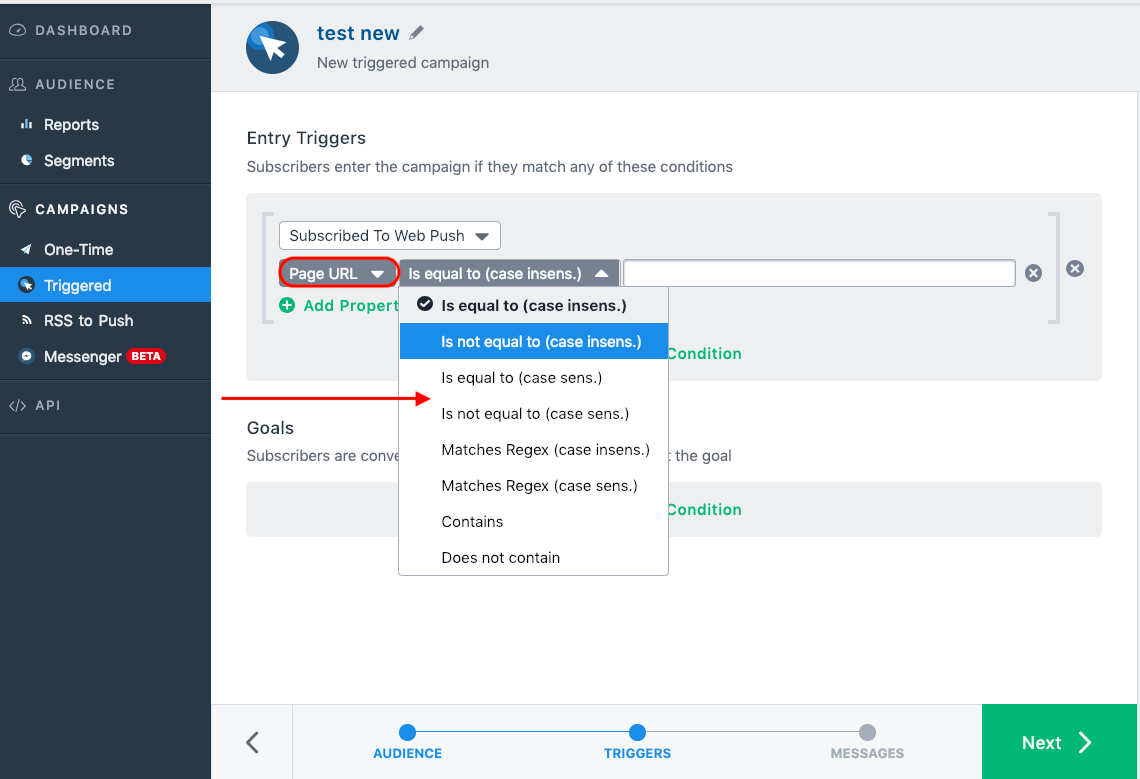
b) Referring URL - The URL from which the visitors are coming over to your website can be provided here and based on which the subscribers are targeted. These are basically Upstream links to your site.
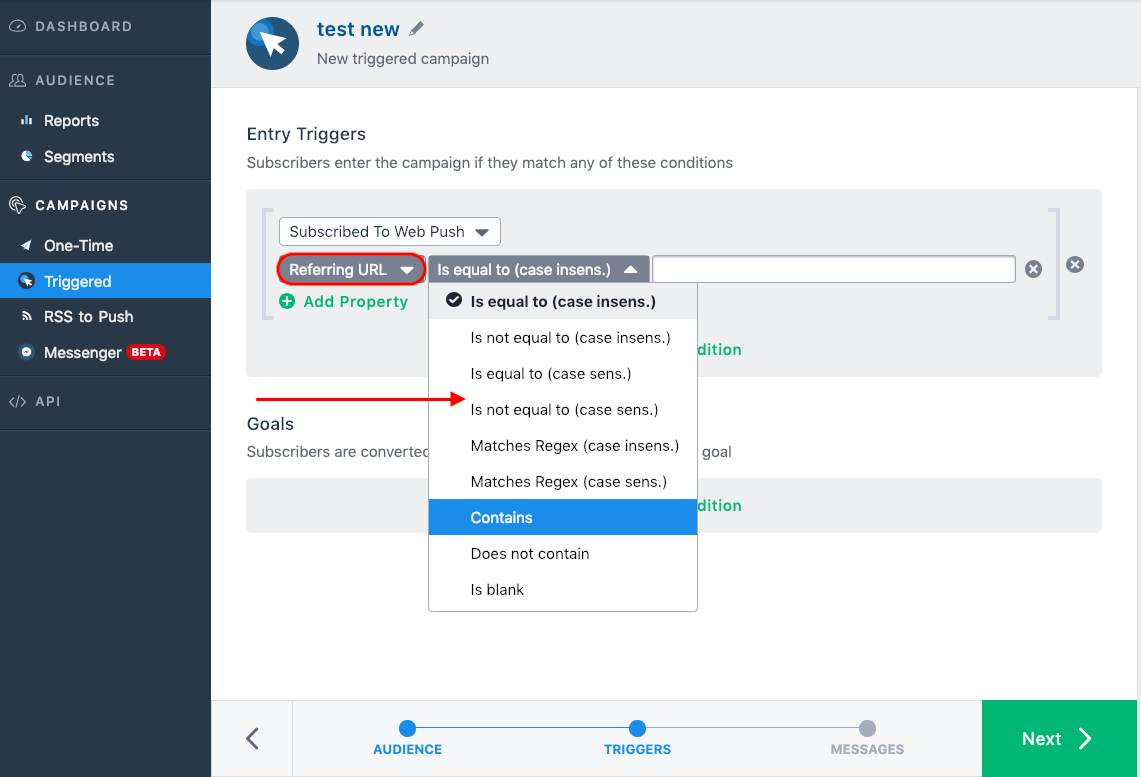
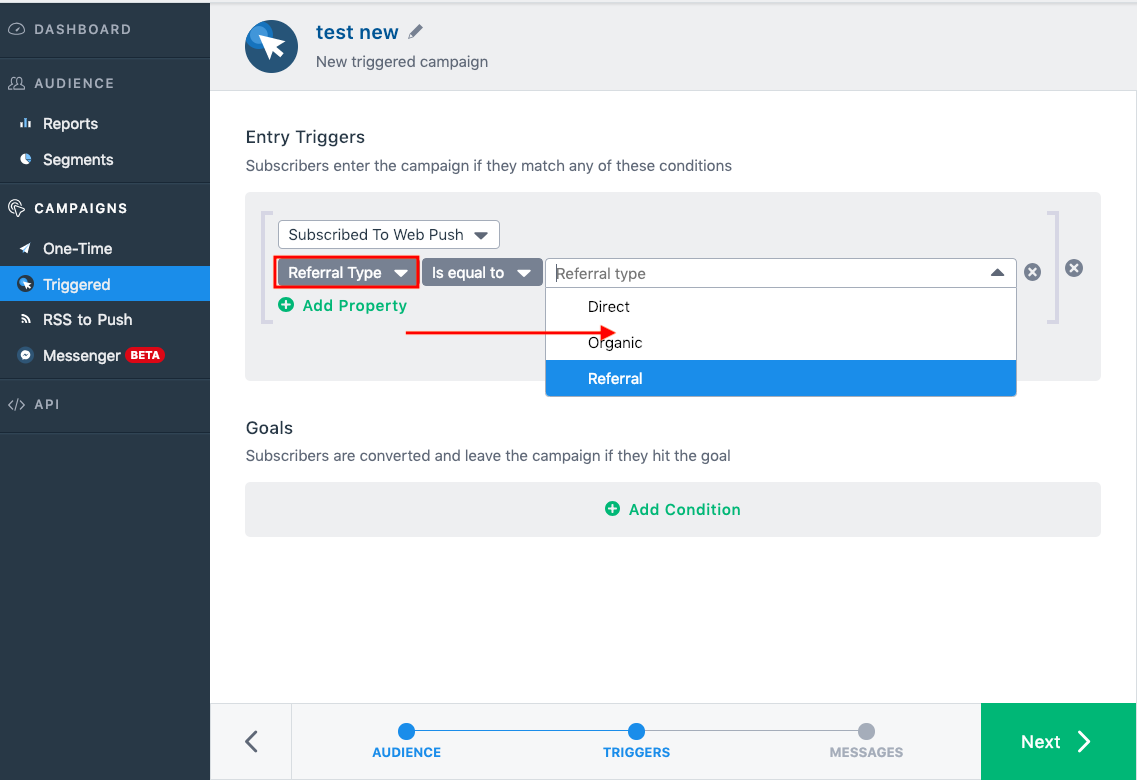
c) Referral Type - Using this, you can target the user based on how the visitors landed on your site. The following are the referral type categories
> Direct - A visitor coming on to your site directly by typing your website URL
> Organic - A visitor coming on to your site through a search engine. For example, Google.
> Referred - A visitor coming on to your site from another external website
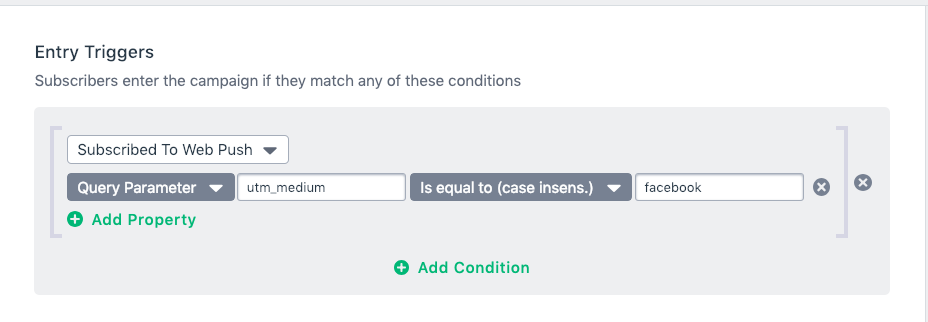
d) Query Parameter - Using this, you can target users based on the query parameter present in the link.
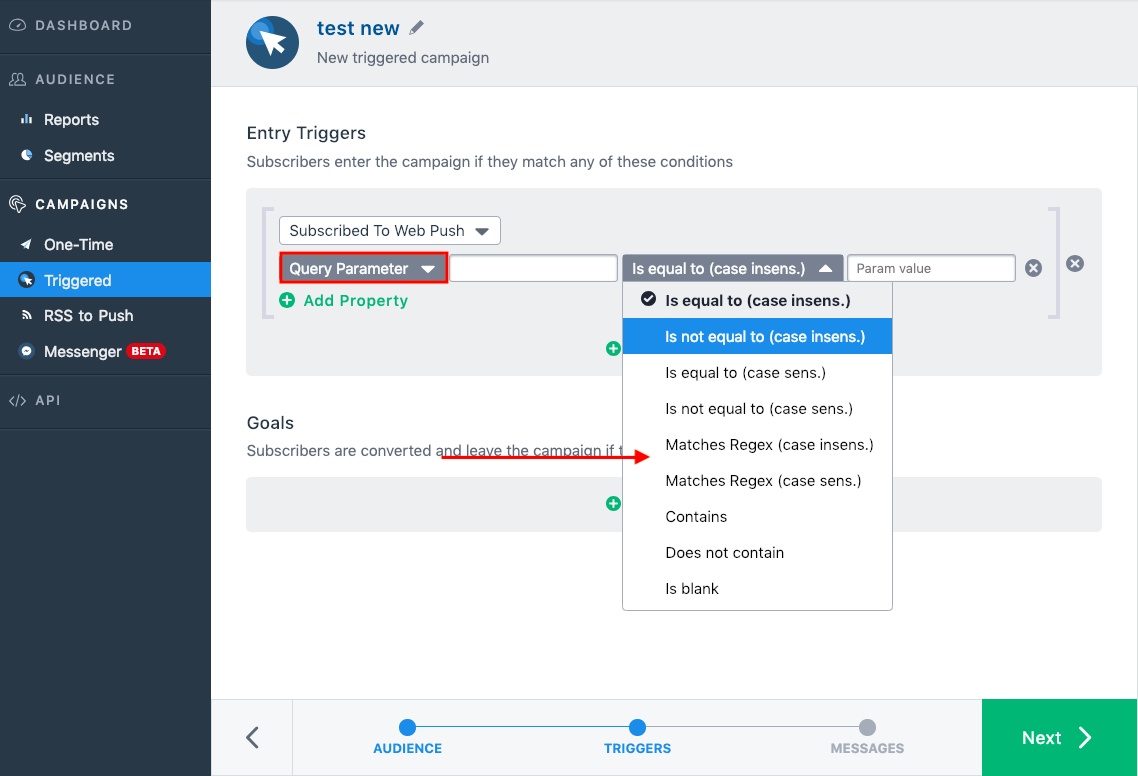
For example, as shown below subscribers are targeted based on the query parameter containing Facebook.
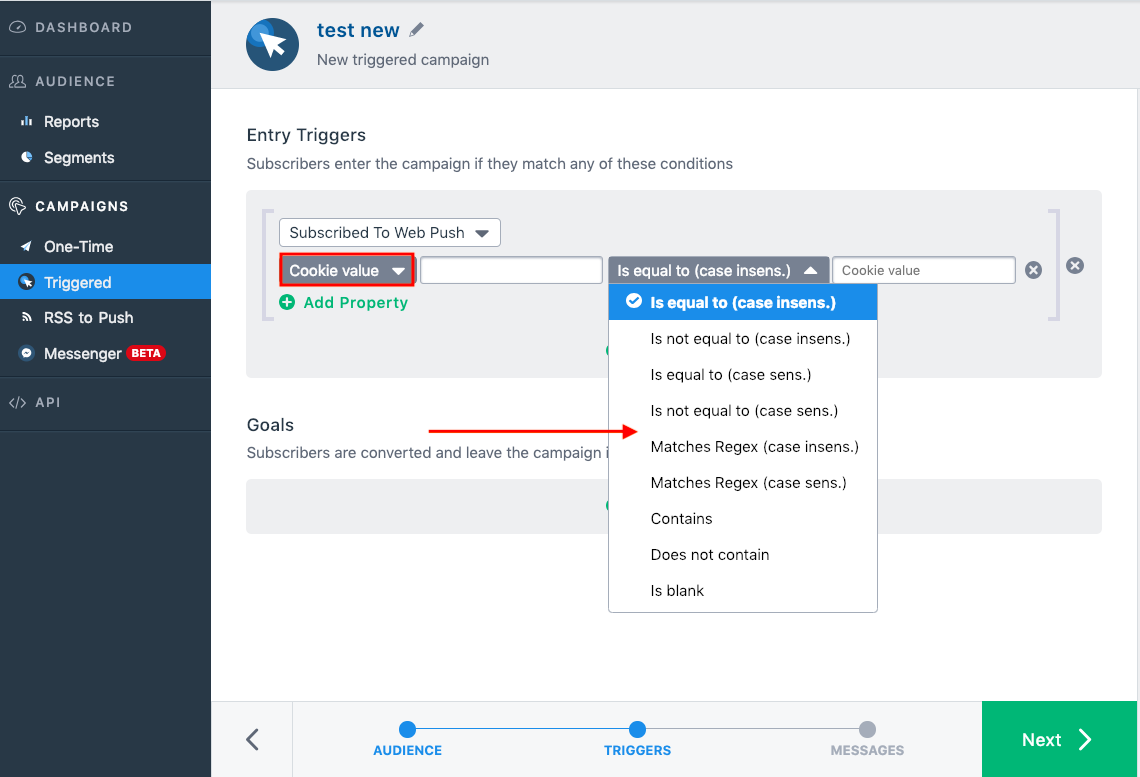
e) Cookie Value - Using this, you can target users based on the cookies name and value pair stored by your website on the user’s browser.
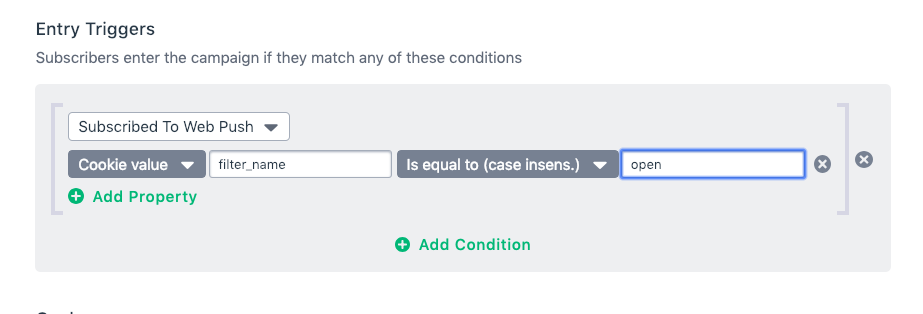
For example, as shown below subscribers are targeted based on the cookies which contain a particular name-value pair - users for whom the cookie filter_name contains open.
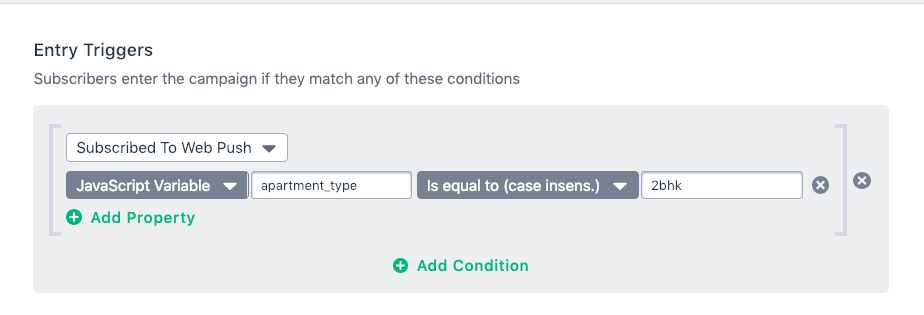
f) JavaScript Variable - Using this, you can target users based on the JavaScript variables present on your website
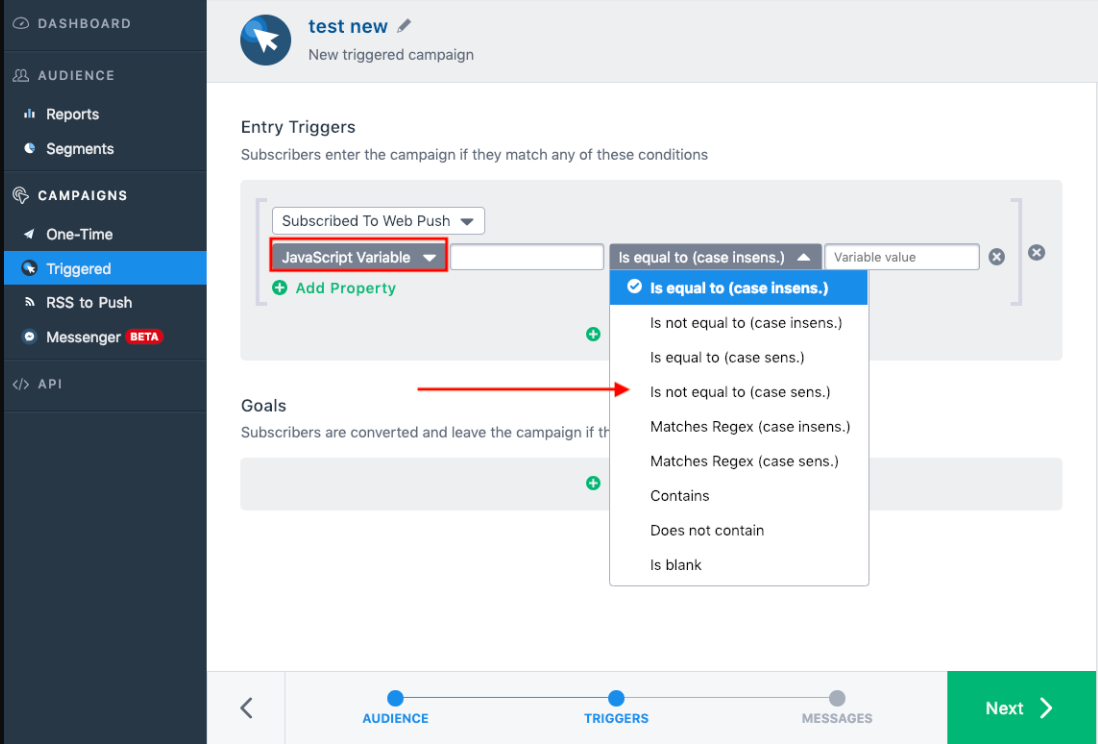
For example, as shown below subscribers are targeted based on the value of a particular JavaScript variable - users who chose apartment_type as 2BHK.
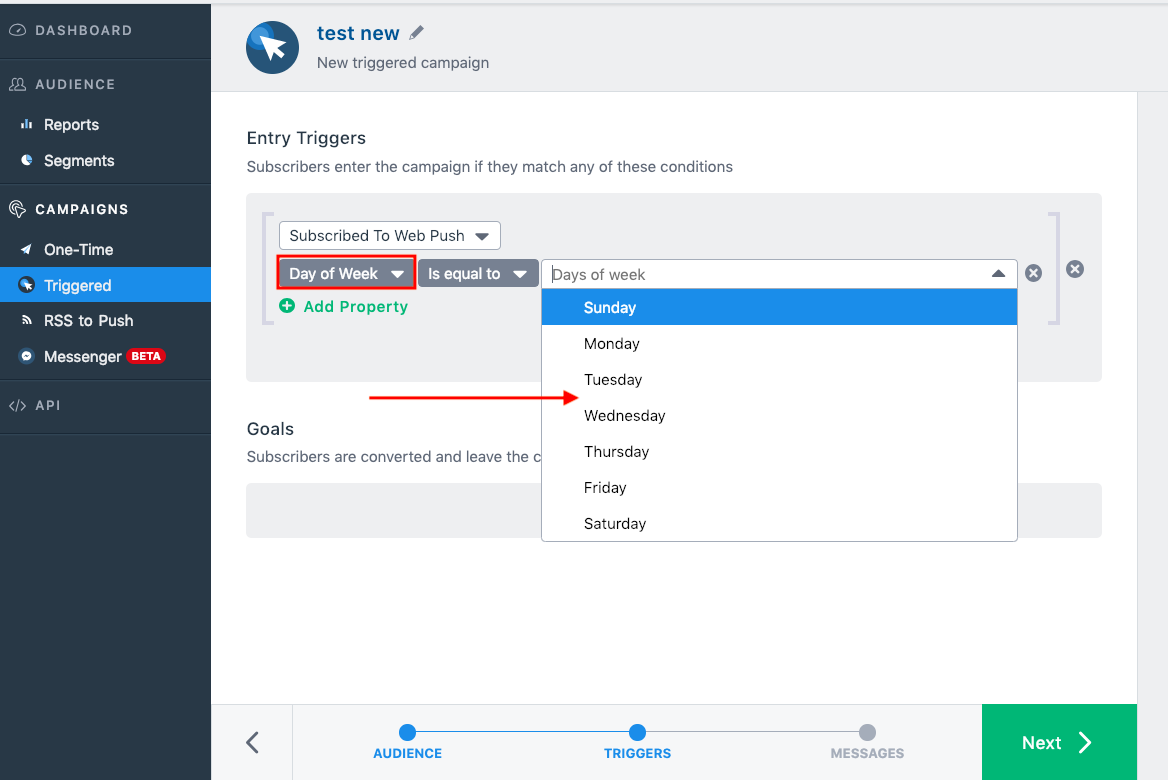
g) Day of the week - Using this, you can target users based on which day of the week he/she visited on your website.
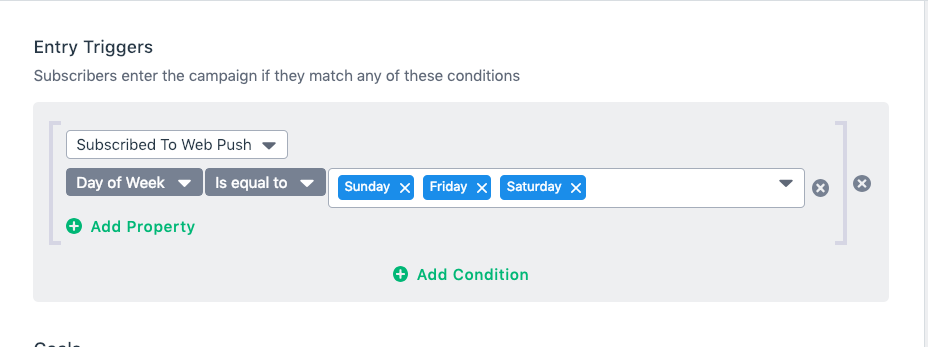
For example, as shown below subscribers are targeted based on the value of a particular Day of the week - users who visited on a weekend.
h) Hour of the Day - Using this, you can target users based on which hour of the day he/she visited on your website.
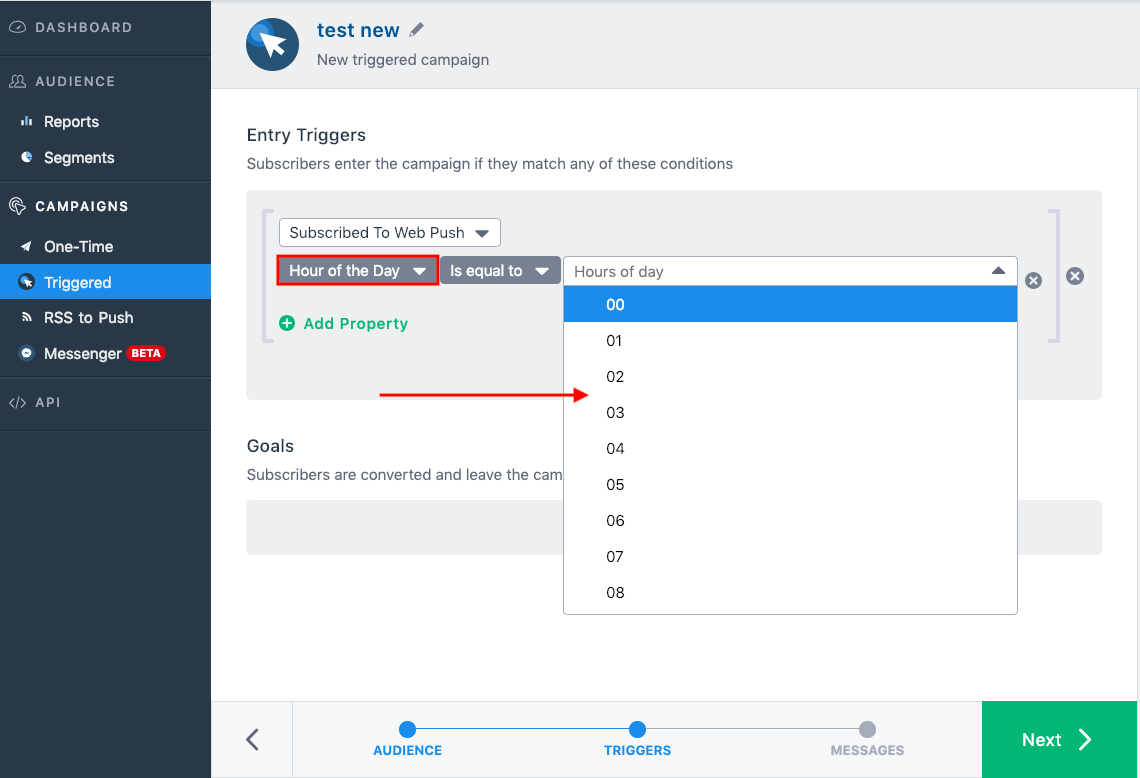
For example, as shown below subscribers are targeted based on the value of a particular Day of the week - users who did not visit in the evening (between the hours 17,18,19).
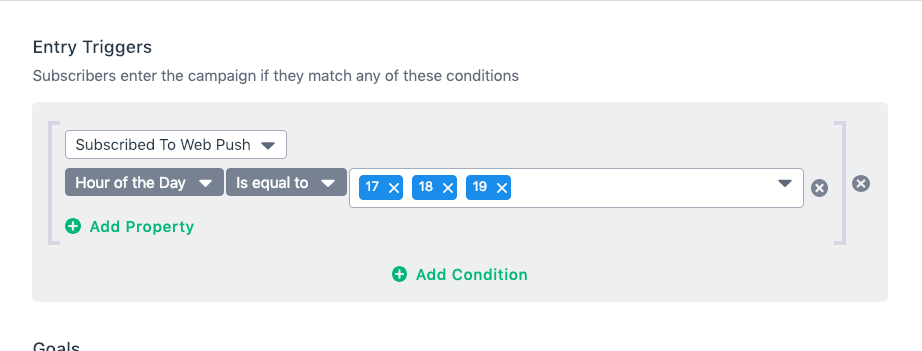
Just Like “Subscribed to Web Push” there are 8 “Visited Page” Parameters using which you can create the triggers.
You can also create Welcome Drip based on the Clicked Elements (Buttons/links/images etc) by your subscriber. All you need to do is specify the CSS selector path of the element to track.
How do I find a CSS path of an element?
- a) Google Chrome
- Right-click on the element you want to track and select Inspect Element. The developer tool display with the element properties
- Right-click on the element property and select Copy and then click Copy Selector
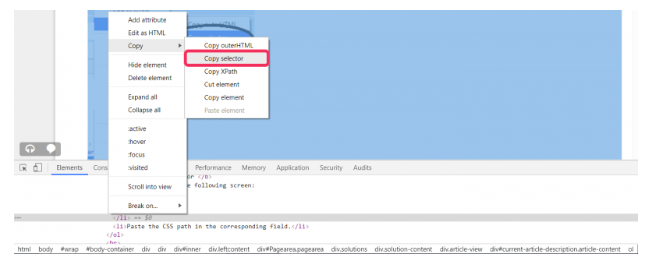
b) Firefox
- Right-click on the element you want to track and select Inspect Element.
- On the Developer tool, right click on the element property and click Copy and CSS Selector.
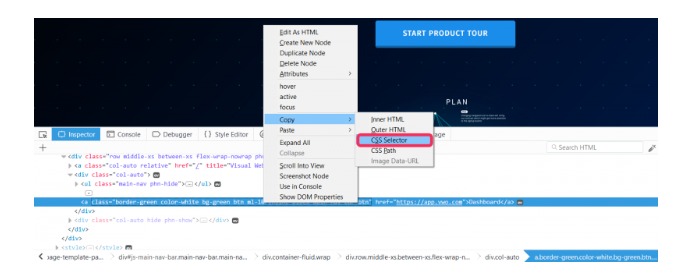
Note: The approach used above is only useful if you want to track a specific element in a specific page in a specific position.
If you want to track for example all "add-to-cart buttons" on all pages of your website, you then have to find what is common in all those buttons - id, class, element etc and use that as the CSS selector.
For example, if you want to create a trigger for subscribers who click on the "Submit" button as shown below, you can find out the CSS path of the "Submit" button by following the steps mentioned above.
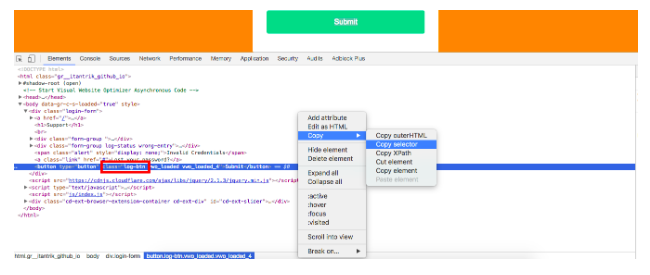
The path of the element (log-btn), in this case, is highlighted in red. Paste this in the CSS selector field in the Welcome Drip as shown below:

Note: The "dot" before the element (log-btn) in the screenshot above represents the selector pattern (.class). This simply means that all the elements with "Class=log-btn" will be selected.
Below are some other selector patterns that you can use:
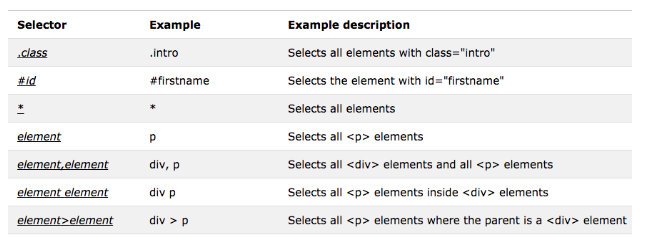
Note: The VWO Engage code must be present on all pages of the elements selected.
Types of Welcome Drip Campaigns
- a) Open-ended Welcome Drip Campaign - This is a type of Campaign where the Goals or Exit trigger is not mentioned and the series of notification reaches your subscribers by default.
b) Closed Campaign - This is a type of Campaign where the Goals are mentioned and if any subscriber who performs the goal action mentioned would be taken out of the triggered Campaign and he would no longer get further notifications.
NOTE
1) You can use Multiple Page visit Parameters to create the Entry trigger and Goals using "Add Property" and "Add condition"
2) If you have already setup cookie values for certain pages, it can be reused as a Page visit parameter
3) VWO Engage SmartCode should be present in the Trigger pages that you mention
Step 5) Once you are done with the above, Click "Next" and you will move next page where you can craft the series of notifications as shown.
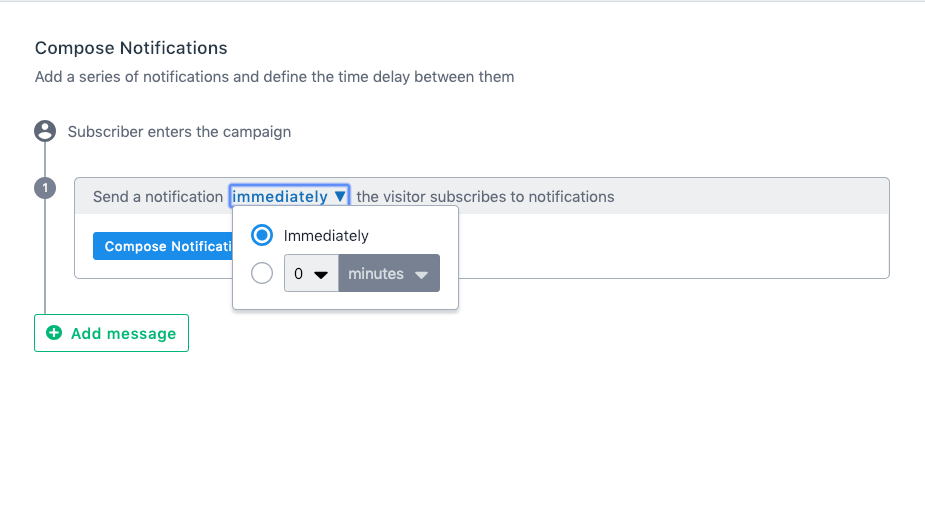
Here you can set the time delay on the notification from a minimum of 5 minutes to a maximum of 28 days. Also, you can add as many notifications you want in the series by clicking on "+' as shown above.
Step 6) Click on "Finish" after you have crafted the series of notification to save the campaign. Click on "Start Now" once you are ready to roll out the campaign.
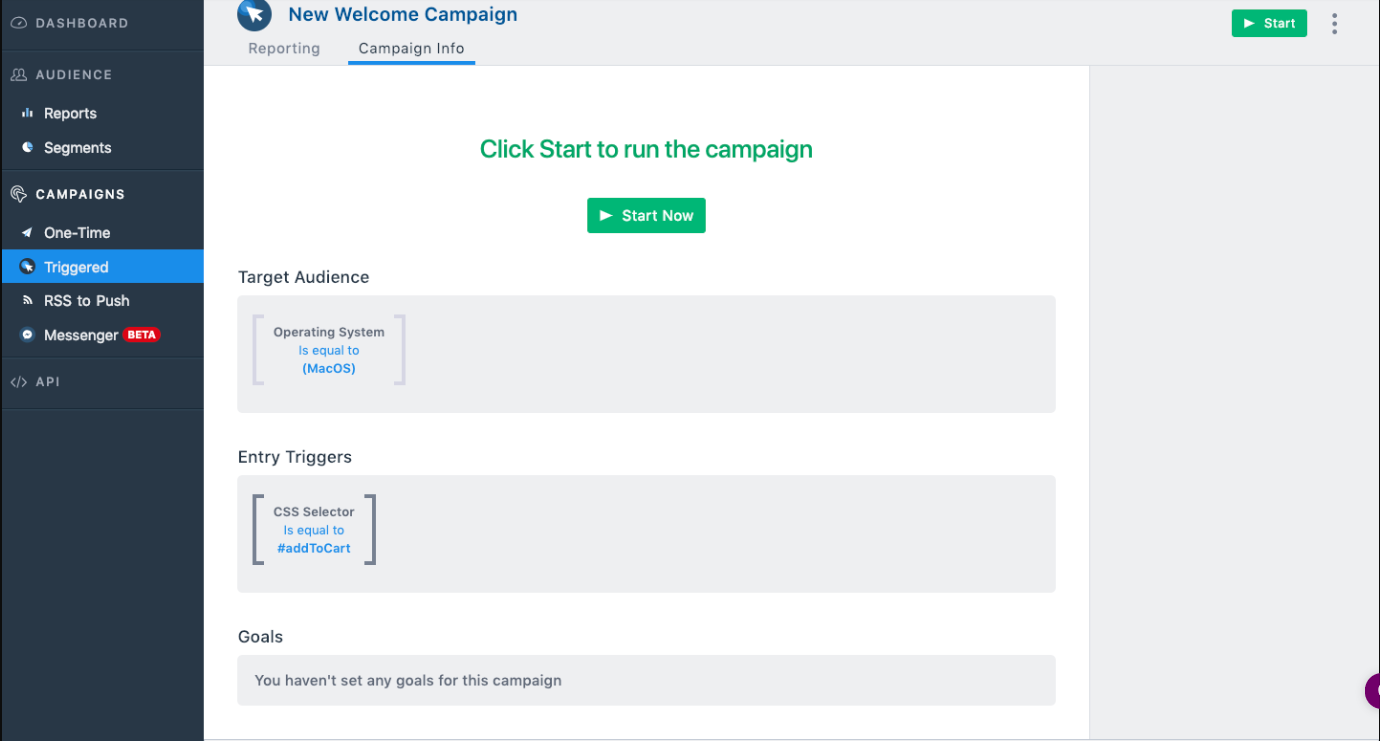
Step 7) Once the Campaign has started, you can see the metrics in the "Reporting tab" as shown.
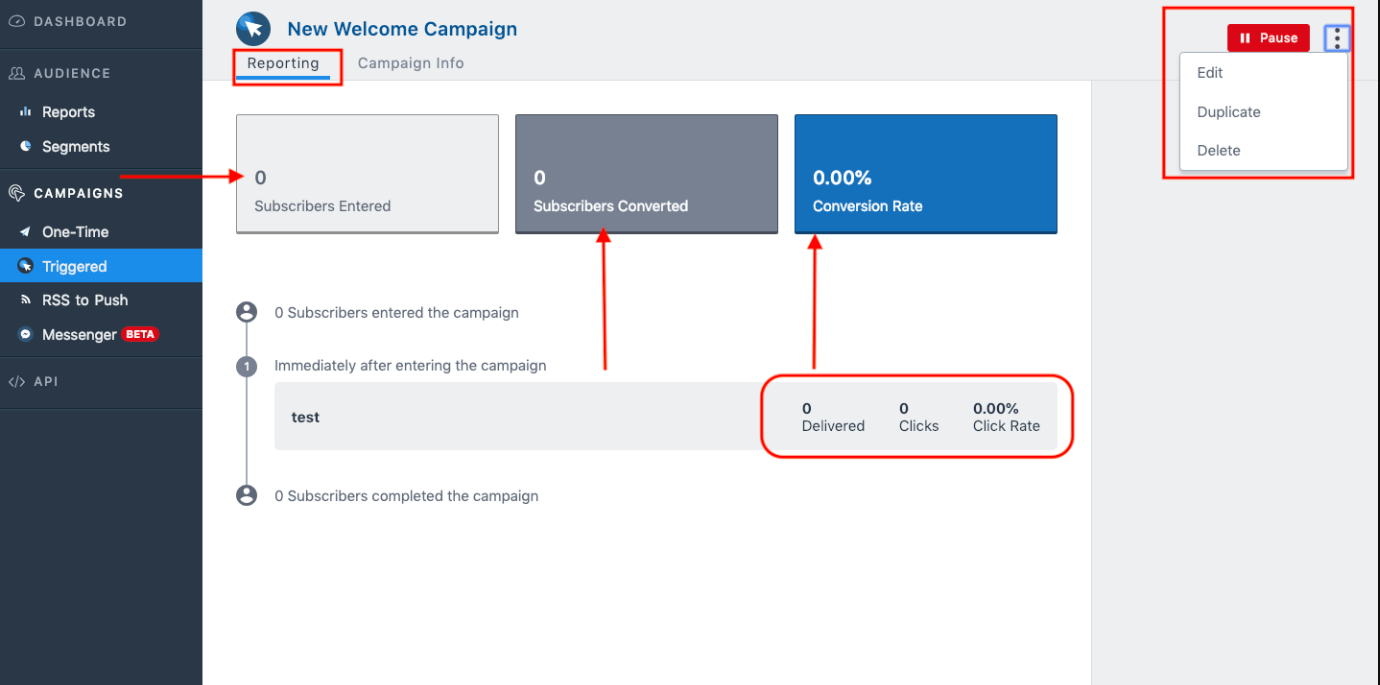
- Subscribers Entered - The number of subscribers who passed the Entry Trigger i.e, the subscribers who are qualified to enter the campaign
- Subscribers Converted - The number of subscribers who completed the goal. It can be a purchase or any other action
- Conversion Rate - The percentage of subscribers who completed the goal
- Delivered - Number of subscribers the notification was delivered to
- Clicks - Number of subscribers who clicked on the notification
- Click Rate - Percentage of subscribers who clicked on the notification
- Duplicate: You can create a replica of Welcome Drip Campaign by using the Duplicate Button. Duplicating of Campaign will copy custom audience, entry and exit triggers along with notifications. Please note no subscribers will be copied.
NOTE
1) Ideally, the TTL of 1st Notification should be equal to the delay of 2nd Notification to avoid continuous overlapping notifications.
2) Once you have saved the Campaign, you can only edit the content of the Notification and not the time delay. Also, you can't add or delete any new notification to the series.
3) Once the Campaign is paused, the subscribers have not collected anymore under the campaign and notifications won't be sent to the ones present in the campaign already.
4) Your Old Welcome Drip Campaign will work as it is. If you want to implement the changes of the new Welcome drip Campaign, you can duplicate the old Welcome Drip.
