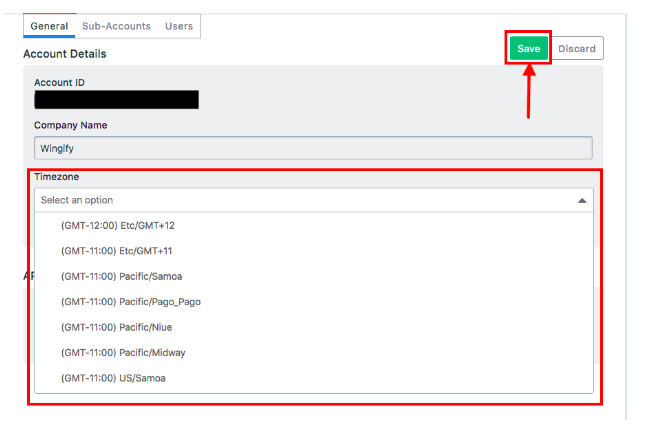
You can schedule your notification according to your user's time zone. We’ve shown below how it can be done.
The default timezone will be GMT+00:00.
How to change the Timezone
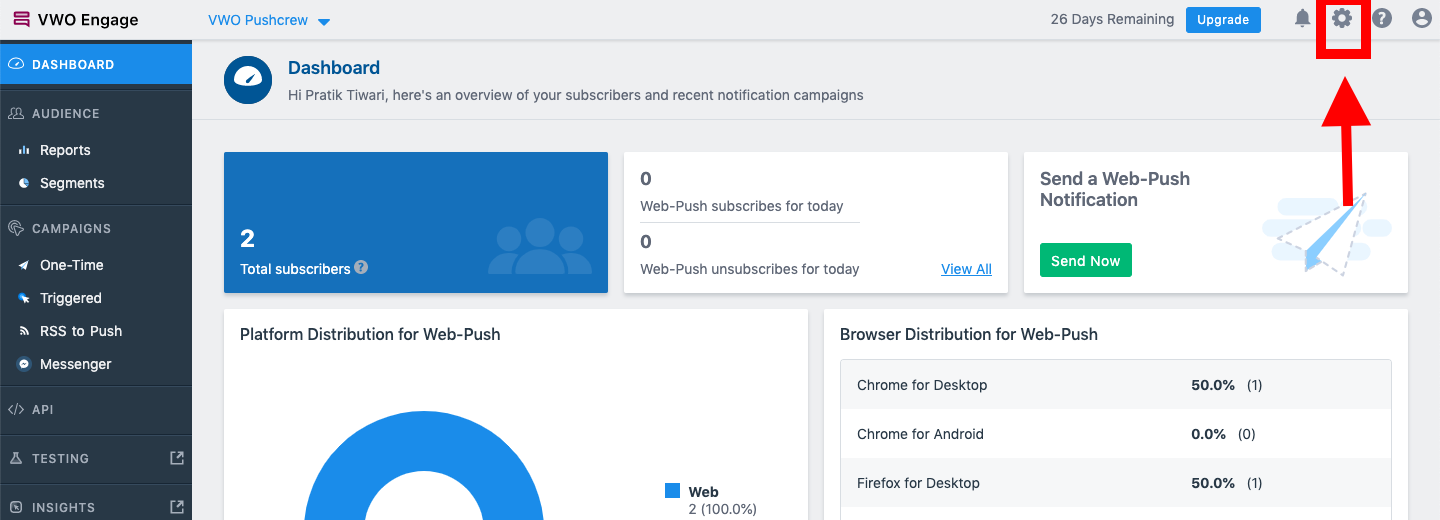
- Click on Settings, then click on the Settings icon
On your dashboard, on the top right side of the panel, click on the Settings icon.
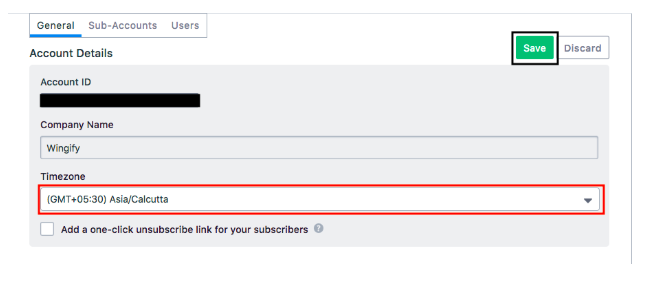
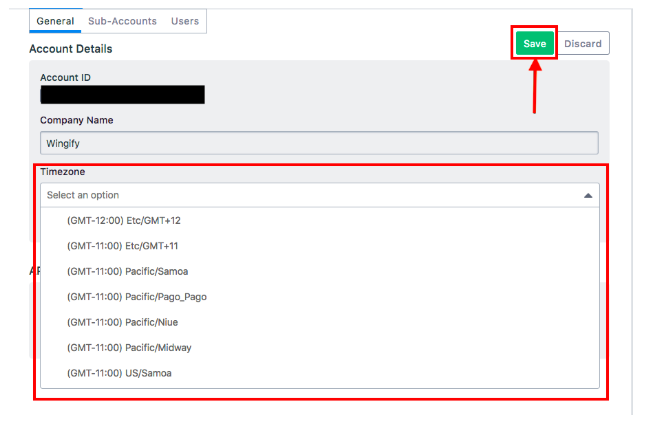
- Click on the drop-down under Timezone
Now on the right, you’ll see the option called Timezone. Click on the drop-down.
- Choose your preferred Timezone and click Save
From the drop-down, you may scroll and choose your preferred timezone. Once you’ve done that, click on Save.
Other means to change the timezone
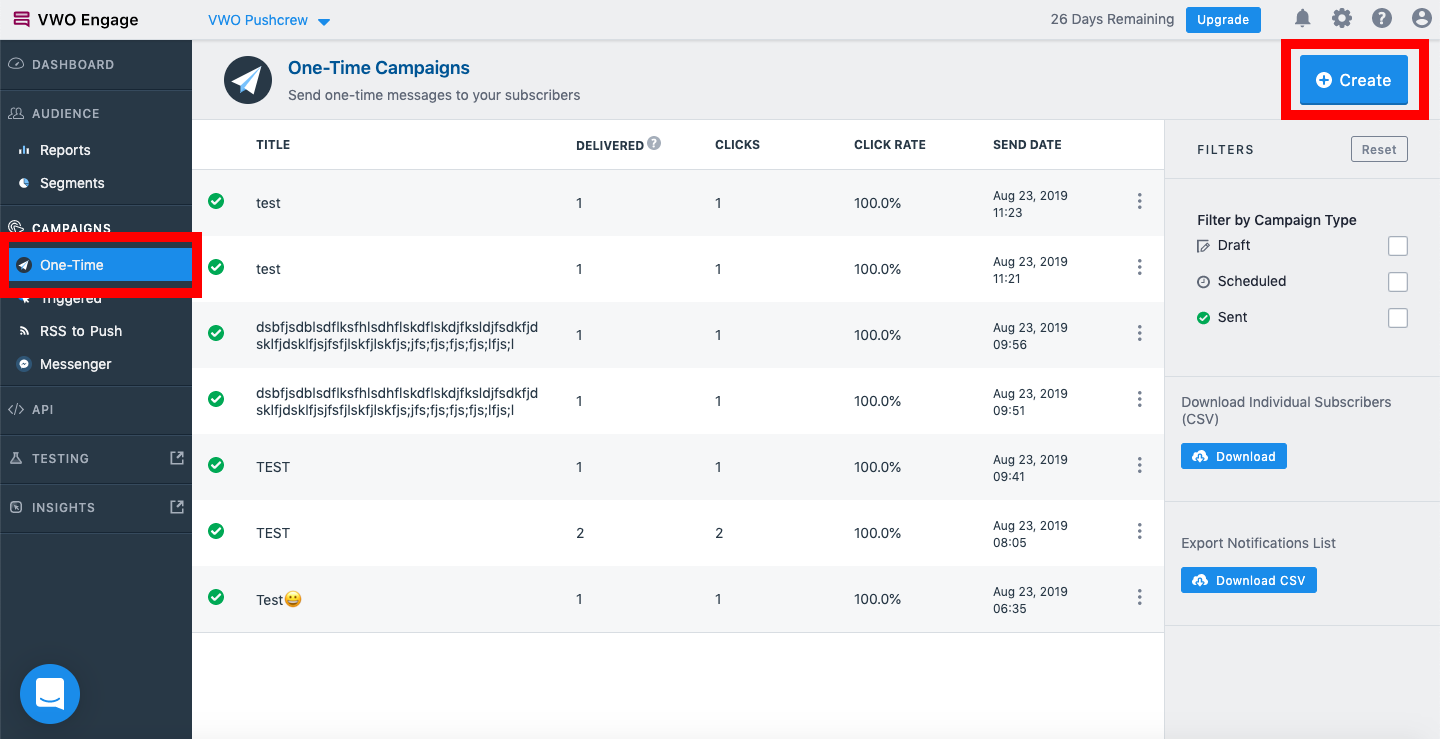
- a) One-Time notification --> Create
On the left side of the panel of your dashboard, select One-Time notification and click on Create button on the top right..
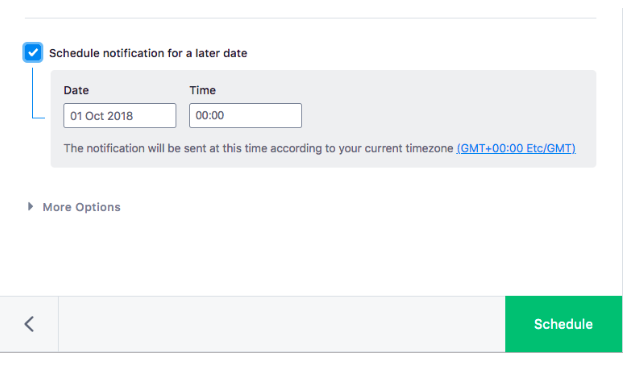
Now, scroll down on the center of your dashboard. You’ll see Schedule notification for a later date. Enable it by clicking on the checkbox next to it. Then, click on the timezone, as shown in the image below.
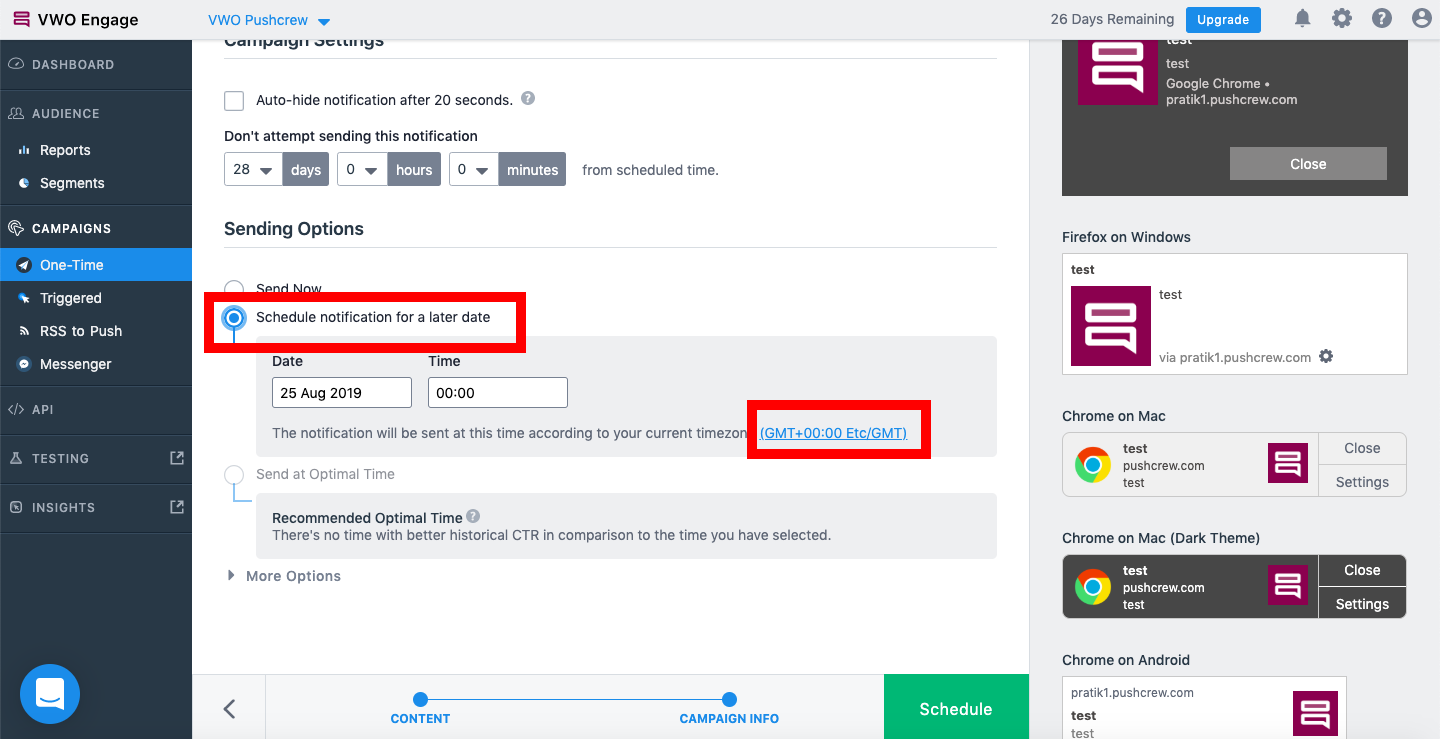
You’ll now be redirected to the Account Settings page.
Now on the right, you’ll see the option called Timezone. Click on the drop down and choose your preferred timezone and click on Save!
