What is the RSS-to-push feature?
RSS-to-push enables you to send automated web push notifications to your subscribers every time you update a post or add new content to your blog. All you have to do is add an RSS feed URL to your VWO Engage(formerly PushCrew) dashboard and we will do the rest :)
NOTE: This feature is available only on Paid and trial plans. This feature will work only if you have at least one subscriber on your account.
How does it work?
VWO Engage parses your feed every 3 minutes. Whenever a new post is found, it will be created as a new push notification in the One-Time tab to be sent out to all subscribers after 30 minutes. We’ll also send you an email saying that a new post has been detected and will be sent out as a notification. You can edit or delete it from the "One-Time" tab within 30 minutes.
Here’s the anatomy of a notification created from an RSS feed post :
- Notification Title: The first 48 characters of your post title are picked up by default to show the title of your notification. If the title of your post is long, the first 48 characters will only be shown. You can edit the notification title from the "One-Time" tab.
- Notification message: The first 100 characters of the body of your post are picked up by default to show as your notification message. Again, if the post is long, the first 100 characters will only be shown. You can edit it to a crisp summary from the Scheduled Notifications tab.
- Notification logo: The logo image added to your VWO Engage account will be shown by default.
Please note that you can edit or cancel these posts from getting sent only within 30 minutes of a new post being detected byVWO Engage. You will get an email from us once we detect the post. Editing and canceling can both be done by clicking on the respective icons in the Scheduled Notifications tab only.
If you cancel an RSS-to-Push notification, it will be shown as an ‘old post’ in the "One-Time" tab.
You’ll then have to manually send it if you want the same notification to be sent before another new post.
You can view stats of RSS-to-Push notifications like Delivery and CTR numbers in the Sent Notifications tab.
How do I set up RSS-to-Push on my VWO Engage account?
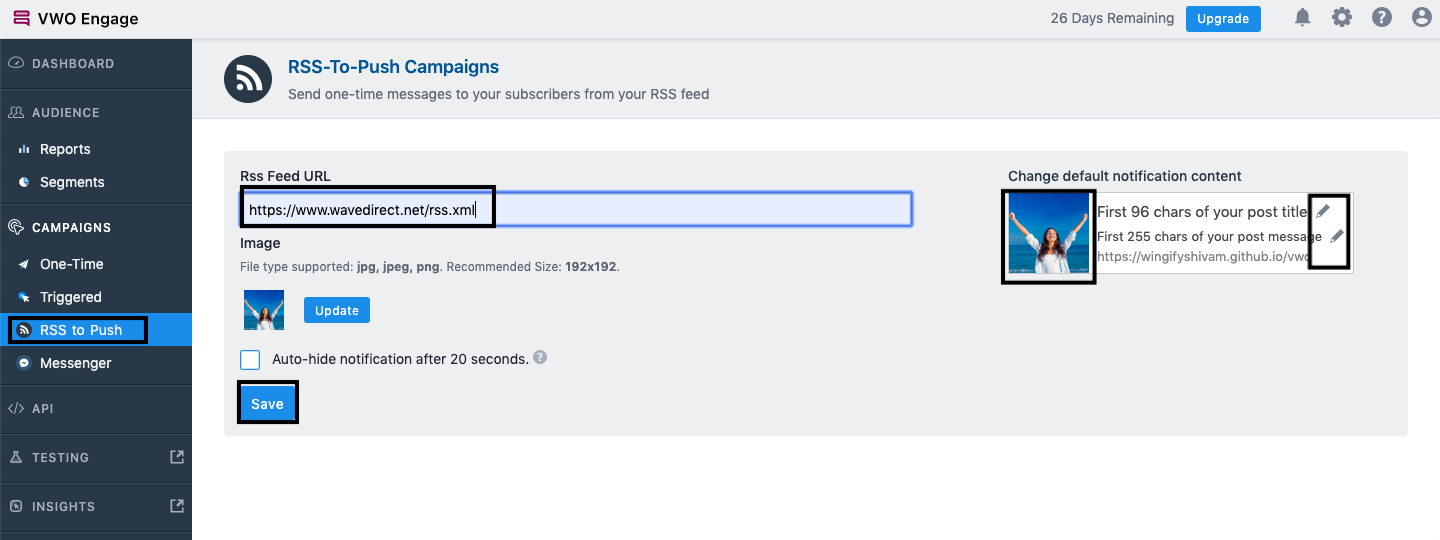
- Login to your VWO Engage account. Click on RSS-to-push on the left-hand side panel. Enter your RSS URL under the ‘RSS Feed URL’ field.
- If you neither want to edit each notification within 30 minutes as discussed above nor want it to be sent with the first 48 and 100 characters of title and body respectively, you can add a default title, body message and logo for every notification using the edit options under the ‘Change default notification content’ section on the right-hand side.
Once you’re done editing this, click on the Add RSS button. - To find your RSS URL: On your website, go to the ‘View Page Source’ option. Search (Ctrl+F on Windows, Command+F on a Mac) for ‘rss’ or ‘atom’
You should be taken to a line that reads something like the below :
<link rel="alternate" type="application/rss+xml" title="RSS Feed" href="https://vwo.com/blog/feed/" /> - The URL between the href- quotes is your RSS URL. In this case its "https://vwo.com/blog/feed/"
(Please note that this is a dummy URL created for this example only and does not actually exist)

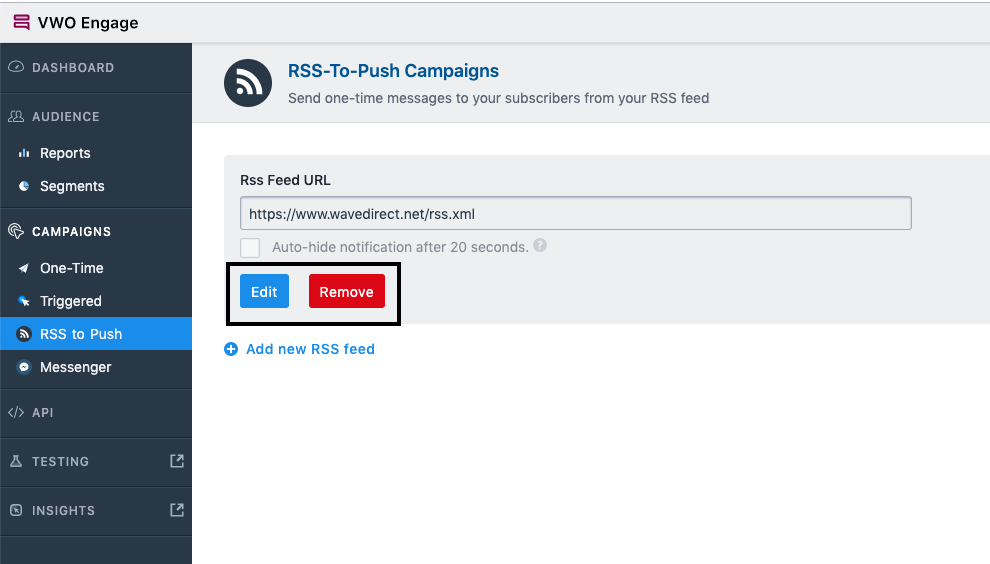
5. You can edit or remove an RSS feed URL by clicking on the respective options.

You can choose to auto-hide notifications by checking on the ‘Auto-hide notifications after 20 seconds’ box. The notification will then disappear in 20 seconds after being delivered to the subscriber.
6. If you edit and make any changes, 10 minutes after every change is made and saved, you’ll be able to see the RSS-to-push notifications in the One-Time tab.
7. You can also add more RSS URLs by clicking on ‘+Add new RSS feed’.
