VWO Engage (formerly PushCrew) now supports Safari on Mac for web push notifications! Here’s how you can configure it.
Pre-requisites:
-
Apple Developer Account : The fee for this is $99/year paid directly to Apple.
If you do not have this already, you can create one here.
-
A computer running MacOS
Points to Remember :
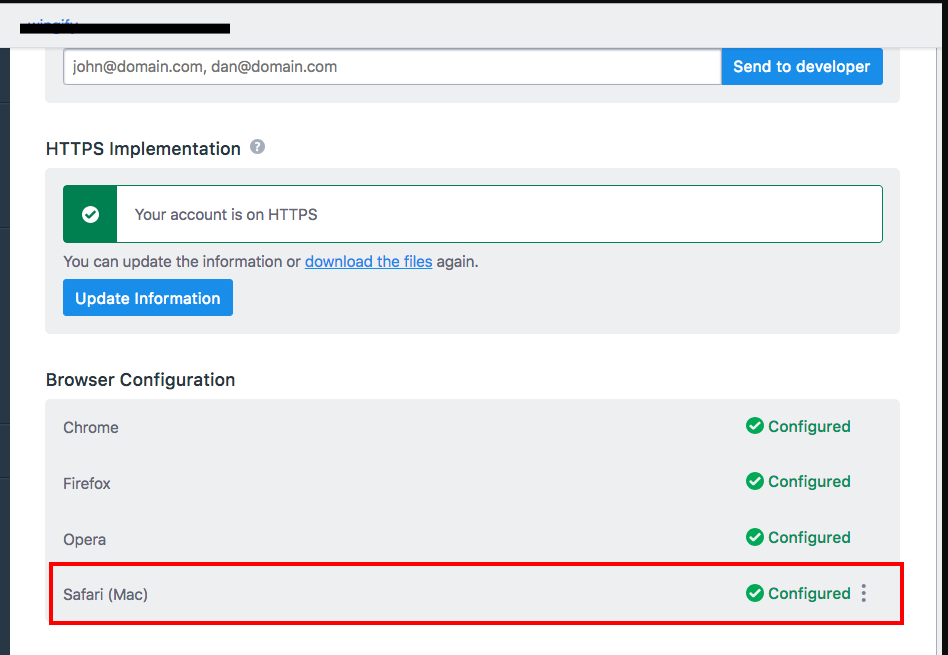
1. The Safari opt-in will only work on all pages of the domain highlighted in the image below. If it is not the correct URL, please get it updated by emailing support@pushcrew.com.

2. Please create different CER/P12 files for different sub-accounts. Uploading the same files for different sub-accounts will show an error.
3. Icon Requirements are as below :
a. Must be in PNG format
b. Should be less than 1 MB in size
c. Dimensions must be greater than or equal to 256x256 px
d. The DPI should be 72
4. Delivery tracking in Safari works differently than on Chrome or Firefox. Apple only lets us track the delivery till the notification reaches APNS (Apple Push Notification Service) Servers. Post that, we do not get any delivery tracking data. APNS is based on Apple Servers, and Apple doesn't give any guarantee on successful message delivery.
5. Safari notifications will only work on desktops, Apple does not support mobile website push notifications on iOS yet.
Here's how to configure Safari:
-
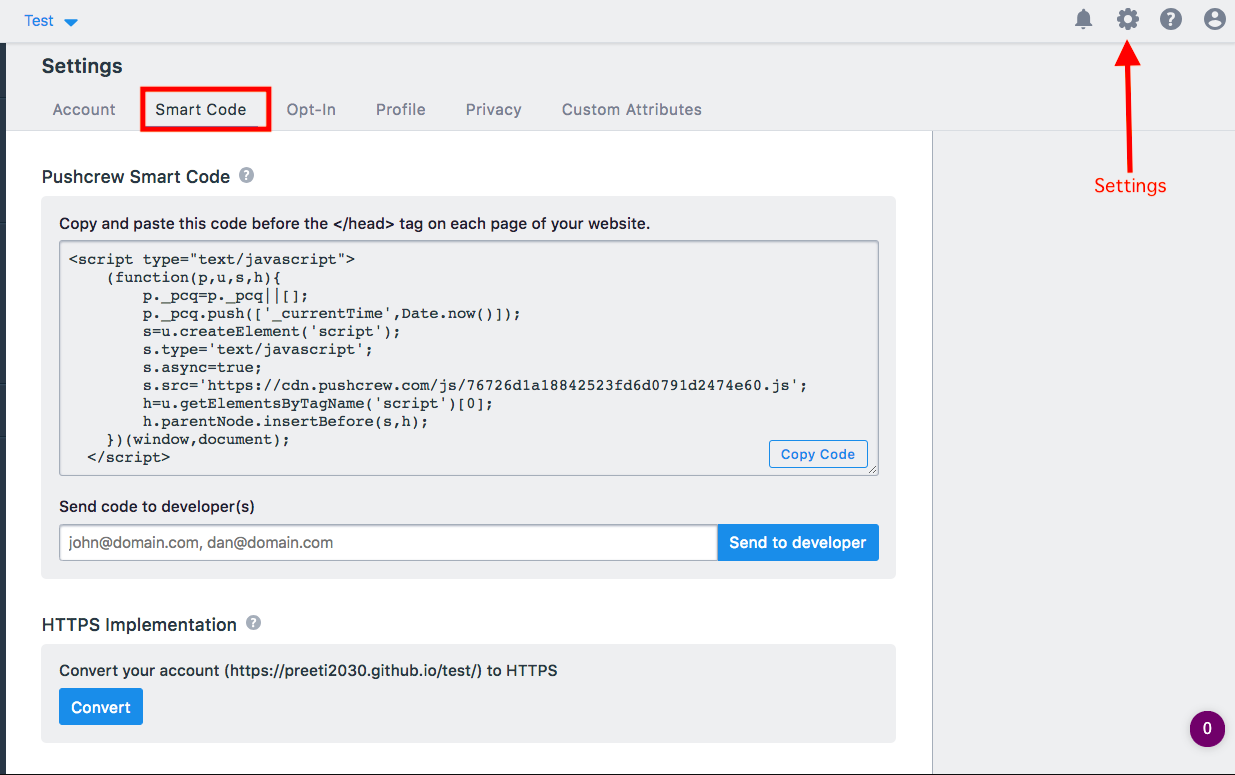
Login to your VWO Engage account. Go to Settings --> SmartCode.
-
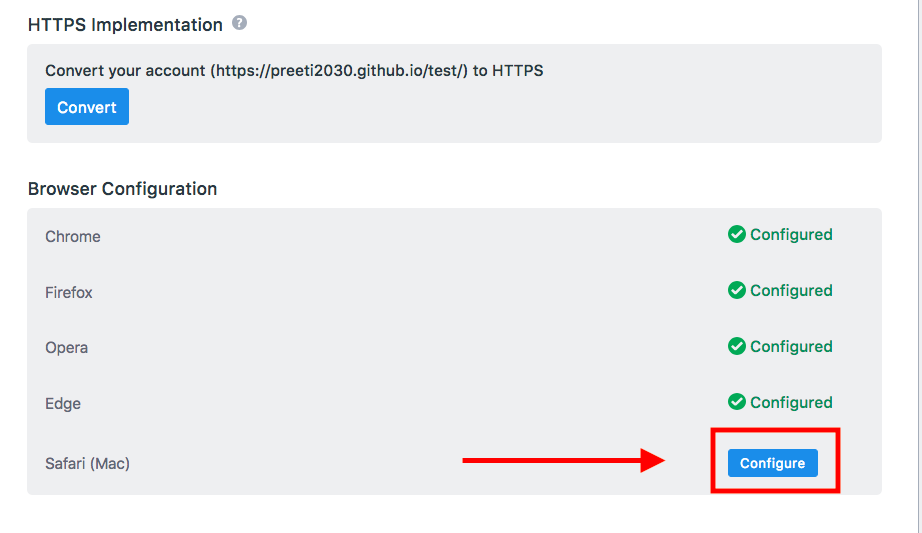
Scroll down to the ‘Browser Configuration’ section. Click on the ‘Configure’ button next to Safari
-
Your sub-account and URL will be pre-filled in the modal box.
Now, there are 2 ways in which Safari can be configured :
- using a CER file or
- using a P12 file
If you are used to creating P12 files (these are used for iOS push notifications too), you can use the P12 option. If not, you can use the CER option.
Both ways of configuring Safari are described in detail below :
A. Configuring Safari using CER file :
1. Click on the ‘Download CSR’ button. Save the file on your computer.
2. Log in to your Apple Developer Account.
3. Click on ‘Website Push IDs’. Then click on the ‘continue’ button at the top right
4. Click on ‘Identifiers +'

You will see a page to register your Website Push ID. Enter a ‘Description’ for the ID. This can be anything. We have used ‘wingify’ as an example.
Also, enter the name of the ‘ID’. This should ideally be in the format web.com.yourdomainname.
In our example, wingify is the domain name so the ID name will be ‘web.com.wingify’
5. Click on the Continue button once you have entered the Description and ID and Click on Register.

6. This page will ask you to confirm if your Website Push ID information is correct. Check the information and click on Register.
7. Click on Identifiers, Click on ‘ Certificates +’ button.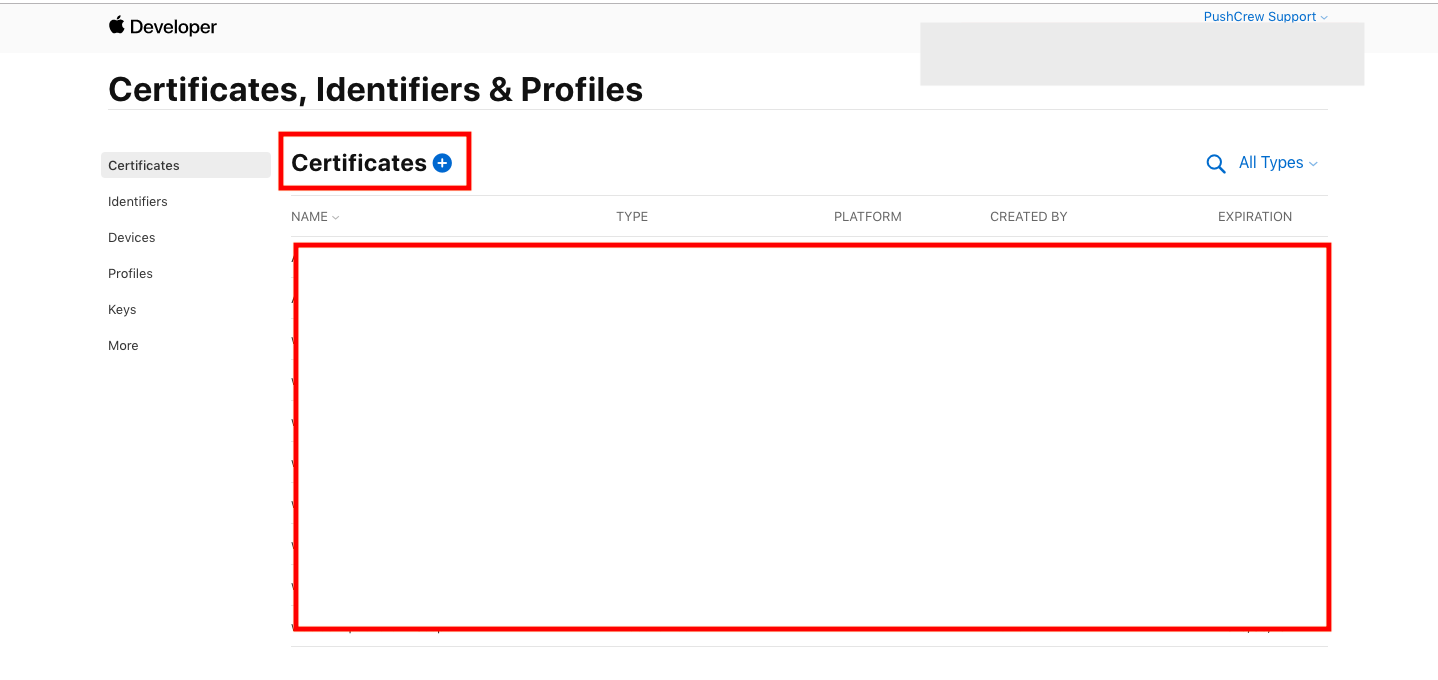
8. Select ‘Website Push ID Certificate’. Click on the Continue button.
9. You will now see a drop-down to select your ‘Website Push ID’. Select the one created previously. In this example, we created the ID ‘web.com.wingify’. You will have to select the one that you have created. Once selected, click on the Continue button.
10. Upload the CSR file you downloaded in Step 1 from your VWO Engage dashboard here. Click on the Continue button.
11. Your CER file will now be generated. Click on the Download button and save it to your computer.

12. Go back to your VWO Engage dashboard. In the modal box that opens when you click on ‘Configure’ next to Safari, click on ‘Upload Certificate’ under CER. Select the certificate that you downloaded from your Apple Developer Account and upload it.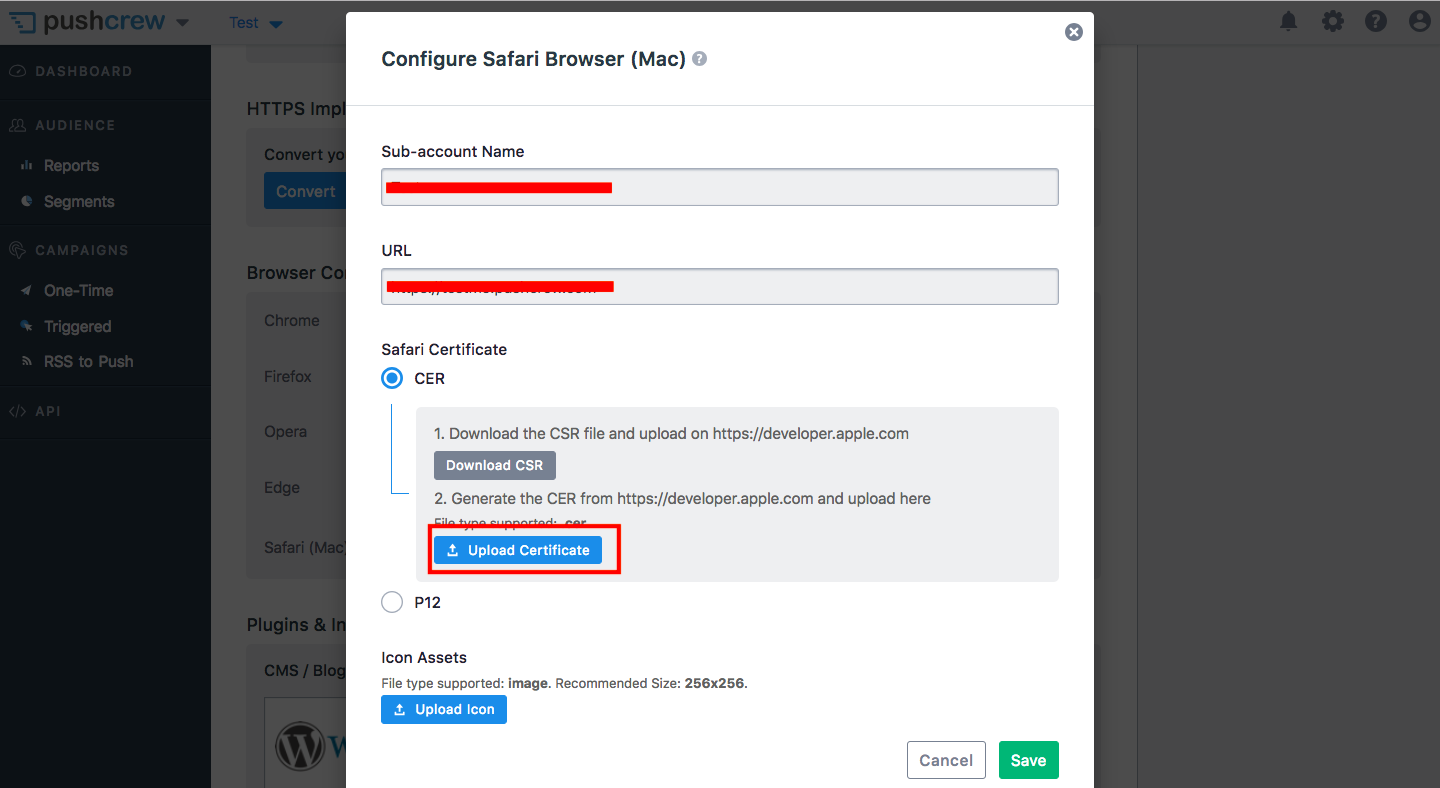
13. Next, upload your icon. This icon will show to subscribers every time they receive a Safari notification.
Note : This icon cannot be changed. It has to be 256 x 256 px or more. The file must be lesser than 1 MB.
Once done, click on Save.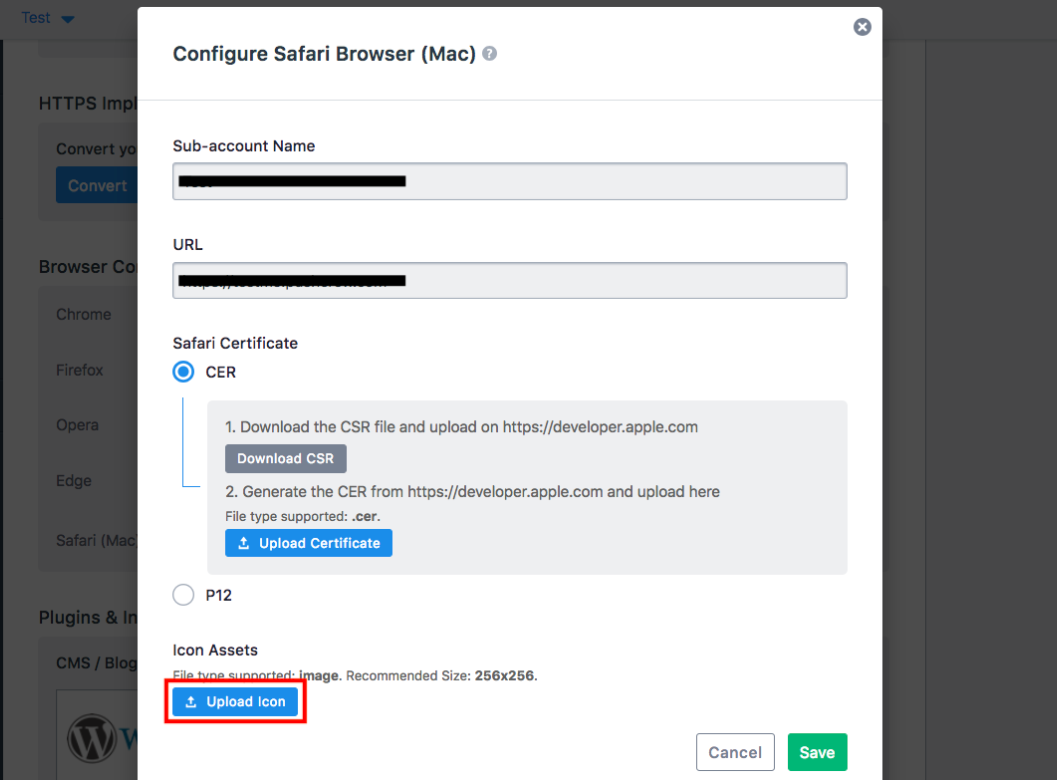
14. You will now see a message saying ‘Safari configured correctly’. Also, ‘Configured’ will appear next to Safari in the ‘Browser Configuration’ section. 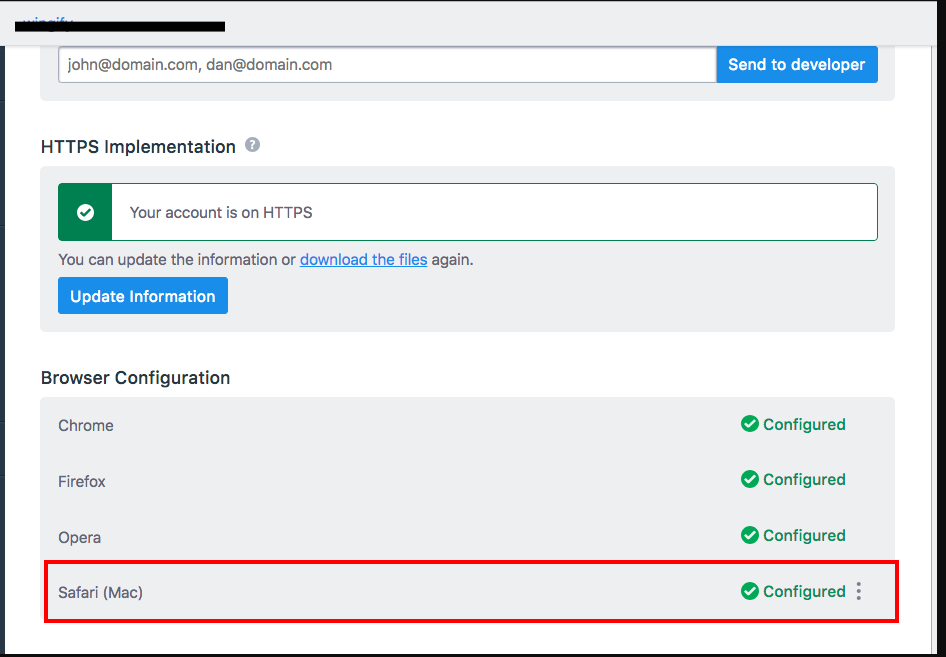
15. You are now set to support Safari web push notifications on VWO Engage. Your opt-in will look like this.

B. Configuring Safari using P12 file
1. On your Mac, search for Keychain Access and open the application. Click on Keychain Access in the Menu Bar - Certificate Assistant - Request a Certificate from a Certificate Authority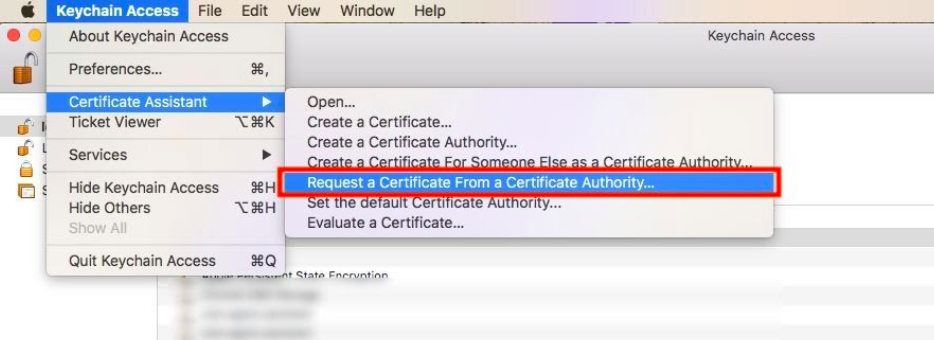
2. In the modal box that opens, enter a valid email address, select the ‘Saved to disk’ option and click on Continue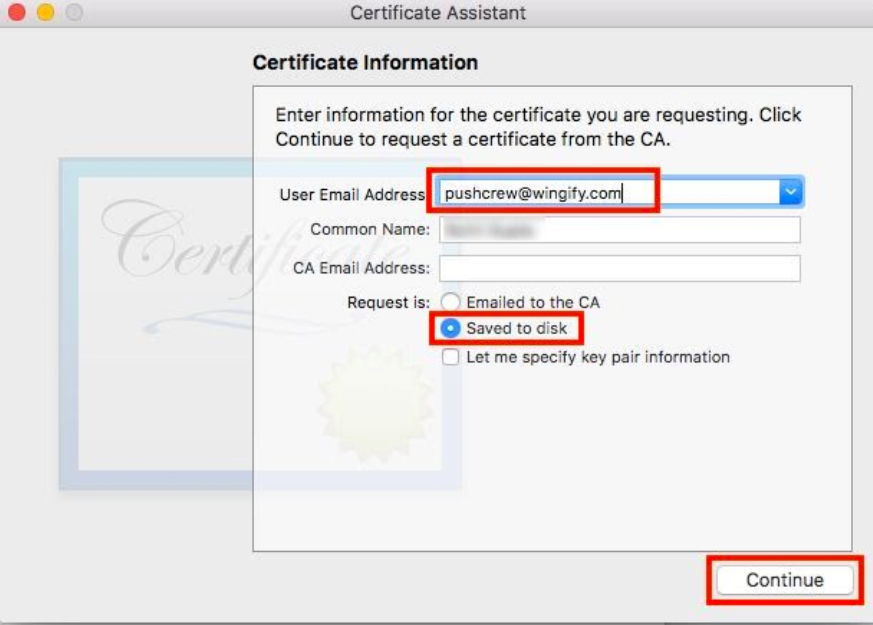
3. Save the file to your computer. Once saved, you will see a confirmation message as below. Click on Done.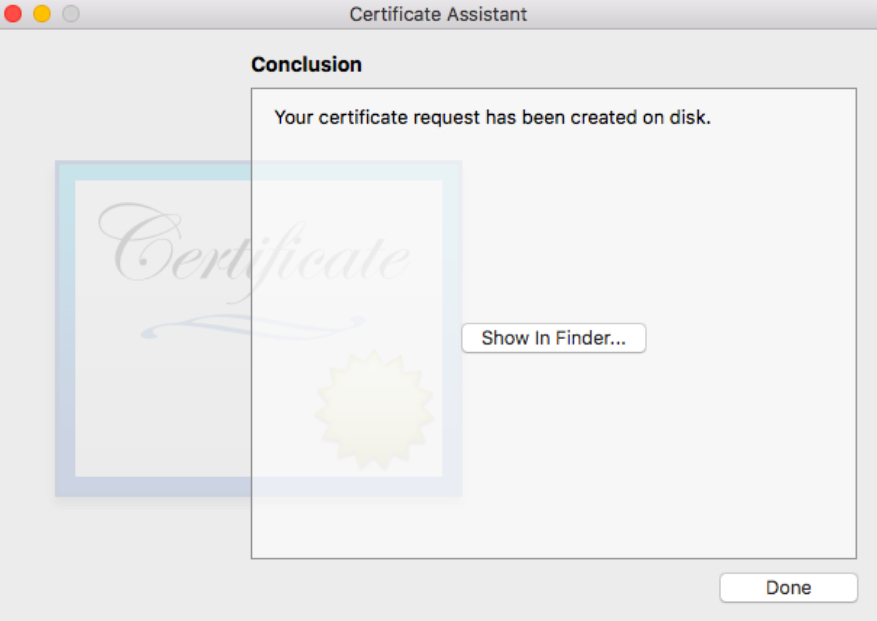
4. Log in to your Apple Developer Account.
5. Click on ‘Certificates, IDs & Profiles’ on the left-hand side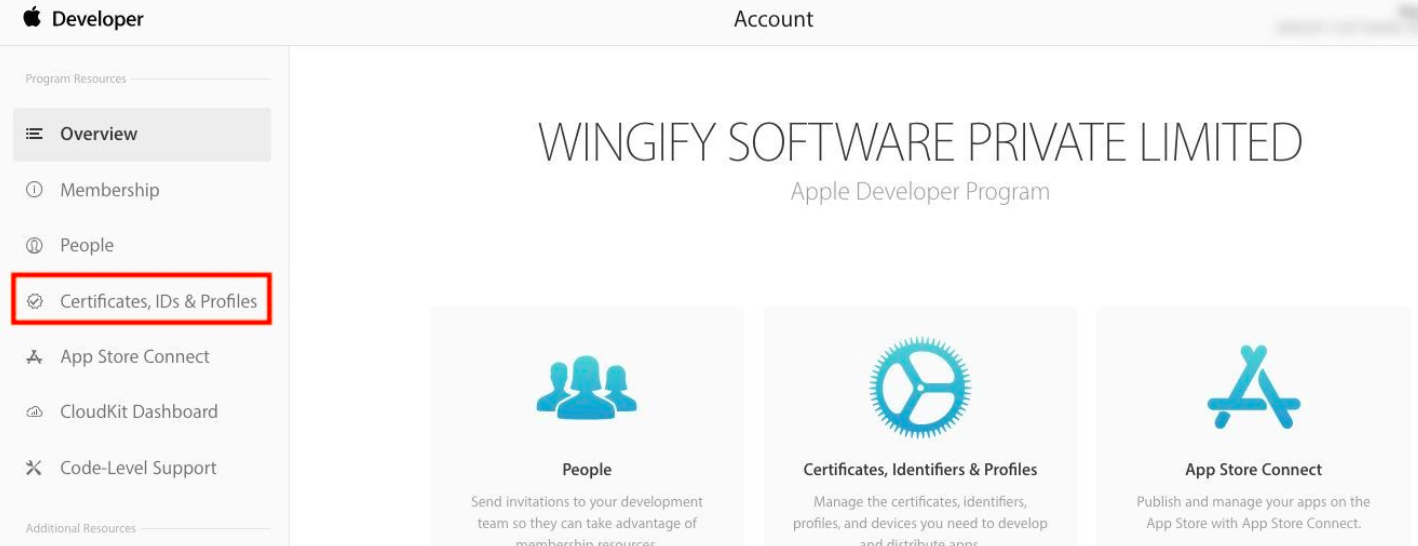
6. On the left-hand side, under ‘Identifiers’, click on ‘Website Push IDs’. Then click on the ‘+’ button at the top right.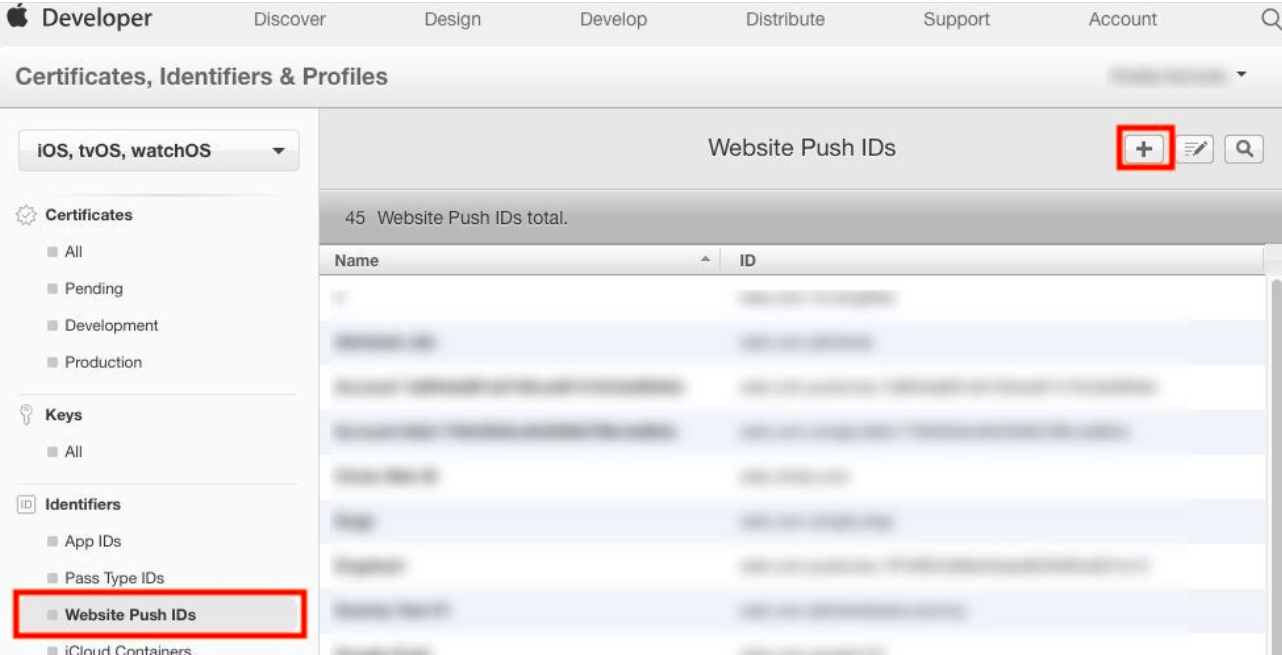
7. You will see a page to register your Website Push ID. Enter a ‘Description’ for the ID. This can be anything. We have used ‘pushcrew123’ as an example.
Also, enter the name of the ‘ID’. This should ideally be in the format web.com.yourdomainname.
In our example, pushcrew123 is the domain name so the ID name will be ‘web.com.pushcrew123’
Click on the Continue button once you have entered the Description and ID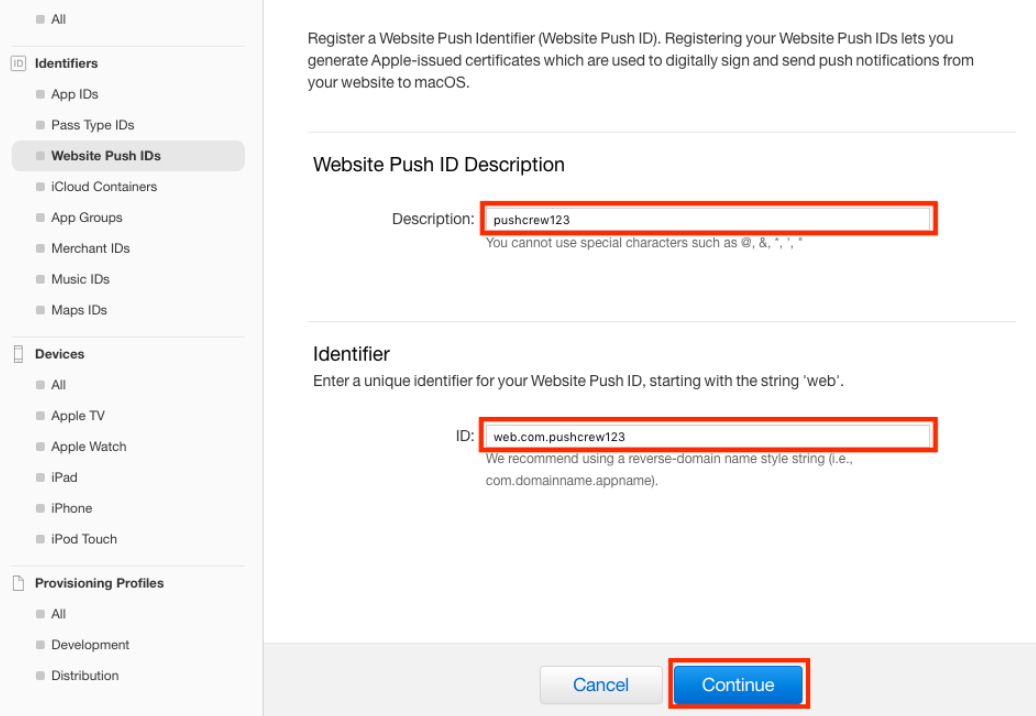
8. This page will ask you to confirm if your Website Push ID information is correct. Check the information and click on Register. On the next page, click on Done.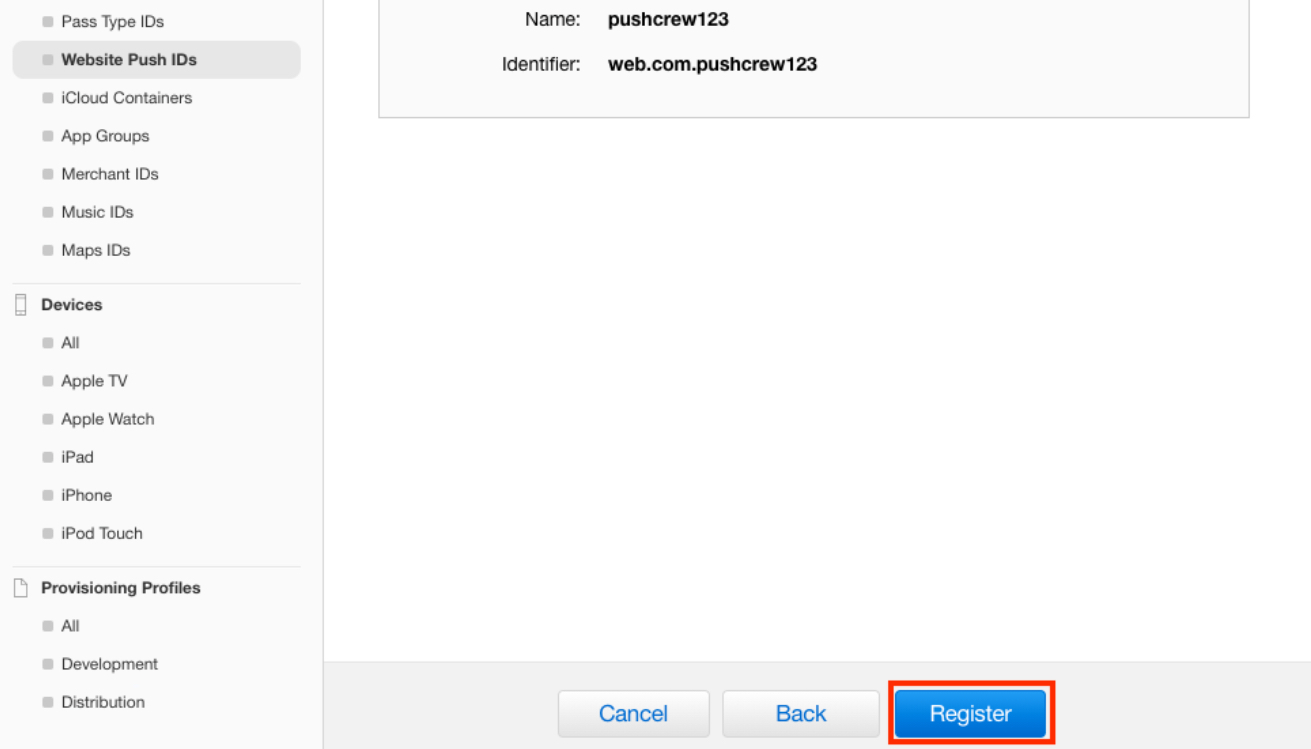
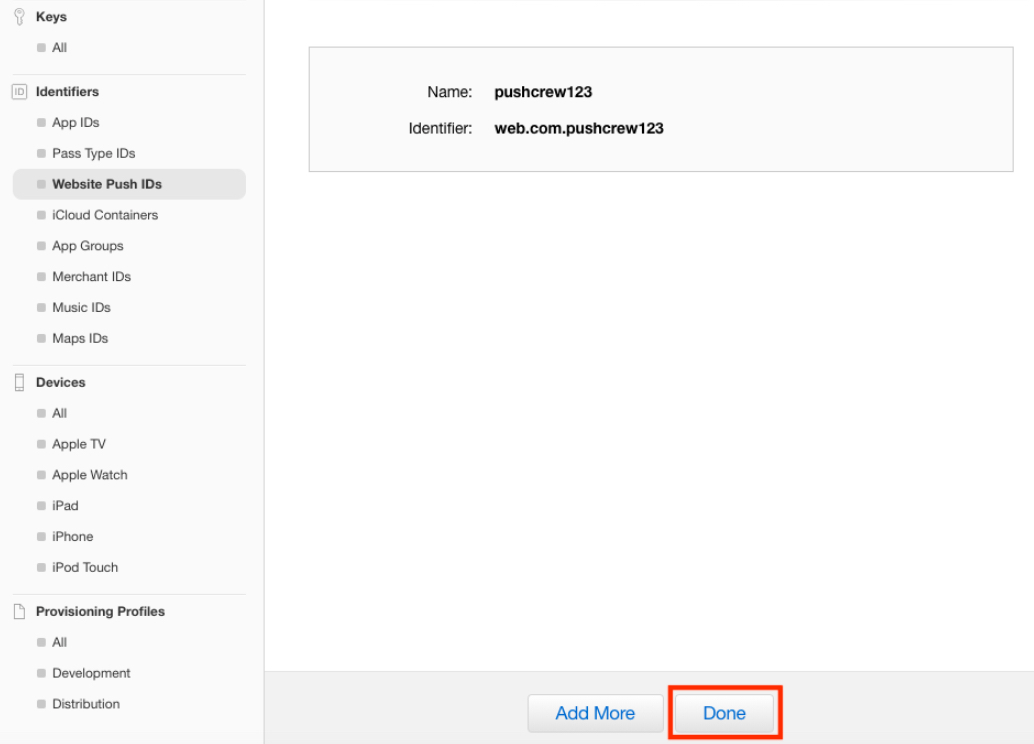
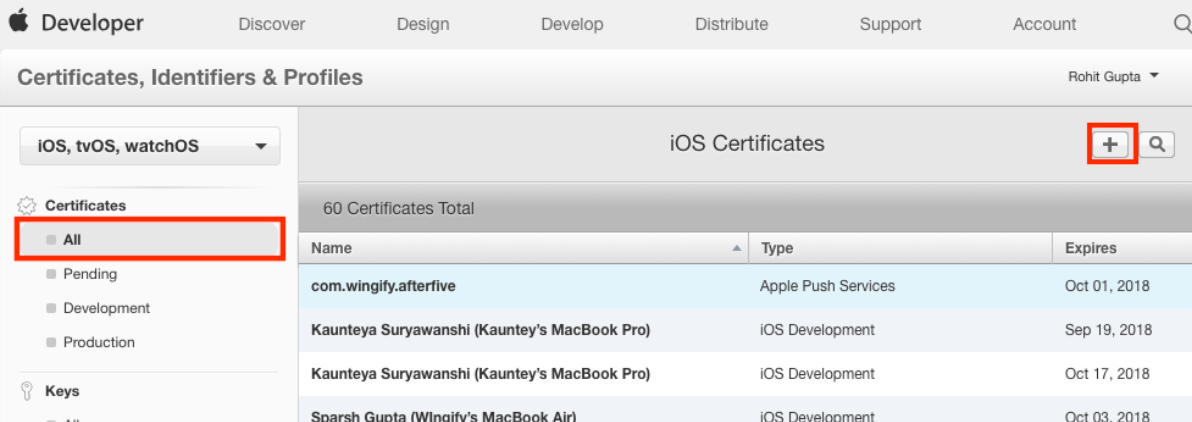
9. On the left-hand side, click on ‘All’ under ‘Certificates’. Click on the ‘+’ button on the top right
10. Scroll down to the ‘Production’ section. Select ‘Website Push ID Certificate’. Scroll down and click on the Continue button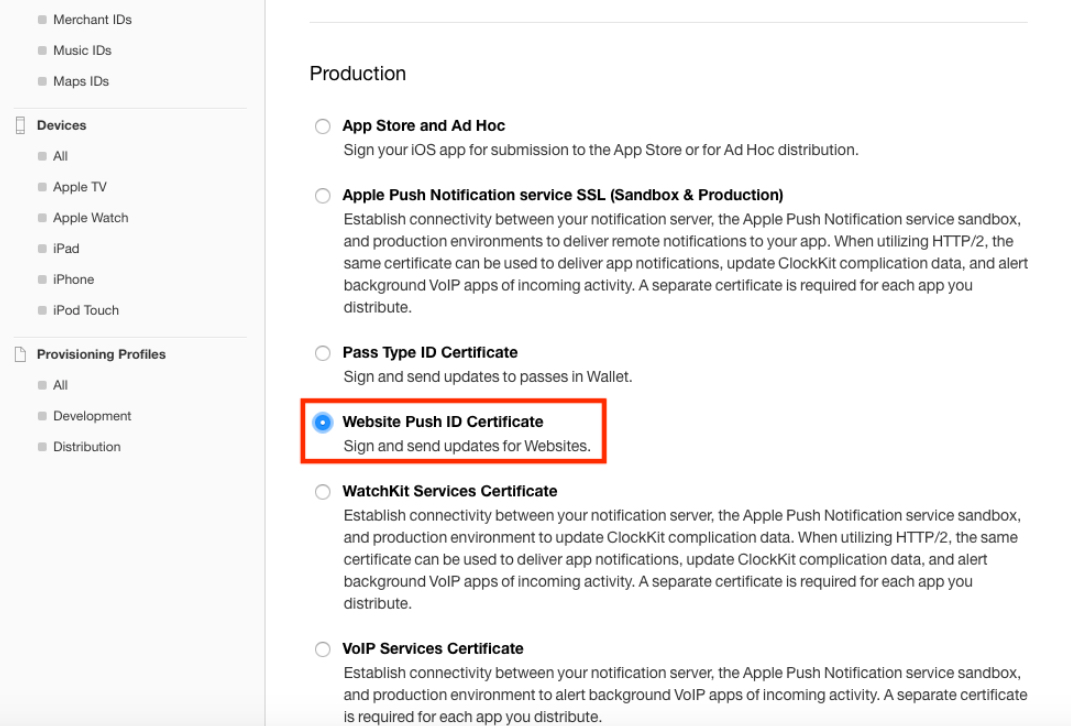
11. You will now see a drop down to select your ‘Website Push ID’. Select the one created previously. In this example, we created the ID ‘web.com.pushcrew123’. You will have to select the one that you have created. Once selected, click on the Continue button below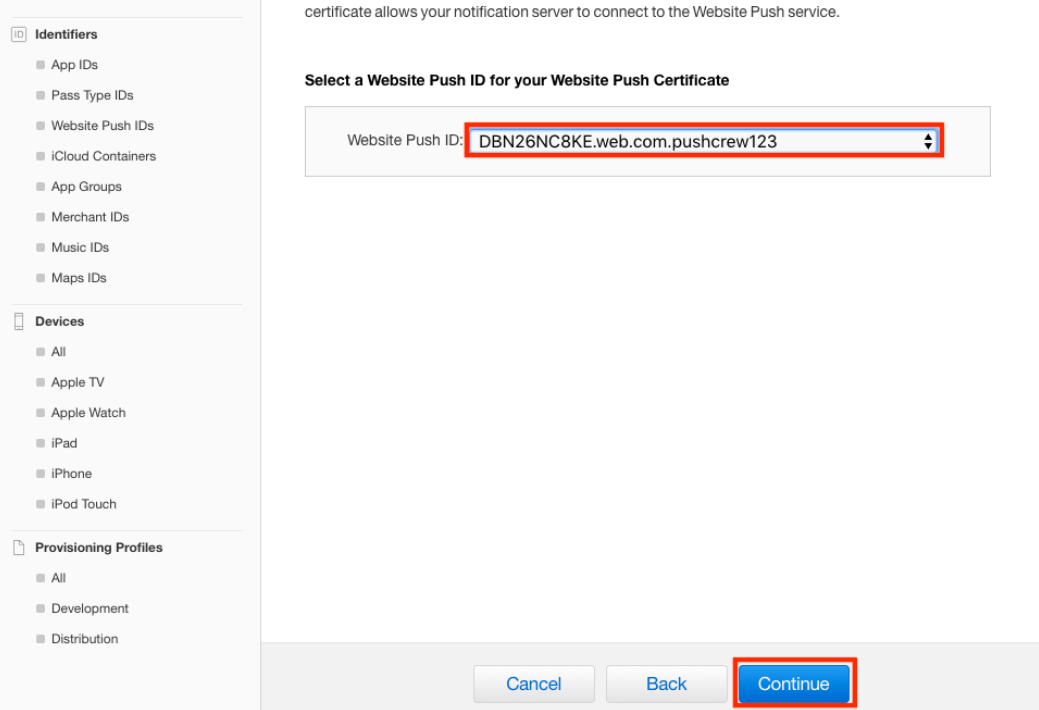
12. Click on Continue on the next page too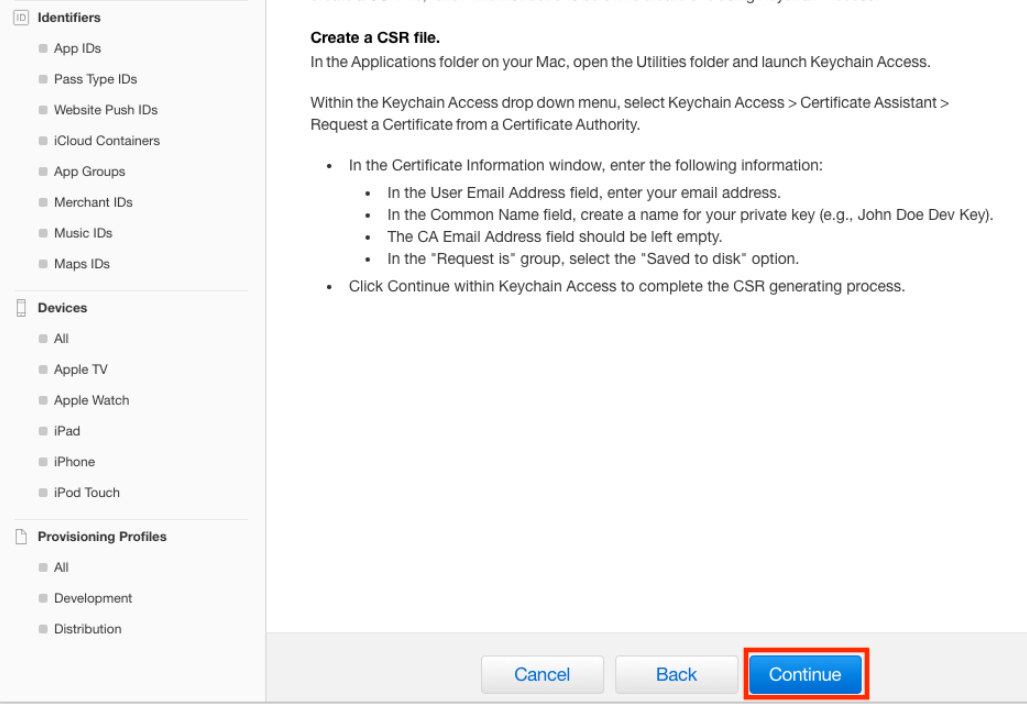
13. Upload the CSR file you generated using Keychain Access previously. Click on Continue below.
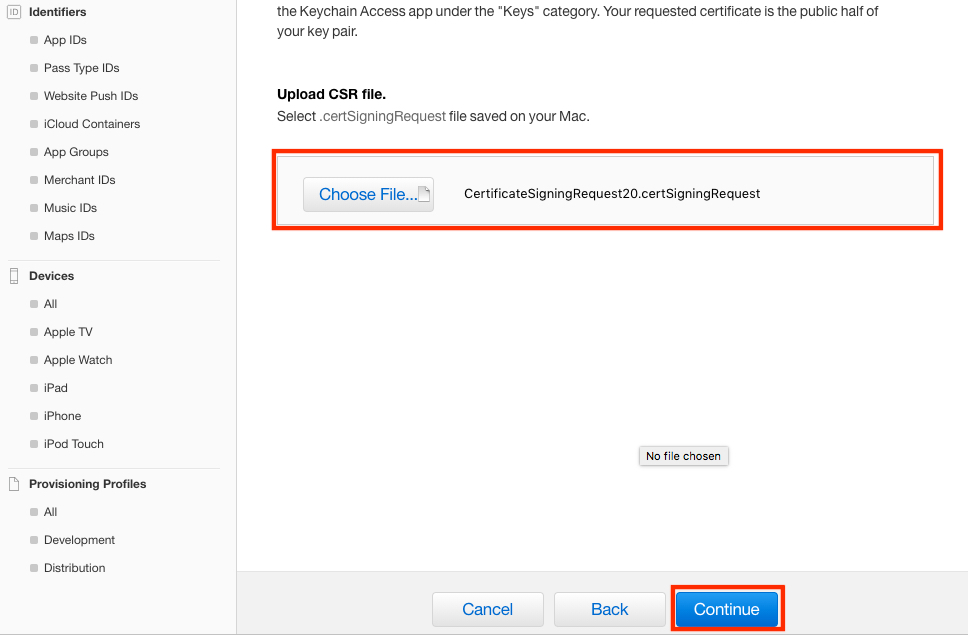
14. Your CER file will now be generated. Click on the Download button and save it to your computer. Click on Done.

15. Double click the downloaded CER file to open it in Keychain Access. Right-click on the file and select ‘Export Website Push ID…’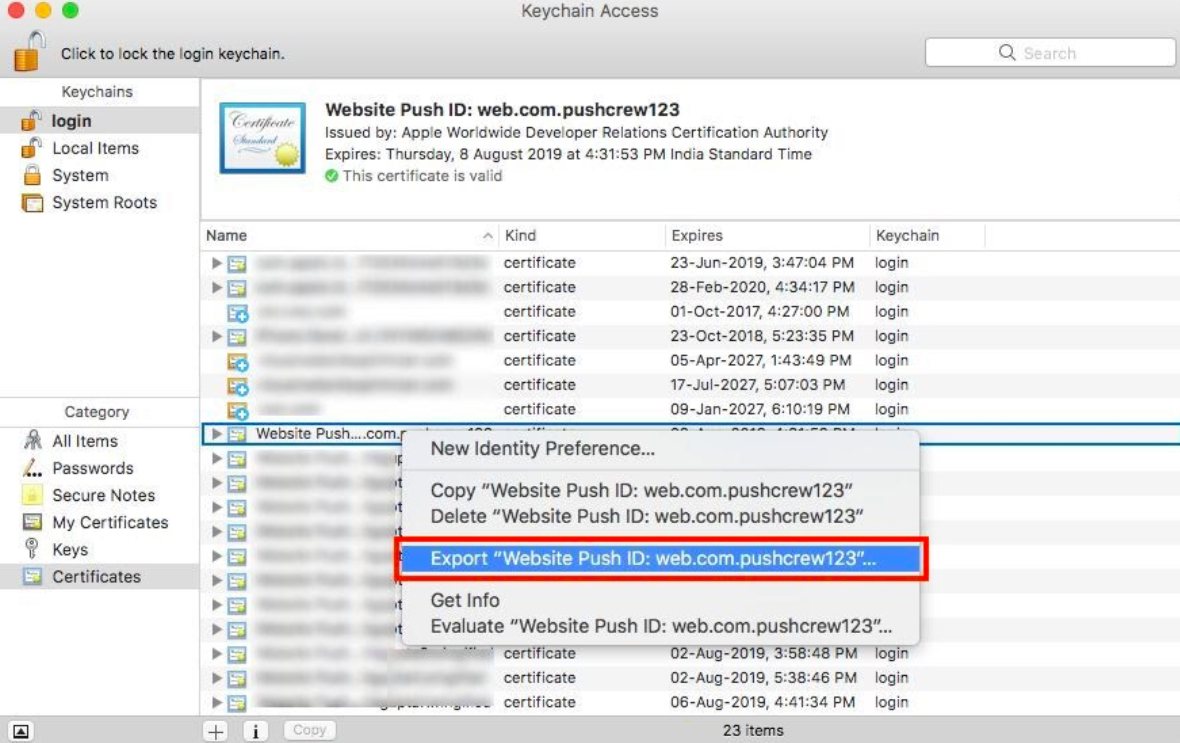
16. Save the file on your computer
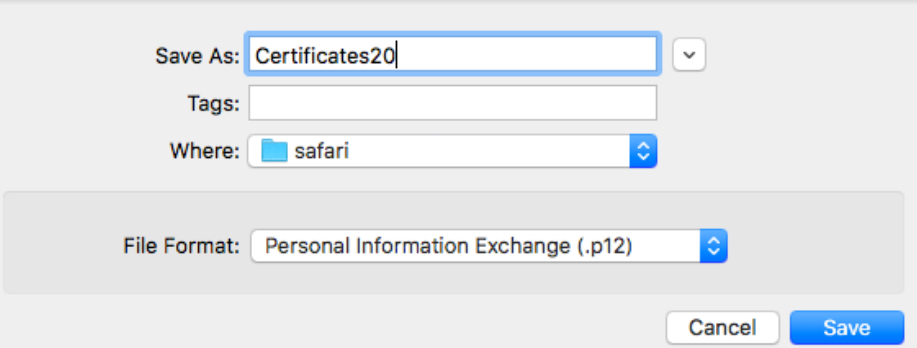
17. You will now see an option to enter a password. Enter a password and verify it. This is optional and you can choose to skip it.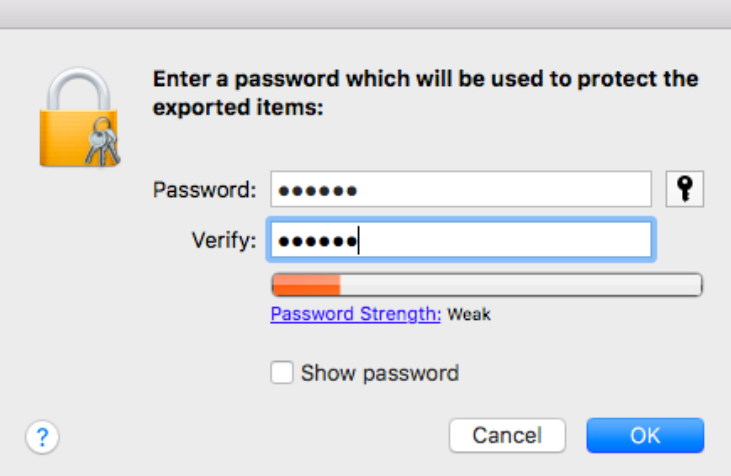
18. You will now be asked to enter your computer password. Click on Allow once done.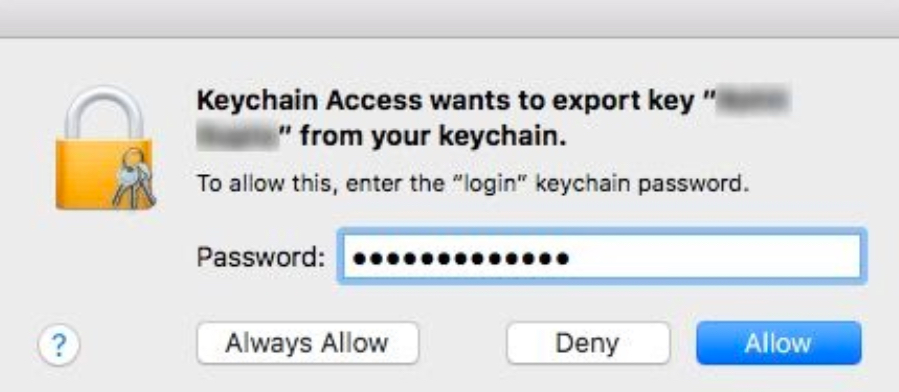
19. The P12 file will now be saved to your computer. Go back to your VWO Engage dashboard. In the modal box that opens when you click on ‘Configure’ next to Safari, click on ‘Upload Certificate’ under P12. Select the certificate that you just downloaded from your Apple Developer Account and upload it.
If you have entered a password in Step 15, enter the same one in the Password field.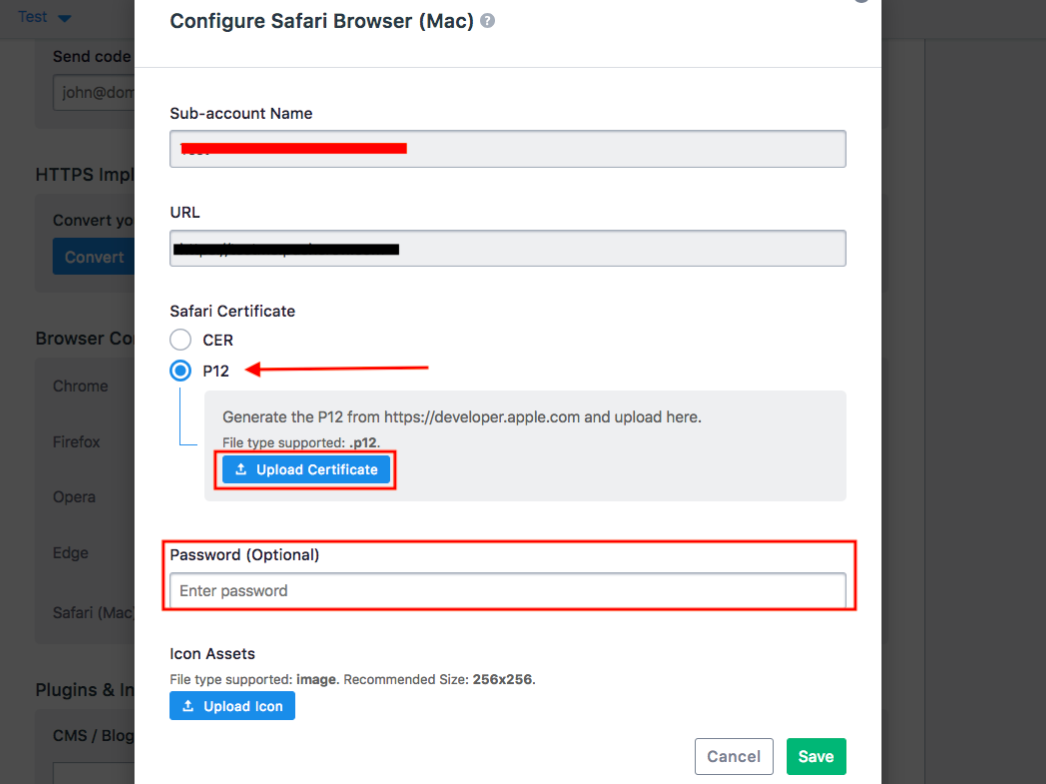
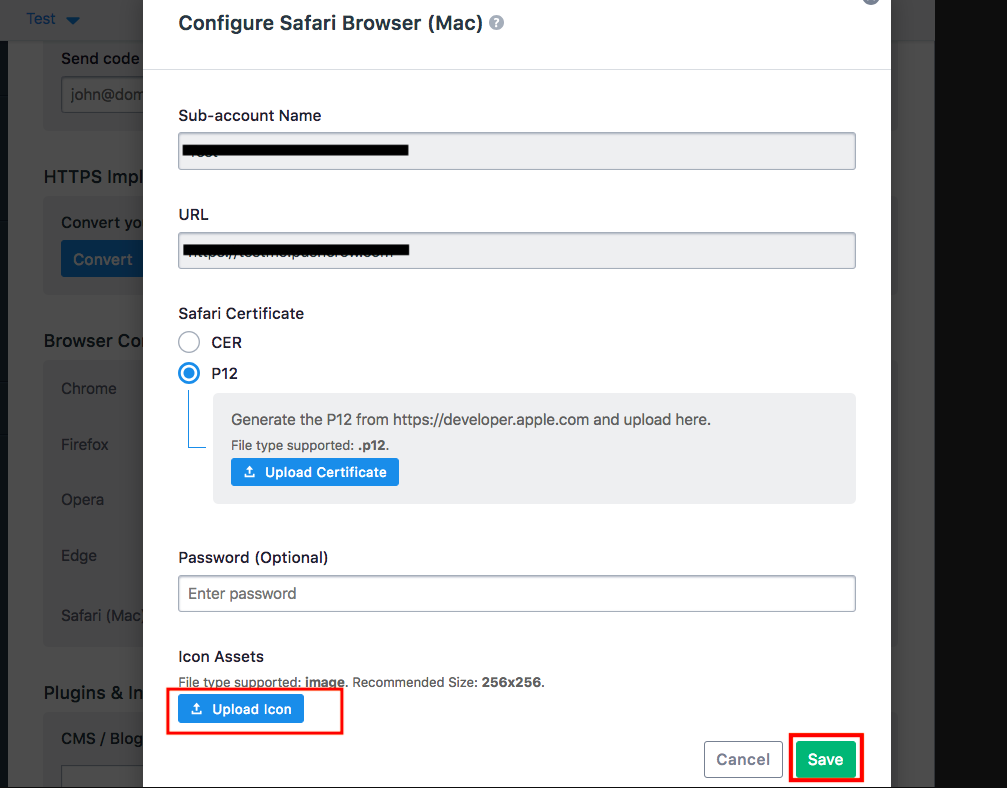
20. Next, upload your icon. This icon will show to subscribers every time they receive a Safari notification.
Note: This icon cannot be changed. It has to be 256 x 256 px or more. The file must be lesser than 1 MB. Once done, click on Save.
21. You will now see a message saying ‘Safari configured correctly’. Also, ‘Configured’ will appear next to Safari in the ‘Browser Configuration’ section. You are now set to support Safari web push notifications on VWO Engage!