Here’s how you can set up VWO Engage (formerly PushCrew) on an HTTPS website :
- Login to your VWO Engage dashboard.
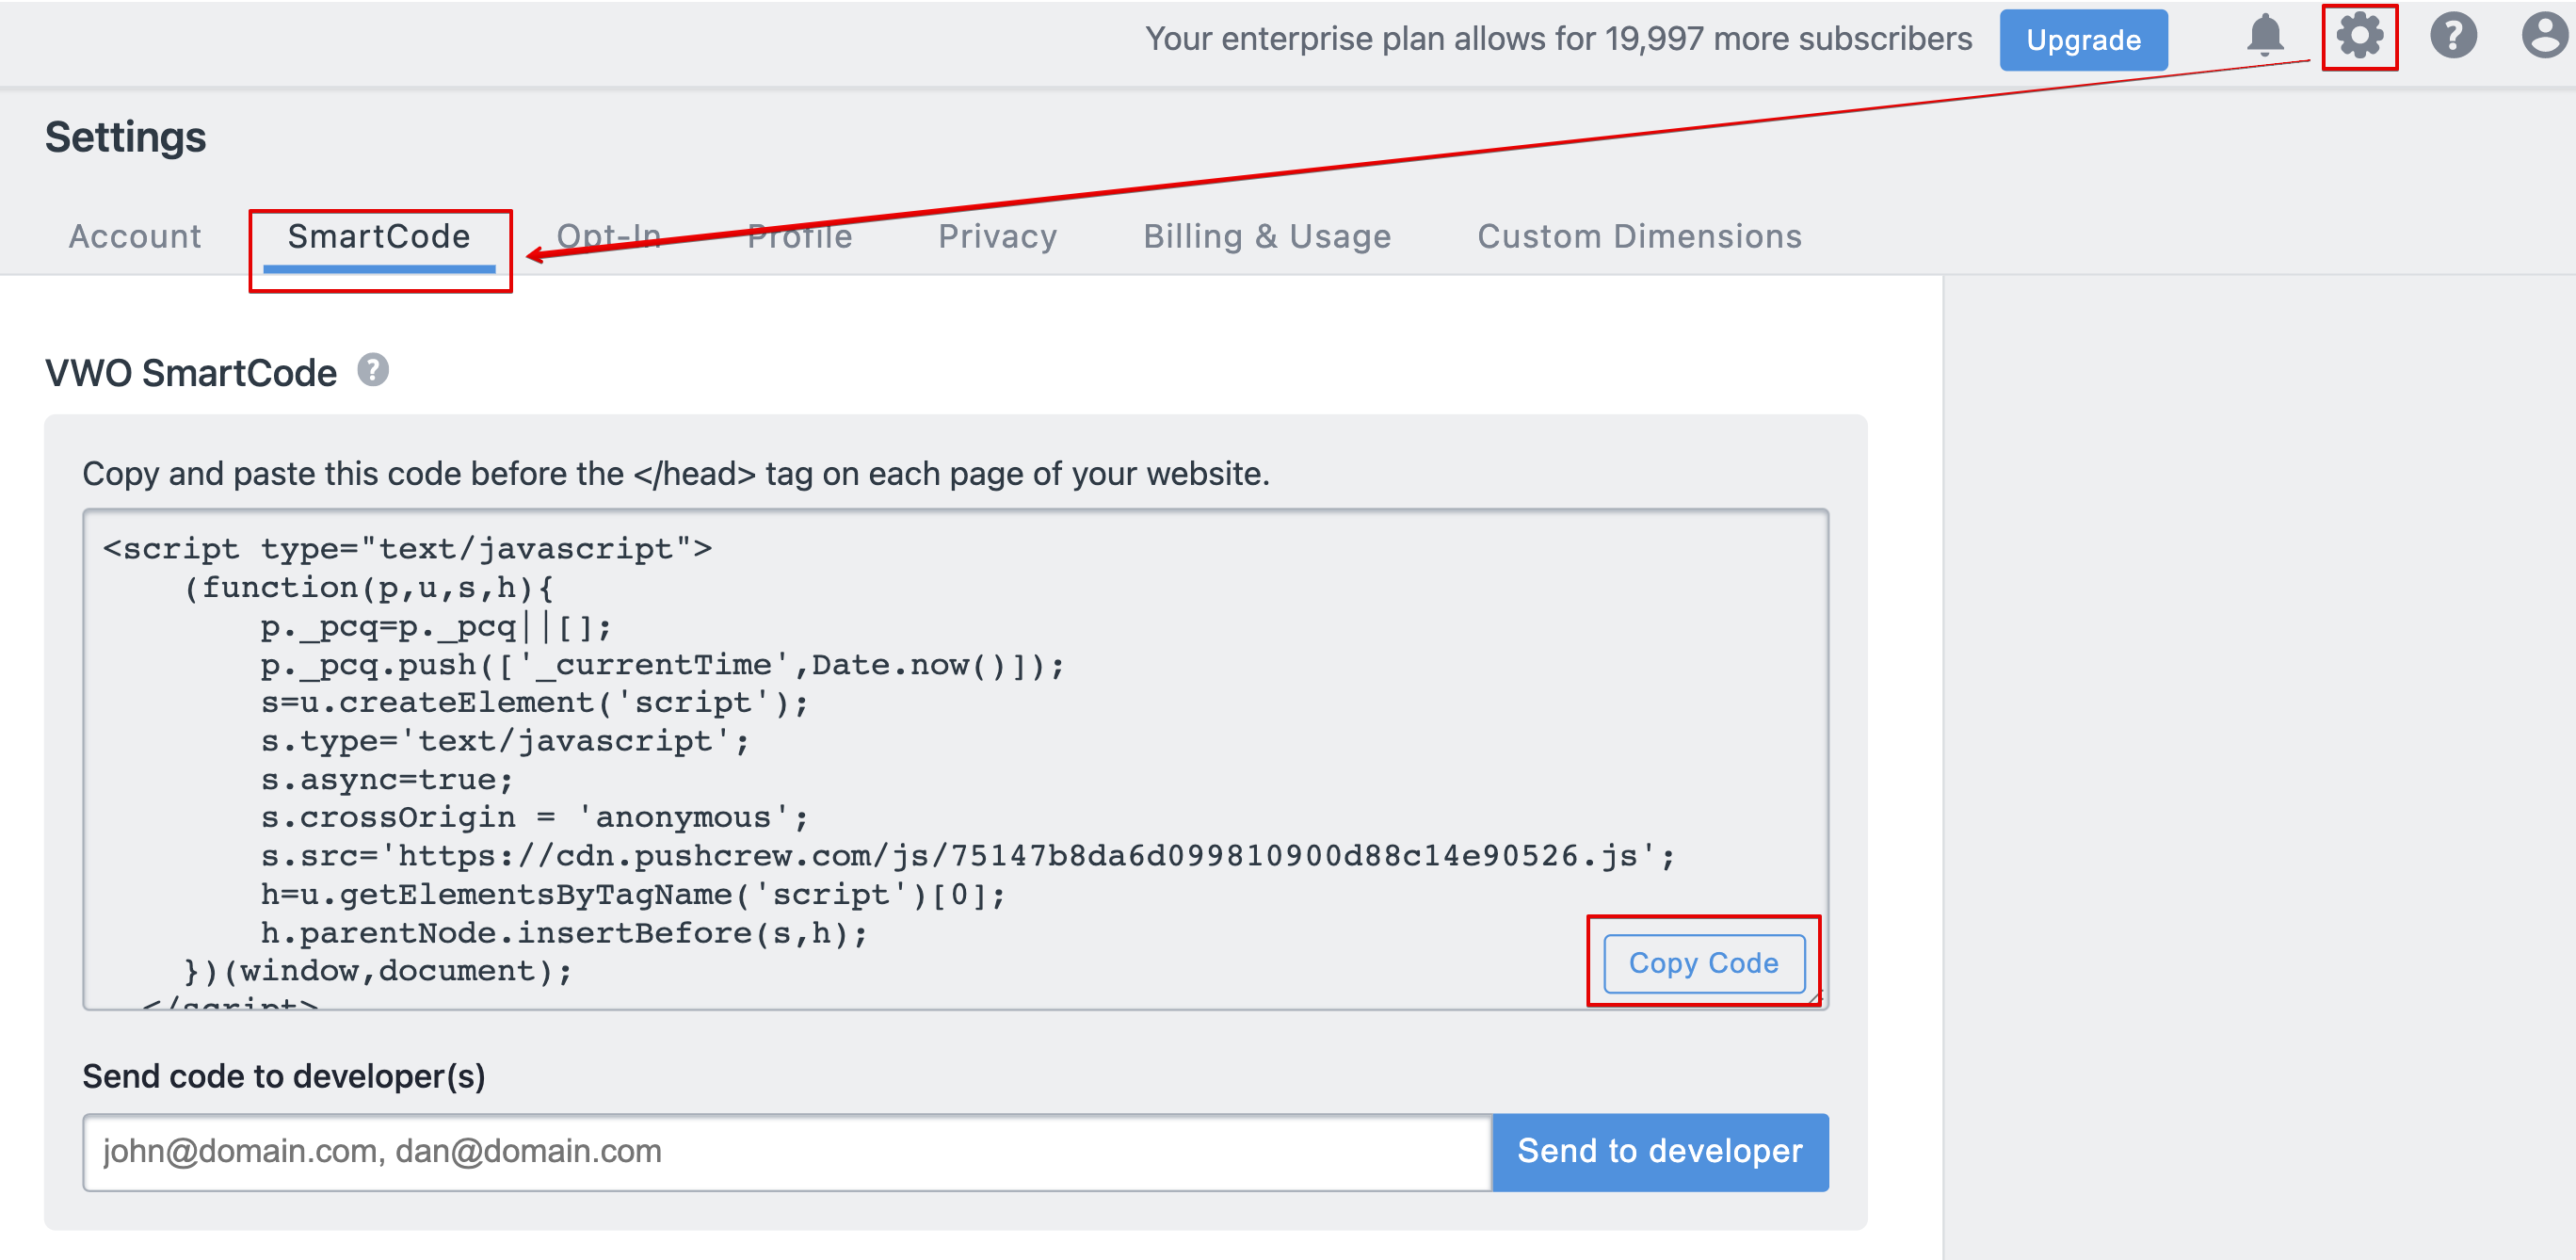
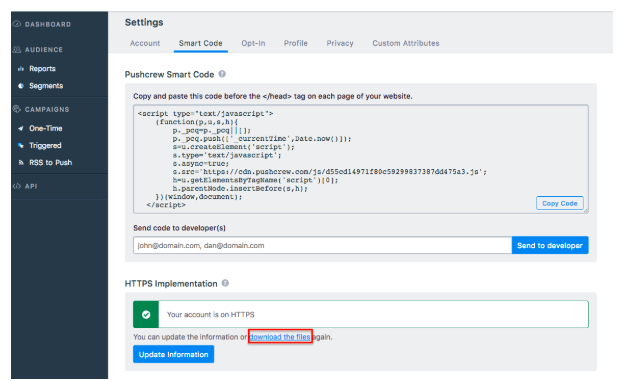
- Get your SmartCode: Go to the Settings - SmartCode tab. You will see a snippet of code called the SmartCode. This code helps you keep track of your old and new visitors, and also captures all the analytics data.

a. If you want the opt-in box (that asks for permission to send Push Notifications) to appear on every page that a user visits for the first time: Copy this SmartCode (as shown in the red rectangular box in the image above) and paste it just before the closing of the HEAD tag of your website. In HTML, it is denoted as </head>. It is recommended to show the opt-in box on the website home page and other landing pages.
b. If you want the opt-in box to appear on a specific page to a visitor: Paste the SmartCode on the specific page where you want the opt-in box to appear to your first-time website visitor. For more details please check the following article.
Alternatively, you can also enter the email of the web developer who handles the website code for you and VWO Engage will send him the SmartCode in an email.
3. Upload Files to the root of your website domain: Go to the Settings - SmartCode tab. Under the HTTPS Implementation section, click on the ‘download the files’ option.
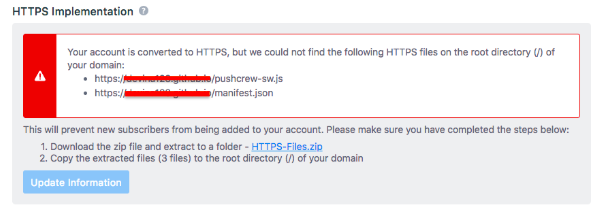
After the files are downloaded, upload these to the root of your website domain. If the files have not been uploaded correctly to the root of your domain, you will start seeing the below error message on this page :

Should you have any queries, feel free to get in touch with us at support@pushcrew.com and we’ll be happy to help :)
