Here’s how you can get started with VWO Engage (formerly PushCrew)!
Login to your VWO Engage dashboard.
Step 1. Get your SmartCode
After you sign up for a VWO Engage account, you will see a snippet of code, called the SmartCode, under the Settings icon present on the top right of the page - go to the SmartCode tab. This code helps you keep track of your old and new visitors, and also captures all the analytics data.
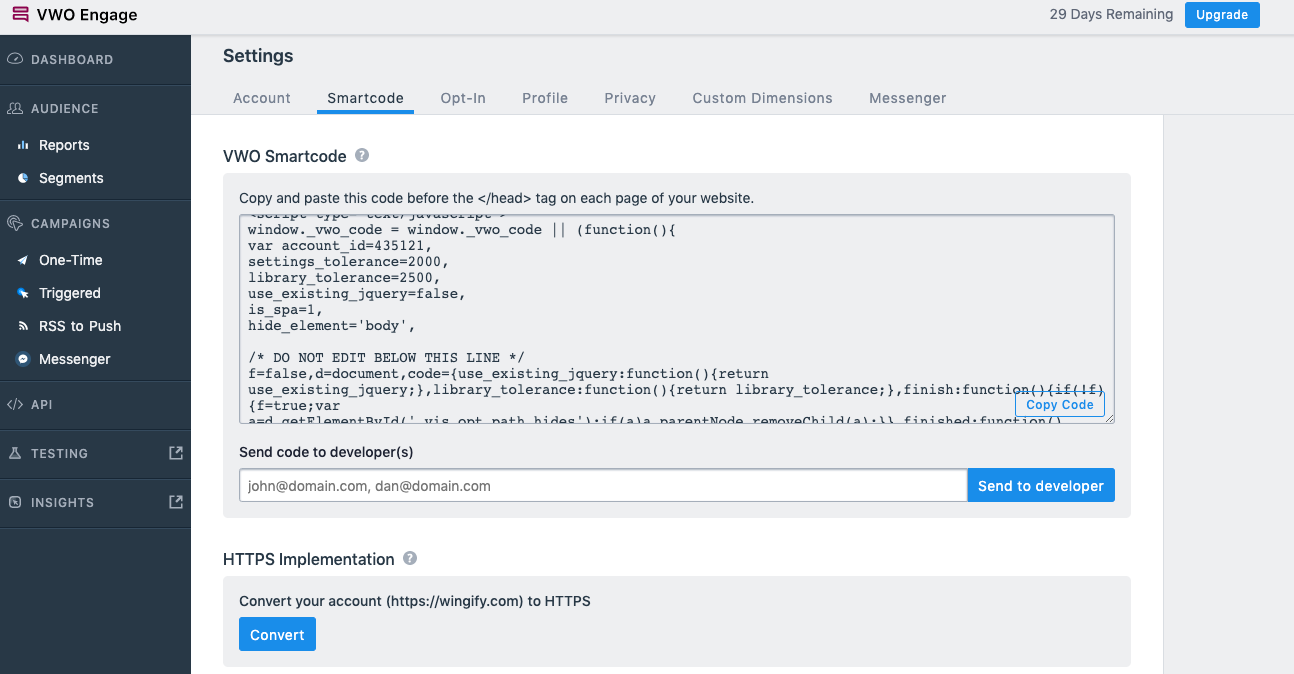
- If you want the opt-in box (that asks for permission to send Push Notifications) to appear on every page that a user visits for the first time:
Copy this SmartCode (as shown in the red rectangular box in the image above) and paste it just before the closing of the HEAD tag of your website. In HTML, it is denoted as </head>.
It is recommended to show the opt-in box on the website home page and other landing pages.
- If you want the opt-in box to appear on a specific page to a visitor:
Paste the SmartCode on the specific page where you want the opt-in box to appear to your first-time website visitor.
Alternatively, you can also enter the email of the web developer who handles the website code for you and VWO Engage will send him the SmartCode in an email.
After you have chosen to perform either of the actions, you would want to activate the Opt-in box, explained in the next step.
Step 2. Customize Opt-in:
For accounts on HTTP implementation:
The opt-in box is the small modal window that will appear on the top-center when a first-time user visits your webpage. It will request your visitors to allow notifications to be sent to them from your website. When the visitor clicks “Allow”, they are added to your subscriber list. They do not need to provide their email or other personal details.
To customize the opt-in, go to Settings - Opt-in tab.
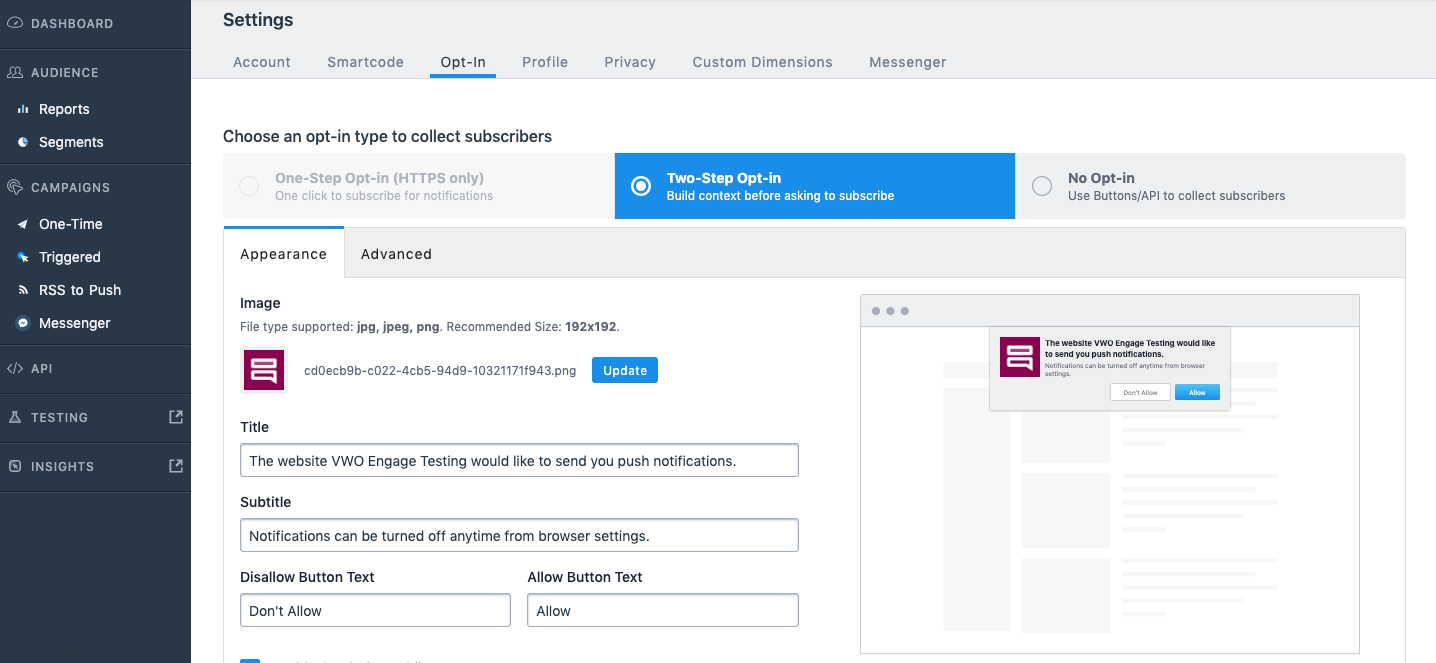
You can customize the below :
- Push Notification Image: You can upload an image using the Browse button. The recommended size for the image is 192x192 px
- Title: You can enter the title for your Opt-in request here
- Subtitle: You can enter the subtitle for your Opt-in request here
- Disallow Button Text: Compose the text to be displayed on the button users can click to deny permission to your website to send them Push Notifications. Eg: Deny, No, Nope, Denied
- Allow Button Text: Compose the text to be displayed on the button users can click to allow your website to send them Push Notifications. Eg: Allow, Yes!, Sure, Granted

Enabling and customizing your opt-in box for mobile:
To enable the opt-in box for your mobile website users, click on the checkbox for “Enable Opt-in for mobile”.
You will then be able to customize the below :
- Title: You can enter the title for your Opt-in request here
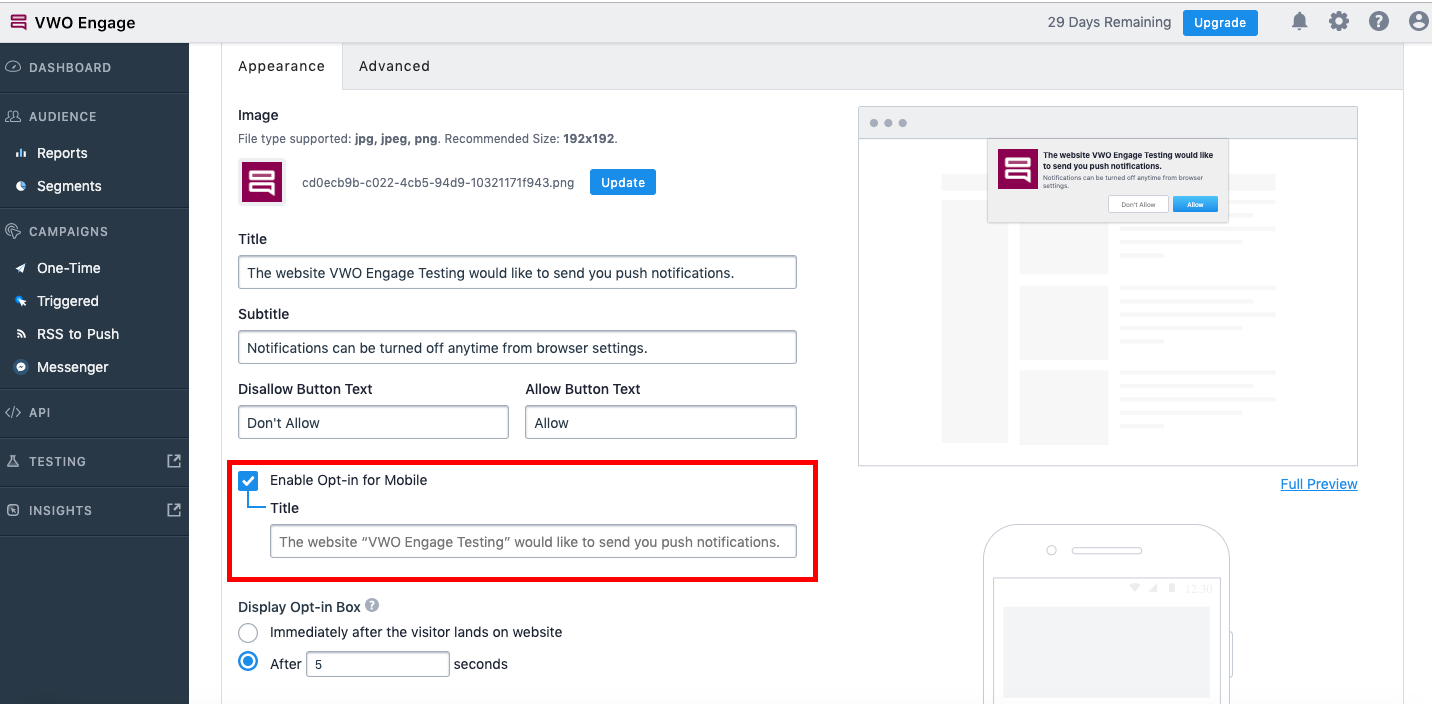
- Display Opt-in Box Time: You may also customize the number of seconds after which the opt-in box appears, as shown below:
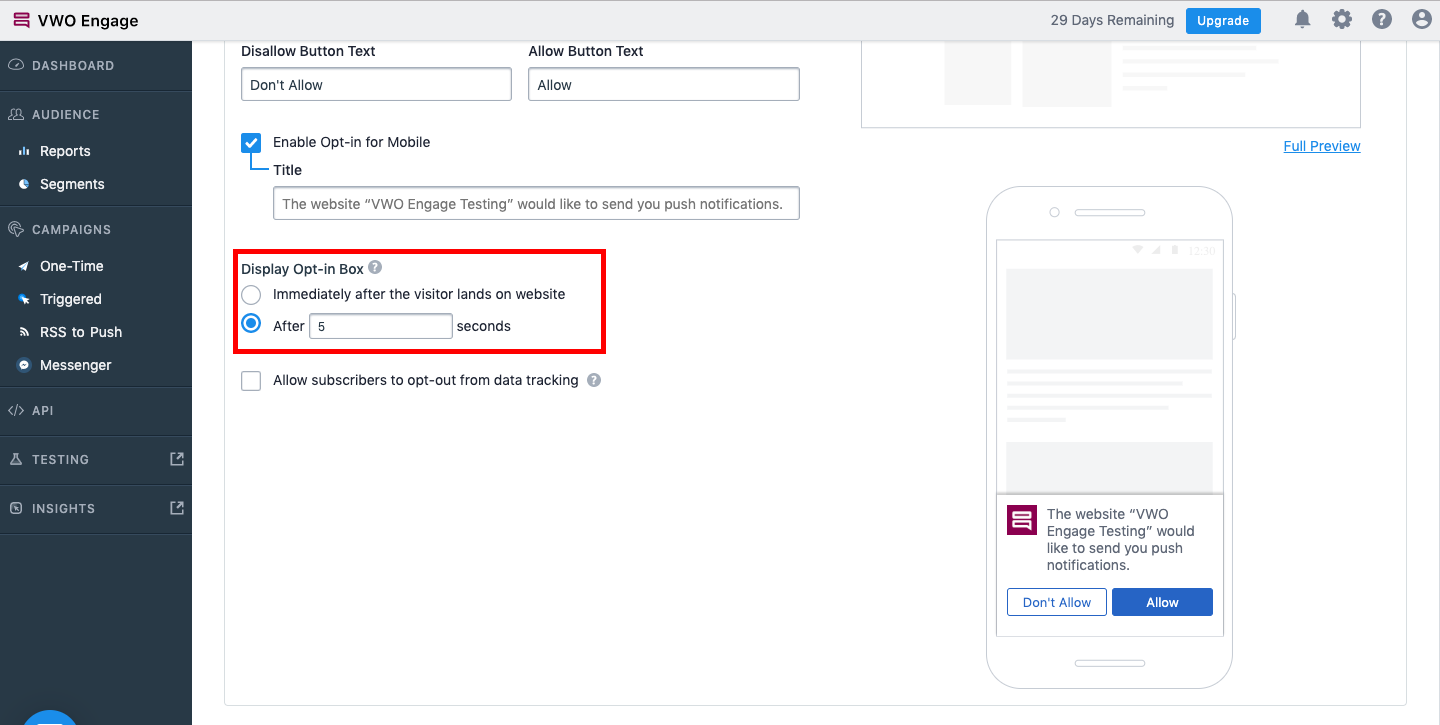
- Data Tracking: You can choose whether or not to give subscribers the option to opt-out of data tracking too. More details on this here.
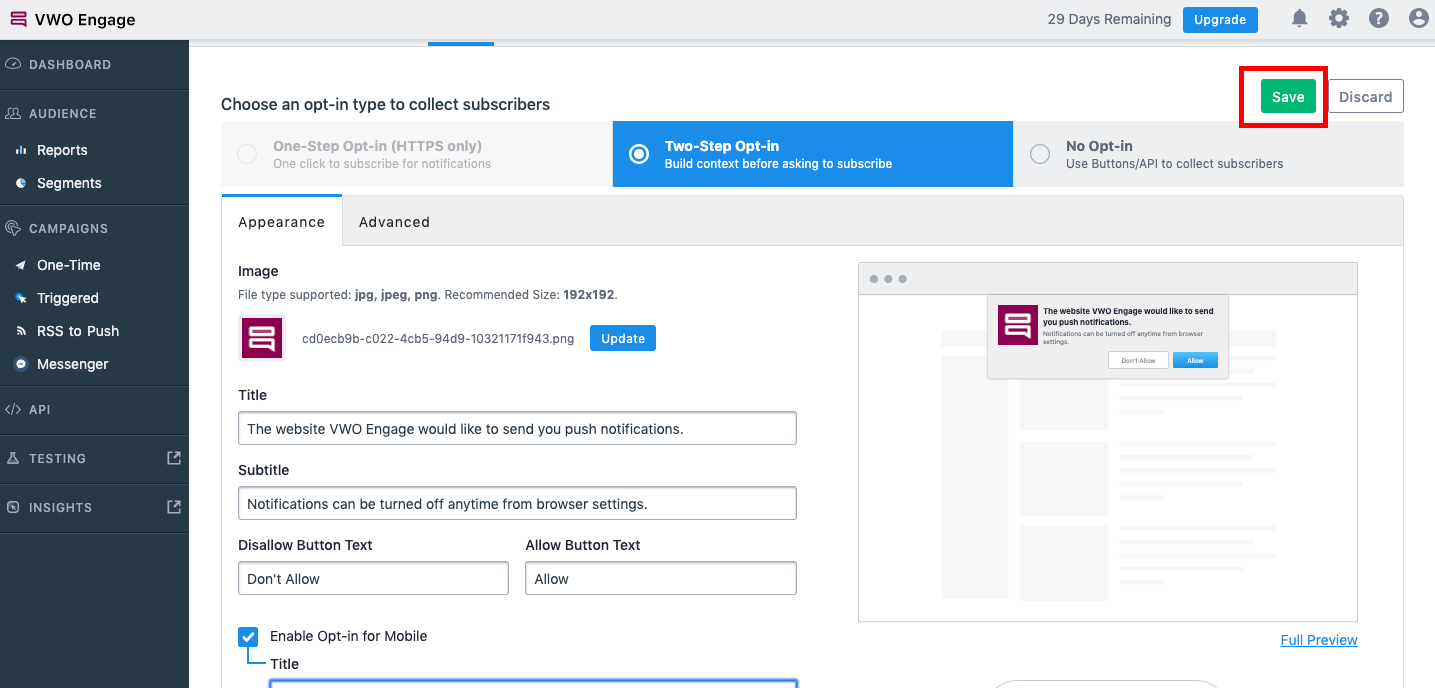
Once you have made the changes, save them by clicking on the ‘Save’ button.
For accounts on HTTPS implementation :
- Upload Files to the root of your website domain:
Go to the Settings button - under the SmartCode tab. Find the HTTPS Implementation section, click on the ‘download the files’ option.
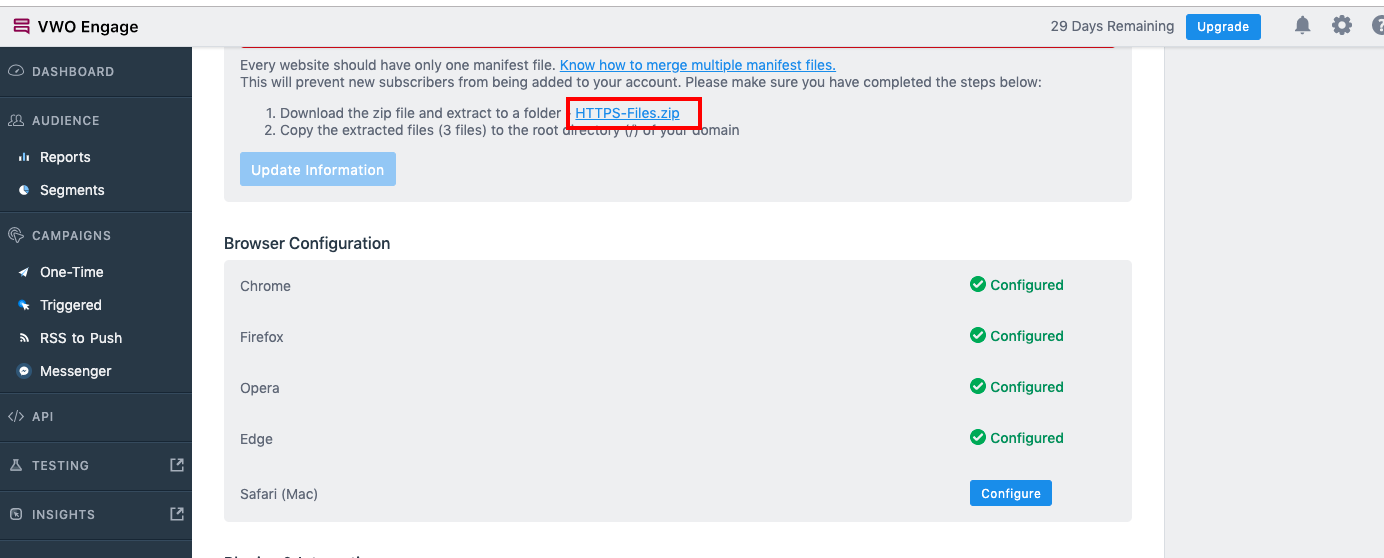
After the files are downloaded, upload these to the root of your website domain.
If the files have not been uploaded correctly to the root of your domain, you will start seeing the below error message on the SmartCode tab :
- Customize your opt-in:
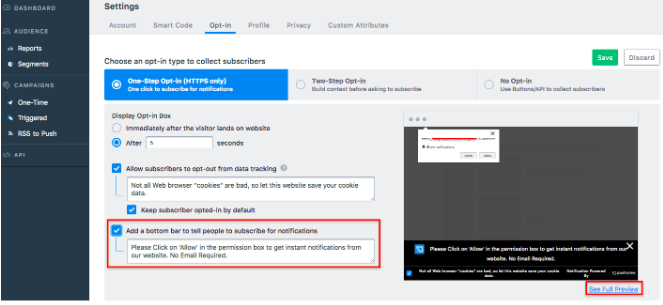
Since the opt-in box for HTTPS accounts is native and one-step, you can only customize the number of seconds after which the opt-in box appears, as shown below :
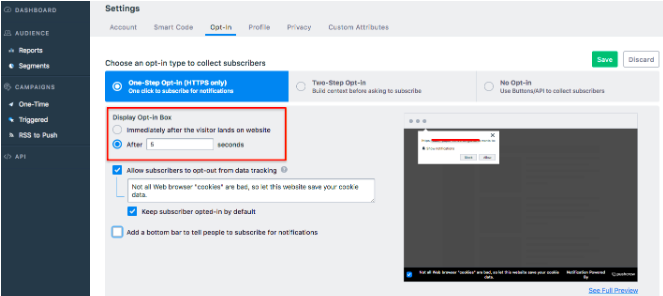
- Data Tracking:
You can choose whether or not to give subscribers the option to opt-out of data tracking too. More details on this here.
- Bottom Bar:
You can also add a bottom bar to give users some context as to why they should subscribe to notifications from your website. When you check the box for ‘Add a bottom bar to tell people to subscribe for notifications’, you will see an option to compose the text for the same.
The ‘Full Preview’ button will show you how the bottom bar will appear on your website.
Once you have made the changes, save them by clicking on the green ‘Save’ button on the same page.
Step 3. Send your first Push Notification!
To send out your first Push Notification, click on One-time located in the left panel of your VWO Engage dashboard. Find the create button present on the top right corner.
Add Notification Details:
- Title: Compose the title of the notification
- Message: Compose the message of the notification that would tell your users what the URL, that clicking on it will lead to, is about.
- URL: Paste the URL of the website page you want your users to land on.
You can also preview how your notification looks like before sending it to users on the right-hand side of the Send Notification page
You can enter the UTM parameters for more Push notification tracking metrics in your Google Analytics account.
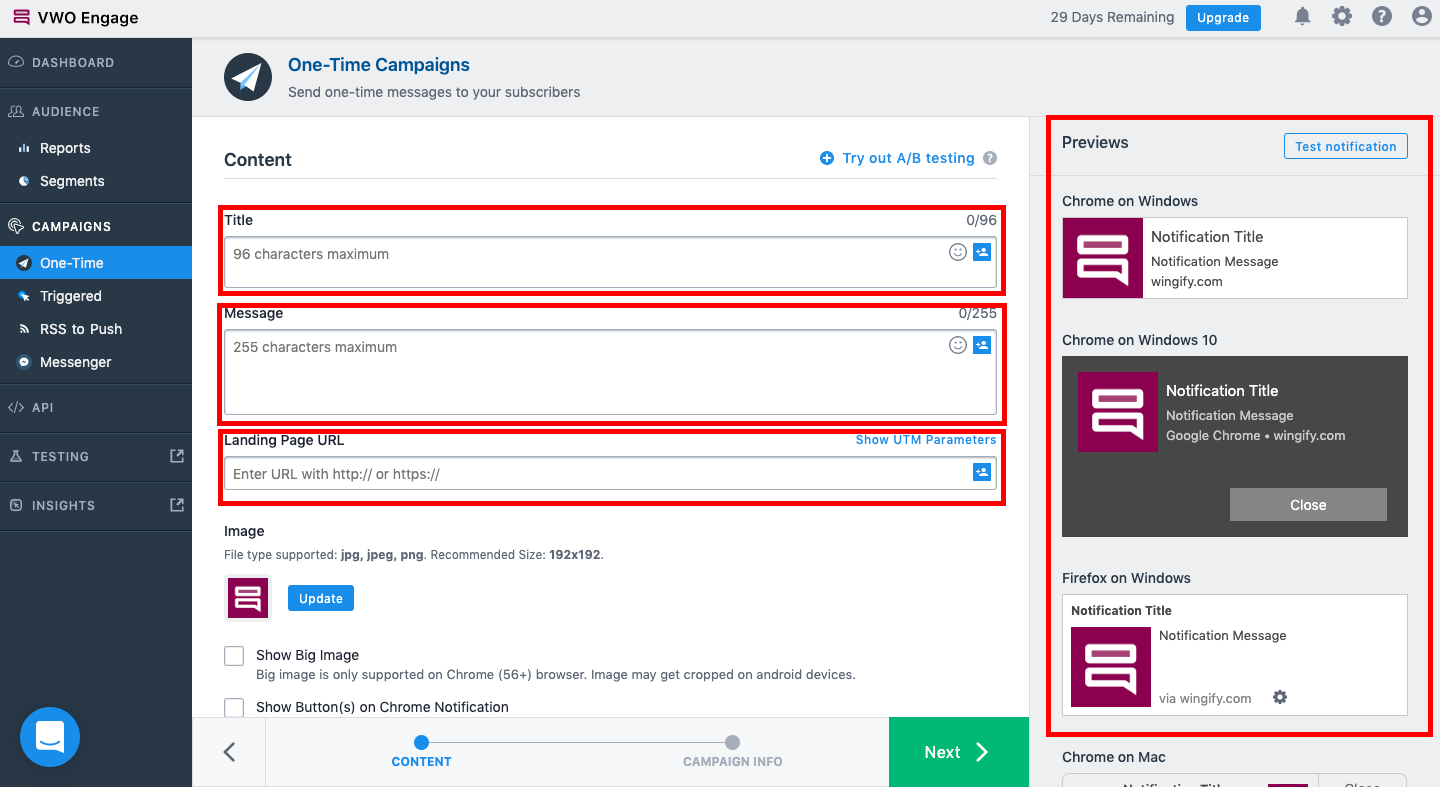
Advanced options also allow you to:
- Upload a Big Image for the notification (PRO and Enterprise plans only)
- Enable CTA Buttons on the notification (PRO and Enterprise plans only)
- Send the notification to a particular segment (PRO and Enterprise plans only)
- Schedule the notification to send it at a later time.
- Let the notification auto-fade from visitors’ screens after 20 seconds.
Once you are done composing your notification, click on the Send Notification button at the bottom of the page.
Step 4. Track your metrics
Now that your notification has been delivered to your users, you can monitor the analytics data and the performance of your Push Notifications.
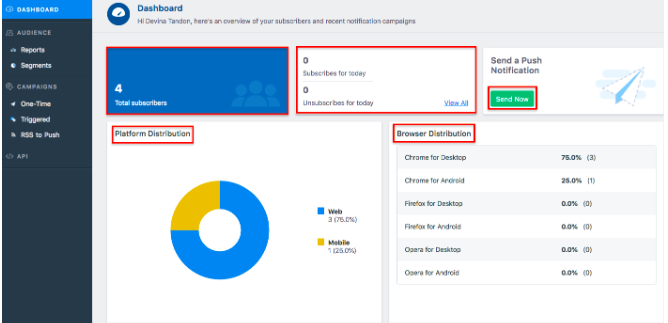
By clicking on the Dashboard you can see the following metrics:
- Total number of subscribers
- Number of subscribers and unsubscribes for that particular day
- Subscribers distribution based on browser and platform.
- By clicking on the green ‘Send Now’ button you will be redirected to the page where you can create the new notification
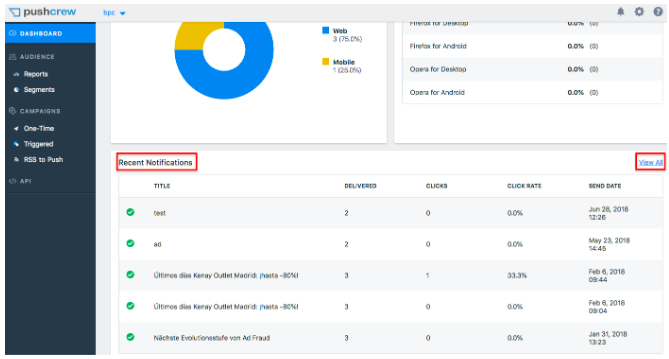
5. Recent Notifications will display the most recent 4-5 notifications sent by you. Also, on clicking at View All you will be redirected to the one time campaigns report of the notifications sent by you
The Reports tab shows the subscribers and unsubscribers data for the past 15 days. Also, you can download the list of subscribers from the ‘Download’ subscriber list button.

Please Note: The data in this report may be up to 12 hours old.

